![]()
Github Repo
Managing media files (processing, storage and manipulation) is one of the biggest challenges we encounter as practical developers. These challenges include:
- Media uploads
- Resource management (leads to heavy costing)
- Media storage
- Media manipulation
- Poor delivery
- Administration
A great service called Cloudinary can help us overcome many of these challenges. Together with Cloudinary, let's work on solutions to these challenges and hopefully have a simpler mental model towards media management.
The process to building this solution is a hands on example which will get our hands dirty but a practical approach. Instagram and Flickr are known for heavy image processing so we can take inspiration from these apps and build something similar.
The image above shows what we are going to be building. We are going to build the app using Node.js, Express (for routing) and EJS (for templating).
The big question is, how do we intend to solve the problems we listed earlier while building this app?
Meet Cloudinary, if you haven't!
"Cloudinary is the media back-end for web and mobile developers. An end-to-end solution for all your image and video needs."
Cloudinary is a powerful tool for managing not just images but also videos. The interesting thing about this tool is that it abstracts a lot (actually all) of the challenges we encounter when managing images and other media files, including the ones we listed above.
We are not just going to discuss how Cloudinary helps us figure these puzzles, rather, we will use Cloudinary in building the above app which will expose all the solutions to these puzzles.
Cloudinary gives us the power to:
- Handle image uploads effectively using a customizable widget
- Optimize images for web and mobile consumption using transformations
- Perform administrative operations including: renaming, deleting, etc
- Store and backup images/videos
- Manipulate media files
- Deliver media files
First things, first. Let's setup a project environment for our app to live in. The GitHub URL provided in the beginning and end of this tutorial is multi-branched. Each branch is prefixed with step-{step-number}- where "step-number" is the an increment for each step.
The first step is step-0-project-structure so you can switch to that branch and follow along from there. The master branch contains the final solution.
To have an overview of the project, it is always a good idea to present a directory structure which we can then build upon:
|---app
|------controller.js // Route handlers
|------model.js // Mongoose model
|---public // Public contents (style, js, imgs)
|---views // EJS views
|-----admin
|-------index.ejs // Admin home page
|-----pages
|-------index.ejs // Home page
|-------new.ejs // New post page
|-------edit.ejs // Edit post page
|-------single.ejs // Preview post page
|-----partials
|-------header.ejs // Header partial
|-------head.ejs // Styles partial
|-------scripts.ejs // Scripts partial
|---package.json
|---routes.js // Routes file
|---server.js // Entry
Something minimal and less overwhelming so we can focus on discussing on the features we are implementing rather than spend time moving codes around.
Update package.json dependencies with the third-party libraries that we will be working with:
"dependencies": {
    "body-parser": "^1.15.2",
    "cloudinary": "^1.4.2",
    "connect-multiparty": "^2.0.0",
    "ejs": "^2.5.2",
    "express": "^4.14.0",
    "mongoose": "^4.6.0"
  }
You can install the dependencies by running:
We are focusing on backend in this tutorial but that doesn't mean we can't afford a good looking design for the frontend. Rather than waste time crafting that, we can use Semantic UI by updating head.ejs and scripts.ejs:
<!-- ./views/partials/head.ejs -->
<link rel="stylesheet" href="https://cdn.jsdelivr.net/semantic-ui/2.2.4/semantic.min.css">
<!-- ./views/partials/scripts.ejs -->
<script src="https://code.jquery.com/jquery-3.1.0.min.js"></script>
<script src="https://cdn.jsdelivr.net/semantic-ui/2.2.4/semantic.min.js"></script>
You get redirected to your Cloudinary dashboard once you create an account by signing up for free. This is what the dashboard looks like:
The dashboard shows a list of SDKs that you can use to talk to Cloudinary in most of the popular languages including Node.js.
Cloudinary core exposes APIs based on your cloud name and all these SDKs do is serve as a language wrapper to these URL. So instead of littering your app with these URLs, you have a better intuitive language based method APIs to work with.
The cloud name is not your name but the name you chose when signing up as cloud name:
We are interested in the Node.js SDK so let's install it in our existing project:
npm install cloudinary --save
Getting your images to the server/cloud is the first and most important stage in managing images in your project. In this section, we are will cover
- how to upload files from the web in your browser/mobile
- upload using Cloudinary's upload widget
- transform images
- display images
- and more...
Let's see how we can upload images to the cloud using the SDK we have installed. Image upload will always require some form of input to grab the image data, so let's create a page that:
<!-- ./views/pages/new.ejs -->
<html lang="en">
<head>
    <!-- Head partial -->
    <% include ../partials/head %>
</head>
<body class="container">

<header>
    <!-- Header partial -->
    <% include ../partials/header %>
</header>

<main>
    <div class="ui grid container">
        <div class="ui two column centered grid">
            <div class="column">
                <!-- Enctype is multipart to support file upload -->
                <form action="/create" method="post" enctype="multipart/form-data" class="ui form">
                    <div class="field">
                        <label>Title</label>
                        <input name="title" type="text" placeholder="Title" />
                    </div>
                    <div class="field">
                        <label>Description</label>
                        <textarea rows="4" name="description" placeholder="Description"></textarea>
                    </div>
                    <div class="field">
                        <label>Image</label>
                        <input name="image" type="file" />
                    </div>
                    <button class="ui primary button" type="submit">Post</button>
                </form>
            </div>
        </div>
    </div>
</main>

<!-- Scripts partial -->
<% include ../partials/scripts %>
</body>
</html>
The form is not just a regular form. As you can see, the enctype property is set to multipart/form-data so as to properly support and handle file uploads via the form.
You can see how we are injecting our template partials into the HTML document. We have already seen the head and scripts partials so what is left is the header partial. The partial just holds the nav bar:
<div class="ui secondary pointing menu">
    <a class="item" href="/">
        Home
    </a>
    <a class="item" href="/new">
        New Post
    </a>
    <a class="item">
        About Scotchgram
    </a>
</div>
We have our markup all set, but we can't serve the markup yet because there is route handling that. Let's create a route and controller action method to do so:
// ./routes.js
var controller = require('./app/controller');

module.exports = function (app) {
    app.get('/new', controller.new);
};
We are pointing to a none existing controller and action method. This action method contains logic that renders the ejs so we can create that now:
// ./app/controller.js

module.exports = {
  new: function (req, res) {
      res.render('pages/new');
  }
};
With that, we can run the app and see our form at /new:
Of course our customers can not consume a form that is just staring back at them. They would want to fill it out and click the Post button. When the click what happens?
On submission, the the form data is collected and sent to /create endpoint which at the moment we are yet to create the route, so let's start doing something about that:
// ./routes.js
var multipart = require('connect-multiparty');
var multipartMiddleware = multipart();
var controller = require('./app/controller');

module.exports = function (app) {
    app.get('/new', controller.new);
    // Use middleware to handle uploaded files and access
    // uploaded files using req.file
    app.post('/create', multipartMiddleware, controller.create);
};
We have not just added a new route but also configured a middleware to help us process and get details about an uploaded file. With the multipartMiddleware, we could access any uploaded file from req.file.
So we have a route, but routes point need logics to handle incoming requests. The controller's create action method is where this logic will live:
// ./app/controller.js
// Dependencies
var cloudinary = require('cloudinary');
// Mongoose Model
var Model = require('./model');

// Configure Cloudinary
// with credentials available on
// your Cloudinary account dashboard
cloudinary.config({
    cloud_name: 'CLOUD_NAME',
    api_key: 'API_KEY',
    api_secret: 'SECRET'
});

module.exports = {
  new: function (req, res) {
      res.render('pages/new');
  },
  create: function (req, res) {
      // Use Cloudinary uploader to upload to cloudinary sever
      // Access files uploaded from the browser using req.files
      cloudinary.uploader.upload(req.files.image.path, function(result) {
          // Create a post model
          // by assembling all data as object
          // and passing to Model instance
          var post = new Model({
              title: req.body.title,
              description: req.body.description,
              created_at: new Date(),
              // Store the URL in a DB for future use
              image: result.url
              image_id: result.public_id
          });
          // Persist by saving
          post.save(function (err) {
              if(err){
                  res.send(err)
              }
              // Redirect
              res.redirect('/');
          });
      });
  }
};
First we required cloudinary and our mongoose model (which we will create soon), then we configured Cloudinary using credentials available on the dashboard. Once the route is hit, we upload the file to Cloudinary server using the SDK's uploader.upload API and persist the post body including the URL returned from Cloudinary to the MongoDB using Mongoose.
You can learn how to work with Mongo DB and Mongoose here."
Once all that is successful, we return to the homepage, else, we send back an error to the browser about the failure.
Let's add the model to complete the flow:
// app/model.js
// Dependencies
var mongoose = require('mongoose');
var Schema = mongoose.Schema;

// create a schema
var postSchema = new Schema({
    title: String,
    description: String,
    image: String,
    image_id: String,
    created_at: Date
});

// the schema is useless so far
// we need to create a model using it
var Post = mongoose.model('Post', postSchema);

// make this available to our users in our Node applications
module.exports = Post;
To confirm that everything is working fine, I have installed Robomongo, a Mongo DB visualization tool. With Robomongo and can confirm that all my fields were persisted:
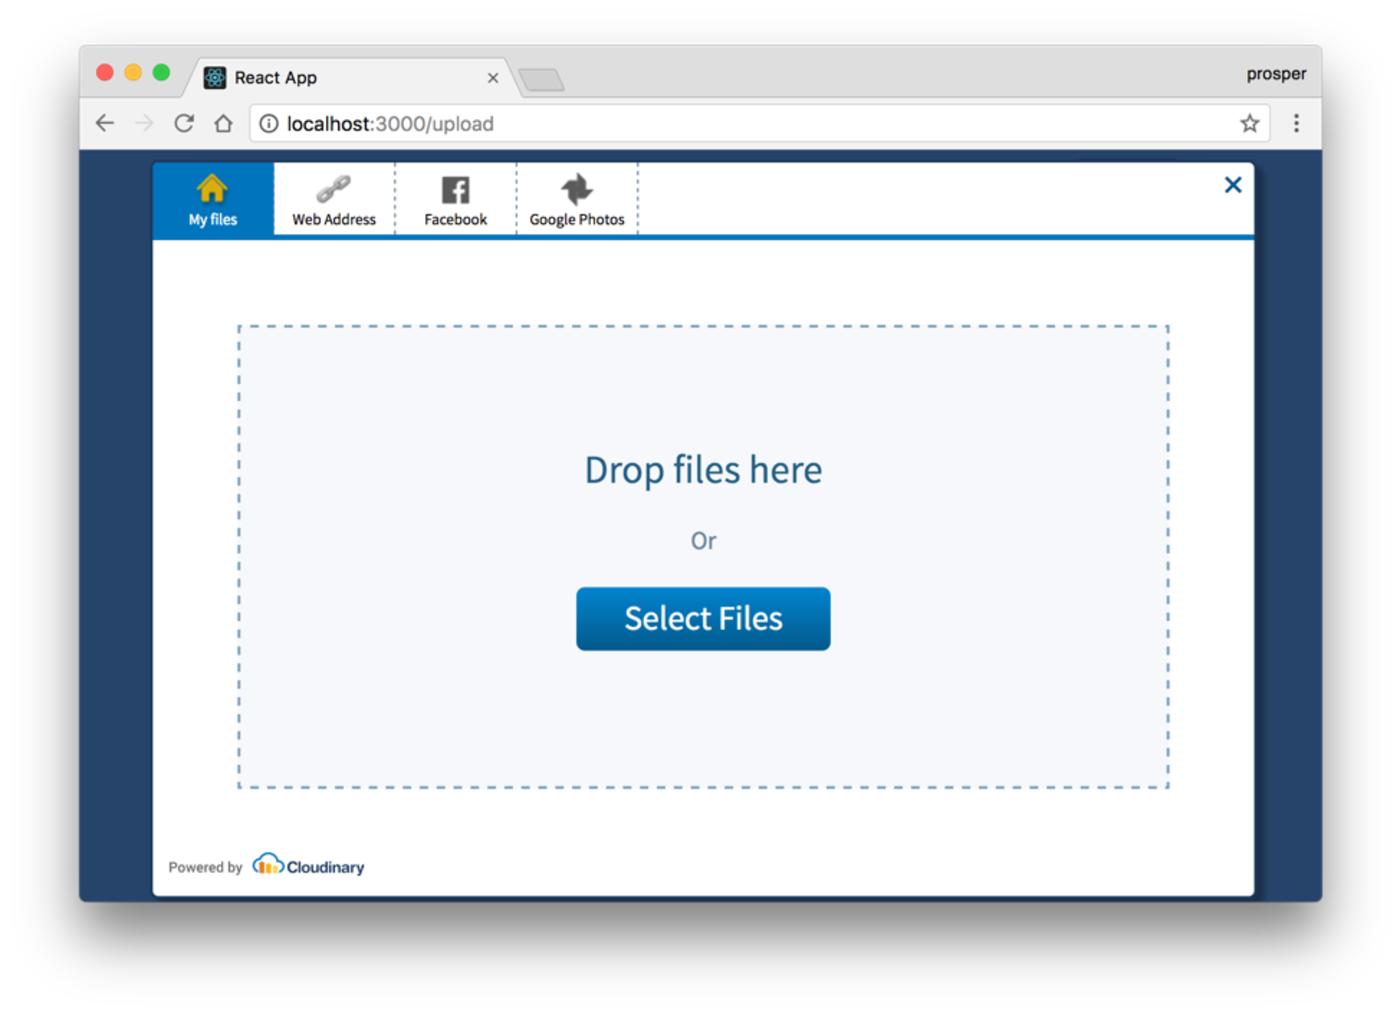
We can choose to make life easier for us by using the widget provided by Cloudinary. I left the this for later so you can appreciate the feature after going through the long process of the custom upload.
To use Cloudinary's widget, include it in your script:
<!-- ./views/partials/scripts.ejs -->
<script src="//widget.cloudinary.com/global/all.js" type="text/javascript"></script>
With the widget script loaded, we can setup a handler for for that:
<!-- ./views/partials/scripts.ejs -->
<script src="//widget.cloudinary.com/global/all.js" type="text/javascript"></script>
<script>
    document.getElementById("upload_widget_opener").addEventListener("click", function() {

        cloudinary.openUploadWidget({ cloud_name: 'CLOUD_NAME', upload_preset: 'UPLAOD_PRESET'},
                function(error, result) {
                    console.log(error, result)
                    // Push URL into text input
                    document.getElementById('url_text').value = result[0].url;
                });

    }, false);
</script>
We attached a click event listener to button on the form (yet to be created). When this event occurs, we open the upload widget by calling openUploadWidget and passing in our cloud name and and upload preset.
The upload preset is just a pre-configuration to what we could have been setting up via parameters in the REST URLs. We set this configuration and using a unique ID to differentiate them from each other. To set yours, go to Settings >> Upload Tab >> Upload Presets >> Enable:
The callback function for the upload gives us the result which we can play around with. What I have done is push the result into our text input so it can be sent to the server.
Then, on the server, we can persist the URL to our database:
// ./app/controller.js
// Truncated
create: function (req, res) {
      var post = new Model({
          title: req.body.title,
          description: req.body.description,
          created_at: new Date(),
          // Now we are requesting the image
          // from a form text input
          image: req.body.image
      });

      post.save(function (err) {
          if(err){
              res.send(err)
          }
          res.redirect('/');
      });
  }
The form can now be updated to include the upload button and substitute the file input with a text input that stores the URL temporarily:
NOTE: A more real life approach to this is using a hidden input
<!-- views/pages/new.ejs -->
<!-- Truncated -->
 <form action="/create" method="post" enctype="multipart/form-data" class="ui form">
                    <div class="field">
                        <label>Title</label>
                        <input name="title" type="text" placeholder="Title" />
                    </div>
                    <div class="field">
                        <label>Description</label>
                        <textarea rows="4" name="description" placeholder="Description"></textarea>
                    </div>
                    <div class="field">
                        <label>Image</label>
                        <input name="image" type="text" placeholder="Image URL" id="url_text"/>
                    </div>
                    <button class="ui button" type="button" id="upload_widget_opener">Upload with Widget</button>
                    <button class="ui primary button" type="submit">Post</button>
                </form>
Most times, it's a good UX practice to show progress of image upload or preview of images being uploaded. With Cloudinary's jQuery plugin, we can get going with this in few minutes.
First thing to do as usual is load the required scripts/dependencies:
<!-- ./views/partials/scripts.ejs -->
<!-- Truncated for brevity -->

<script src="https://ajax.googleapis.com/ajax/libs/jqueryui/1.12.0/jquery-ui.min.js"></script>
<script src='https://cdnjs.cloudflare.com/ajax/libs/blueimp-file-upload/9.12.5/js/jquery.iframe-transport.js' type='text/javascript'></script>
<script src='https://cdnjs.cloudflare.com/ajax/libs/blueimp-file-upload/9.12.5/js/jquery.fileupload.js' type='text/javascript'></script>
<script src='https://cdn.jsdelivr.net/jquery.cloudinary/1.0.18/jquery.cloudinary.min.js' type='text/javascript'></script>
The above is an arsenal of tools that will help us accomplish previewing images and showing a progress bar.
Update the view to provide accommodation for the preview thumbnails and progress bar (with semantic):
<!-- views/pages/new.ejs -->
<!-- Truncated for brevity -->
<div class="field">
  <label>Image</label>
    <input name="file" type="file" class="upload_field"/>
</div>

<!-- Image thumbnails will be loaded here -->
<div class="thumbnails"></div>

<div class="ui teal progress" class="progress">
    <div class="bar"></div>
</div>
We can now update our script logic to support preview and progress:
// Configure Cloudinary
$.cloudinary.config({ cloud_name: 'CLOUD_NAME', api_key: 'KEY'})
// Perform unsigned upload
$('.upload_field').unsigned_cloudinary_upload("UPLOAD_PRESET",
            { cloud_name: 'CLOUD_NAME',},
            { multiple: true }
    )
    .bind('cloudinarydone', function(e, data) {
        // Populate thumbnails when upload is finished
        $('.thumbnails').append($.cloudinary.image(data.result.public_id,
                { format: 'jpg', width: 150, height: 100,
                    crop: 'thumb', gravity: 'face', effect: 'saturation:50' } ))
                    })
       .bind('cloudinaryprogress', function(e, data) {
        // Update progress bar with upload progress
        $('.progress').progress({
            percent: Math.round((data.loaded * 100.0) / data.total)
        });
The idea is that the Cloudinary jQuery plugin provides special custom events which let's us hook into each stage of the upload process and do what ever pleases us.
The cloudinarydone event is called once the upload is complete, giving us the power to grab uploaded data and append to the view.
The cloudinaryprogress is called during the upload intervals making it easier for us to build a progress bar around the upload process.
We can as well send the data returned on cloudinarydone back to the server if we wish to persist the URL as we have been doing in previous steps.
Transformations in Cloudinary are like database rules or Express middleware. This is because, they can interfere upload, to manipulate uploaded content before sending to the cloud.
Assuming we want a ration of 2:1 applied to our images with 1000 x 500 dimension before they are uploaded, we can apply this rule (transformation) in our upload logic:
// ./app/controller.js
// Truncated
create: function (req, res) {
     cloudinary.v2.uploader.upload(req.files.image.path,
          //Apply transformation
          { width: 1000, height: 500, crop: "limit" },
          function(err, result) {
           // Handler here
      });
  }
We are using v2 to support transformation.
In a real project that handles a lot of this kind of request, it could be a good idea to use queues/jobs (whichever your environment supports) to abstract this transaction and push it to a later time if the image being transformed is not going to be used instantly.
One thing to keep in mind with this kind of transformation is that it does not save the original image which means that it transforms the image and then stores. To persist the original image, see the next section
This kind of transformation unlike the one we saw previously will store both the original image and the transformed. The transformed image can then be accessed with a different endpoint:
// ./app/controller.js
// Truncated
create: function (req, res) {
     cloudinary.v2.uploader.upload(req.files.image.path,
          //Apply transformation
          { eager: [
            { width: 2000, height: 1000, crop: "pad" },
            { width: 750, height: 300, crop: "crop", gravity: "north"} ]},
          function(err, result) {
           // Handler here
      });
  }
Most times we pass in a lot of configuration to while trying to upload images especially transformation based configuration. If find yourself in a situation where you have to pass in the same configuration in more than one situations, then upload preset is for you.
With upload preset, you can create configuration from your dashboard that can be re-used at different point in your application. The presets are assigned a unique ID and then you can tell the SDK which preset it should apply by passing it that ID.
To configure a preset, first enable it via Settings >> Upload Tap >> Upload Presets >> Enable and then you can start adding new presets based on your taste. You will be provided with an already existing preset for default purposes but you can add more as you wish.
When you have a preset configured and you have grabbed the ID, you can use it in your app:
// ./app/controller.js
// Truncated
create: function (req, res) {
     cloudinary.v2.uploader.upload(req.files.image.path,
          //Apply Upload preset
          { upload_preset: "PRESET_ID" },
          function(err, result) {
           // Handler here
      });
  }
To start performing admin tasks, let us first of all create a list of cards on the home page to show all our images.
We have no route for / yet and that is what we need right now. So let's add that to our existing routes configuration:
// ./routes.js
// Truncated for brevity
app.get('/', controller.index);
Then we can go ahead to create an index action method in our controller:
// ./app/controller.js
// Truncated for brevity
index: function (req, res) {
      Model.find({}, function (err, posts) {
          if(err) res.send(err);

          res.render('pages/index', {posts: posts});
      });
  }
  //...
With the controller rendering a view with the post data, we need to create this view and present the data on the view:
<!-- views/pages/about.ejs -->

<html lang="en">
<head>
    <% include ../partials/head %>
</head>
<body class="container">

<header>
    <% include ../partials/header %>
</header>

<main>
    <div class="ui grid container">
        <div class="ui three column centered grid">
            <% posts.forEach(function(post, index) { %>

                    <div class="column">
                    <div class="ui card">
                        <div class="image">
                            <img src="<%= post.image %>" style="max-height: 150px">
                        </div>
                        <div class="content">
                            <a class="header"><%= post.title %></a>
                            <div class="meta">
                                <span class="date">
                                    <i class="calendar icon"></i> <%= post.created_at.getFullYear() %>
                                    <br>
                                    <i class="image icon"></i> <%= post.image_id %>
                                </span>
                            </div>
                            <div class="description">
                                <%= post.description %>
                            </div>
                        </div>
                       <div class="extra content">
                            <form action="/destroy" method="post" style="display: inline" id="destroy_form<%= index %>">
                                <input type="hidden" name="image_id" value="<%= post.image_id %>">
                                <a onclick="document.getElementById('destroy_form<%= index %>').submit(); return false;">
                                    <i class="remove icon"></i> Remove
                                </a>
                            </form>
                            <a href="/edit/<%= post.image_id %>">
                                <i class="edit icon"></i> Update
                            </a>
                        </div>
                    </div>
                </div>

            <% }); %>
        </div>
    </div>

<% include ../partials/scripts %>
</body>
</html>
It's important to note that the remove link is submitting a parent form which just send the ID of the image we want to remove to the server while the update link takes us to an edit page (yet to be created).
To delete images, we have to first delete from cloudinary server, wait for a response, and if successful remove from our database. The API for removing from the cloud using the SDK is destroy:
As usual, we first create a route:
// ./routes.js
// Truncated for brevity
app.post('/destroy', controller.destroy);
Then we create the action method in our controller:
// ./app/controller.js
// Truncated for brevity
destroy: function (req, res) {
      var imageId = req.body.image_id;
      // The destroy method takes the image ID
      // which we need to remove
      cloudinary.v2.uploader.destroy(imageId, function (result) {
              // We also delete this
              // image details from our database
              Model.findOneAndRemove({ image_id: imageId }, function(err) {
                  if (err) res.send(err);

                  res.redirect('/');
              });
          });
  }
We first remove the image by calling the destroy method and passing it the ID of the image we want to remove. When that is completed, we also remove the image details from our database.
When an image is uploaded, it is assigned a random generated image ID. If for some reason, this image ID matters to you, we can change it to a real name. While doing so, we can use the opportunity to also update the image details.
Let's make a route to render the edit form page which basically looks like that of new form but very few variation:
// ./routes.js
// Truncated for brevity
app.post('/edit', controller.edit);
// Handle submitted updates
app.post('/update', controller.update);
We used the opportunity to add an extra route which will handle the update request from the edit form.
Next we create the controller actions for the above routes, edit and update:
// ./app/controller.js
// Truncated for brevity
  /***
  * Edit action method
  ***/
edit: function (req, res) {
      Model.find({image_id: req.params.id}, function (err, posts) {
          if(err) res.send(err);
            // Render edit form
            //with existing post
          res.render('pages/edit', {post: posts[0]});
      });
  },
  /***
  * Update action method
  ***/
  update: function (req, res) {
      var oldName = req.body.old_id
      var newName = req.body.image_id;
      cloudinary.v2.uploader.rename(oldName, newName,
          function(error, result) {
              if (error) res.send(error);
              Model.findOneAndUpdate({image_id: oldName},
                  Object.assign({}, req.body, {image: result.url}),
                  function (err) {
                  if (err) res.send(err);

                  res.redirect('/');
              })
          })

  },
We use Cloudinary's rename API method to update image name on the cloud. It takes the existing name (to find the image on the cloud), the new name and a callback as arguments.
See how we are using Object.assign to update the model with req.body while updating the image property with the latest URL. This is because, after renaming an image on the cloud, the URL also changes because an image ID is part of the little pieces that composes an image URL.
Now we can happily create the edit view and everything will just work:
<!-- views/pages/new.ejs -->

<html lang="en">
<head>
    <% include ../partials/head %>
</head>
<body class="container">

<header>
    <% include ../partials/header %>
    <h3 class="ui center aligned icon header">
        Edit: <%= post.title %>
    </h3>
</header>

<main>
    <div class="ui grid container">
        <div class="ui two column centered grid">
            <div class="column">
                <img class="ui medium centered image" src="<%= post.image %>">
                <form action="/update" method="post"  class="ui form">
                    <div class="field">
                        <label>Title</label>
                        <input name="title" type="text" placeholder="Title" value="<%= post.title %>"/>
                    </div>
                    <div class="field">
                        <label>Description</label>
                        <textarea rows="4" name="description" placeholder="Description"><%= post.description %></textarea>
                    </div>
                    <div class="field">
                        <label>Rename Image ID</label>
                        <input name="image_id" type="text" placeholder="image_id" value="<%= post.image_id %>"/>
                    </div>
                    <input type="hidden" value="<%= post.image %>" name="image">
                    <input type="hidden" value="<%= post.image_id %>" name="old_id">
                    <button class="ui primary button" type="submit">Post</button>
                </form>
            </div>
        </div>
    </div>
</main>

<% include ../partials/scripts %>
</body>
</html>
Just like tags in a blog post, we can categorize images by assigning tags to the. Thereafter, the images can be pulled up based on the assigned tag(s). Tagging improves organization of images and we can perform specific actions to a set of images identified by a tag.
To tag images, we can either do that when uploading them or update the image at a later time with the tags. Let's play around by adding tags during upload.
Update the new form view to have an extra field for submitting tags:
<div class="field">
    <label>Tags</label>
    <div class="ui fluid multiple search selection dropdown" id="tag">
        <input name="tags" type="hidden">
        <i class="dropdown icon"></i>
        <div class="default text">Tags</div>
        <div class="menu">
            <div class="item" data-value="puppy">puppy</div>
            <div class="item" data-value="kitten">kitten</div>
        </div>
    </div>
</div>
We are using Semantic's dropdown multi-select widget and it can only work fine with a script:
 $('#tag').dropdown({
    allowAdditions: true
 });
Now to the real thing -- when the form is submitted, we would grab the input from tags input and pass it as an option (just like we did for transformation) to Cloudinary's upload API method in our controller's create action method:
cloudinary.v2.uploader.upload(req.files.image.path,
          {tags: req.body.tags },
//... truncated
At the end, the form will look like this:
When the image is uploaded, from our management console we can see the tags:
We are already doing a great job and I would like to show off some of resource browsing features we can get with Cloudinary.
It's a good thing we are storing data in a database but Cloudinary is generous enough to allow us to store additional information known as metadata. We can use Cloudinary's listing features to filter images and their metadata.
A possible use case in our application is listing only the images in our server for administrative use. At the moment, we are only listing the images created by clients via browser uploads which there metadata are persisted in Mongo.
We begin with an admin route which is just like every other ones we have seen:
// ./routes.js
/*
 * Admin Routes
 *
 * */
 app.get('/admin', controller.admin.index);
Thereafter, we can create the admin.index action method which just list all images from the cloud:
// ./app/controller.js
admin:{
        index: function (req, res) {
            var q = req.query.q;
            var callback = function(result){
                // This is value is used to
                // populate the search input box
                var searchValue = '';
                if(q){
                    searchValue = q;
                }
                res.render('admin/index', {posts: result.resources, searchValue: searchValue});
            };
            if(q){
                // Filter based on search input
                // if provided
                cloudinary.api.resources(callback,
                    { type: 'upload', prefix: q });
            } else {
                // If no search input, list all
                cloudinary.api.resources(callback);
            }
        }
    }
We also implemented a search functionality which is simple one. We use Cloudinary's resources API method to fetch all images, if a query parameter was passed in, we use the prefix option to search for it, else, we just spit all the images.
Our view just looks like what we had in pages/index but with different properties and a search box:
<!-- views/admin/index.ejs -->

<html lang="en">
<head>
    <% include ../partials/head %>
</head>
<body class="container">

<header>
    <% include ../partials/header %>
    <h3 class="ui center aligned icon header">
        Administrator
    </h3>
</header>

<main>
    <div class="ui grid container">
        <div class="ui two column centered grid">
            <div class="column">
                <form class="ui form">
                    <div class="field">
                        <input name="q" type="text" placeholder="Search"  value="<%= searchValue %>"/>
                    </div>
                </form>
            </div>
        </div>
    </div>
    <div class="ui grid container">
        <div class="ui three column centered grid">
            <% posts.forEach(function(post, index) { %>

            <div class="column">
                <div class="ui card">
                    <div class="image">
                        <img src="<%= post.url %>" style="max-height: 150px">
                    </div>
                    <div class="content">
                        <a class="header"><%= post.public_id %></a>
                        <div class="meta">
                                <span class="date">
                                    <i class="calendar icon"></i> <%= post.created_at %>
                                </span>
                        </div>
                        <div class="description">
                           Dimension: <%= post.width %> X <%= post.height %>
                        </div>
                    </div>
                    <div class="extra content">
                        <form action="/admin/destroy" method="post" style="display: inline" id="destroy_form<%= index %>">
                            <input type="hidden" name="image_id" value="<%= post.public_id %>">
                            <a onclick="document.getElementById('destroy_form<%= index %>').submit(); return false;">
                                <i class="remove icon"></i> Remove
                            </a>
                        </form>
                        <a href="/edit/<%= post.public_id %>">
                            <i class="edit icon"></i> Edit
                        </a>
                    </div>
                </div>
            </div>

            <% }); %>
        </div>
    </div>

    <% include ../partials/scripts %>
</body>
</html>
Remember when we added tags to images and we discussed that tags help us organize images? Image organization becomes possible because we are able to categorize them using tags.
For the sake of simplicity, we won't add this feature into our existing app but for your consumption, you can create a tag cloud by fetching the list of tags available in your cloud from Cloudinary:
cloudinary.api.tags(function(result){
    res.render('pages/index', {tags: result.resources})
});
With that, you can loop through all your tags and create a tag cloud with them. Cloudinary's tags API did the magic.
You can also filter your images based on a specified tags. For instance:
resources_by_tag takes a tag name as one of it's argument which it uses to filter your images and return the ones that has the same tag that was passed in.
In public facing systems that content quality and kind matters a lot, moderation becomes very important. With moderation feature, you can approve or decline uploaded images if they do not reach a particular requirement.
An example of such requirement is when adding profile image at Upwork. During registration, the user adds his/her photo and waits for few days for an admin to consider if the image is a head-shot before approving.
Achieving moderation with Cloudinary is a breeze. You just switch the moderation option to manual when making uploads:
create: function (req, res) {
      cloudinary.v2.uploader.upload(req.files.image.path,
          { width: 300, height: 300, crop: "limit", tags: req.body.tags,
          // Turn on moderation
           moderation:'manual' },
          function(err, result) {
              console.log(result);
              //... Brevity sake
 //... Brevity sake
When you open your media library, you can now see that as an admin, there is a button to accept or decline this image.
Backing up your web resources and any data in general has always been a recommended practice since day one. Cloudinary is no exception. Backing up in Cloudinary just entails turning on a switch.
Backups as expected, takes extra space and for that reason, it is turned off by default so you can enable when you think you cloud deserves backups. Turning Automatic Backup ensures that images uploaded to your cloud are backed up.
To turn Automatic Backup on, got the Upload Settings from the management dashboard and change Automatic backup to Enabled.
You can also explicitly specify that you want a given image to be backed up when it is being uploaded. To do so, set the backup option to true when making the upload as shown below:
cloudinary.uploader.upload(req.files.image.path,
    // Backs up this particular image
    { backup: true },
    function(result) {
        console.log(result);
     });
Let's see how we can combine everything we have seen including transformation to manipulate images while retrieving them from the cloud.
We have been using the .upload method to send images and now to retrieve them, we use .image or .url method. The difference between image and url is, the former composes a HTML image tag while the latter generate the image's URL.
We have already started embedding images to our web pages by getting the URL we stored in our database. What if we had no means of persisting data to a database and all we could afford is the image cloud? How do we get the images?
The methods we saw above answers the question. It just takes in the image ID that we need to retrieve and an optional configuration object to manipulate the image.
To demonstrate how we can embed images, let's add another feature to our app which displays a single post.
Route first:
// ./routes
// Truncated
app.get('/:id', controller.find);
Then the controller's action method, find:
find: function (req, res) {
      var id = req.params.id;
      Model.findOne({image_id: id}, function (err, post) {
          if (err) res.send(err);

          res.render('pages/single', {post: post, image: cloudinary.image, image_url: cloudinary.url});
      })
  },
We use Mongoose's findOne to retrieve a single post with the image ID which is passed in as param. When rendering, we are not just passing the post down to the view but also extracting the image and url methods from Cloudinary, aliasing them and passing them to the view as well.
Have a look at what the view now loos like:
<!-- views/pages/single.ejs -->

<html lang="en">
<head>
    <% include ../partials/head %>
</head>
<body class="container">

<header>
    <% include ../partials/header %>
    <h3 class="ui center aligned icon header">
        <%= post.title %>
    </h3>
</header>

<main>
    <div class="ui grid container">
        <div class="ui three column centered grid">
            <div class="column">
                <!-- Use cloudinary.url to get image url -->
                <img class="ui medium centered image" src="<%= image_url(post.image_id) %>" style="border: 7px solid lightgrey">
                <br>
                <p><strong>Title: </strong> <%= post.title %></p>
                <p><strong>Description: </strong> <%= post.description %></p>
                <p><strong>Public ID: </strong> <%= post.image_id %></p>
            </div>
        </div>
    </div>

    <% include ../partials/scripts %>
</body>
</html>
The new thing in the snippet above is that instead of using post.image to get the image as returned from our database, we use cloudinary.url which we already aliased as image_url to retrieve the image.
Remember I mentioned we can transform images both when uploading or retrieving when we discussed image transformation. Let's start seeing how we can transform images while fetching them:
<img
    class="ui medium centered image"
    src="<%= image_url(post.image_id, {width: 200, height 100}) %>">
That will resize the image to 200 x 100 without considering the quality. We can also crop the image like so:
<img
    class="ui medium centered image"
    src="<%= image_url(post.image_id, {width: 200, height 100, crop: 'scale'}) %>">
The scale type of cropping will change the size of the image exactly to the given width and height without necessarily retaining the original aspect ratio. There are other cropping techniques and you can read more about them here.
With Cloudinary's face detection algorithm, we can crop an image based on where a face is positioned on the image.
Assuming we have an image of a child in a very wide background of about 2000 X 1200 dimension and we need to get this down to about 100 x 100 with the face in the middle of the dimension, we can do this:
<img
    class="ui medium centered image"
    src="<%= image_url(post.image_id, {width: 100, height 100, crop: 'thumb', gravity: 'face'}) %>">
The gravity property is used to target the face when cropping an image by specifying it's value to face.
Cloudinary just keeps getting amazing! We can use a technique known as automatic cropping to crop an image down to contain only the most important part and trimming down the redundant pieces. This is very much like face detection cropping but this time, we are not looking for a face but the important content:
<img
    class="ui medium centered image"
    src="<%= image_url(post.image_id, {width: 100, height 100, gravity: "auto", crop: "fill"}) %>">
By setting the gravity to auto instead of face as we saw previously, we are able to crop down the image in an intelligent manner leaving us with the most important portion of the image.
Images are universally recognized by there popular formats (JPEG, PNG, etc) but some native environment have there own supported formats which is a more optimized approach.
An example of such environment is Chrome (including the browser and other implementation like Electron or Node Webkit). Chrome supports a format type called WebP and it performs better than the universal formats.
When fetching images, you can set the fetch_format property to auto so it can render the images based on the native format rather than the universal. If no native format is supported, it defaults to universal.
<img
    class="ui medium centered image"
    src="<%= image_url(post.image_id, {width: 100, height 100, gravity: "auto", crop: "fill" fetch_format: "auto"}) %>">
Format selection is not the only automated process we can get from Cloudinary. Image quality is also achievable, automatically. By setting quality to auto, Cloudinary will analyze a given image to find the best quality compression level and optimal encoding settings based on the image content and the viewing browser, in order to produce an image with good visual quality while minimizing the file size:
<img
    class="ui medium centered image"
    src="<%= image_url(post.image_id, {width: 100, height 100, gravity: "auto", crop: "fill" quality: "auto"}) %>">
What I have been doing is applying styles explicitly using CSS. Cloudinary is always trying to make our jobs and lives easy which us why we can change the shapes and styles of these images using the API.
Let's see how we can change the shape of our images in the single post view to a rounded images and also add the grey borders using Cloudinary API:
<img
    class="ui medium centered
        image" src="<%= image_url(post.image_id,
                {
                    width: 200,
                    height: 200,
                    radius: 100,
                    crop: "fill",
                    border: "10px_solid_grey"
                }
            ) %>" />
The radius is responsible for setting the image shape to circle and border adds the image borders. The border property is just like what we get with CSS but with the spaces replaced with an underscore (_).
There are lots more under image and shapes and you can visit Cloudinary to explore your options
Just like adding the styles and updating the shape, we can add fun filters to the image. My favourite is changing the image color to greyscale:
<img
    class="ui medium centered
        image" src="<%= image_url(post.image_id,
                {
                    width: 200,
                    height: 200,
                    radius: 100,
                    crop: "fill",
                    border: "10px_solid_grey",
                    effect: "grayscale"
                }
            ) %>" />
Setting the effect property to greyscale gives us a black and white kinda thing:
Feel free to explore other options including: hue, red, blue, green, negate, brightness, brightness_hsb, colorize, etc.
If you are still building fixed width websites, then you may be out of touch with current trends. Fluid design and responsive content should be a primary focus for every developer because the web has gone from solely desktop systems to include mobile devices, such as smartphones and tablets of all sizes.
It's difficult to build sites that adapt to a variety of device sizes. By default, text reflows to automatically fit the design, but other contents, particularly images, do not.
Cloudinary provides a handful of options when it comes to making images responsive. Let's explore few of these options:
Automatic Responsive Images: This is achieved using Client Hints technology which allows web browsers to inform servers (or CDN layers) with the required dimensions and pixel densities of each specific image download request.
With that kind of information, the server can then send a suitable image dimension for every giving device width.
Chrome, Android and Opera are the browsers that support Client Hint and hints can be provided in the markup document via a meta tag:
<meta http-equiv="Accept-CH" content="DPR, Viewport-Width, Width">
It is identified by the http-equiv which the value is set to Accept-CH (Accept Client Hint). The relevant hints are the DPR (Device Pixel Ratio) value, the Width available for the specific image in the responsive layout, and the Viewport-Width of the browser's window.
Now that hints are being sent to the cloud, we can make request for our images and Cloudinary will be smart enough to send us the perfect image for our device width:
<img
    class="ui medium centered
        image" src="<%= image_url(post.image_id,
                {
                    client_hints: true,
                    transformation: [
                      {
                          aspect_ratio: "16:9",
                          crop: "fill"
                      },
                      {
                          width: "auto",
                          dpr: "auto",
                          crop: "scale"
                        }
                  ]}
            ) %>" />
JavaScript Based Detection: Another option which works better across browsers is using JavaScript to detect the viewport of a given client and then serve an image based on this information.
Cloudinary's JavaScript library already implemented this approach internally so we do not have to write any complex logic to get going. We already have the library included in our demo project.
We use data-src rather than src to request for the images. This enables Cloudinary to serve these images dynamically. You can set the src attribute to a placeholder image.
<img
    data-src="<%= image_url(post.image_id) %>"
    src="http://placehold.it/200x300" />
Next, we call the JavaScript method to tell Cloudinary that we need to make use of the JavaScript-based detection:
<script type="text/javascript">$.cloudinary.responsive()</script>
All the goodies we have seen in Cloudinary does not only apply to images that are stored in Cloudinary cloud. We can apply it to any other remote image making it possible for us to just use the Cloudinary SDK even when our content is not hosted by Cloudinary:
<img
    class="ui medium centered
        image" src="<%= image_url('http://i.imgur.com/67iZh9H.jpg',
                {
                    type: 'fetch'
                    width: 'auto',
                    radius: 100,
                    crop: "fill",
                    border: "10px_solid_grey",
                    effect: "grayscale"
                }
            ) %>" />
By specifying the type option as fetch, we can pass in a URL rather than a Cloudinary image ID.
There are some other solutions out there but from my experience and that of over 140k+ happy Cloudinary users, satisfaction is guaranteed. This article will not just serve as a tutorial but a reference to run back to when building your awesome apps with Cloudinary.
Cloudinary documentations, blog posts and GitHub repos are also very helpful and most portion of this tutorial where gotten from them.
This article was originally posted on Scotch.io
 |
Christian Nwamba (CodeBeast), is a JavaScript Preacher, Community Builder and Developer Evangelist. In his next life, Chris hopes to remain a computer programmer. |