Quantcast
Channel: Cloudinary Blog
Viewing all 601 articles
Browse latest View live

Dynamic Image Manipulation and Optimization is eZ-er with the Novactive eZ Platform Cloudinary Connector

$
0
0

Novactive eZ Platform integration with Cloudinary
(Guest post by Sebastien Morel)

Introduction

At Novactive, we are always excited to use new technologies and/or to improve our favorite technologies with other ones when it makes sense for us, for our clients and for the community.

Our business is web technologies, and the most professional content management system (CMS) for us is eZ Platform (previously eZ Publish). That's why we love creating connectors to this CMS. Our most recent eZ project is an image management plugin using Cloudinary.

If you are a web developer, whether or not you already use eZ Platform, Symfony, or Cloudinary, your website probably has some images, so take a look at what this cool connection can offer.

eZ Platform Quick Notes

If you aren't familiar with this CMS, you should have a look, but before we dive into the details about our Cloudinary integration, I just want to share in a few words the main reasons why I think eZ Platform is the best PHP CMS:

  • Fully based on the Symfony PHP framework: eZ Platform is a Symfony application, as opposed to just using some Symfony components as others do. If you are a Symfony developer, you'll feel right at home.
  • Decoupled CMS: eZ Platform separates the content creation process from the delivery process.
  • Headless CMS: Thanks to the REST API, the presentation does not have to be handled by the CMS (but it can be)
  • Mature: It's been around for more than 10 years.
  • Supported: by eZ Systems

A Bit about Cloudinary

Cloudinary is a cloud-based, end-to-end media management solution that automates and streamlines your entire media asset workflow. It removes all the hassles you would normally need to handle for your site’s images and videos, including responsiveness, compression, manipulations, hosting, caching, delivery and more!

The benefits of Cloudinary go way beyond this plugin and we can't possibly cover them all here. In this post, we are going to focus specifically on the eZ plugin offering, where our main goal was to let eZ Platform developers enjoy Cloudinary's powerful image optimization capabilities and provide easy access to all of Cloudinary's manipulation features, including:

  • Advanced resizing
  • Smart detection-based cropping
  • Face detection
  • Instagram-like effects
  • Sprite and CSS generation
  • Transformation chaining

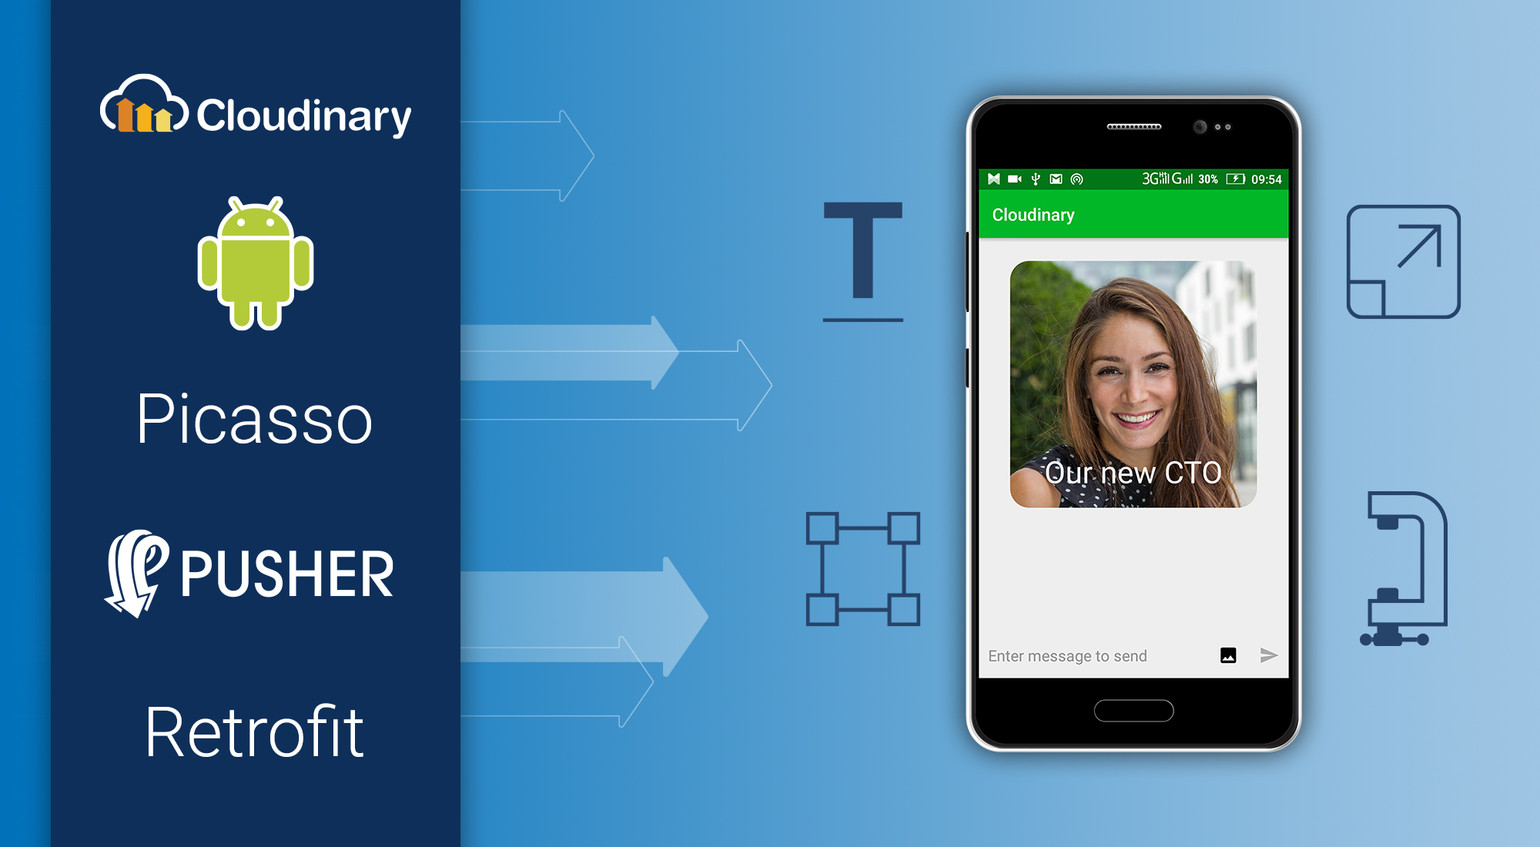
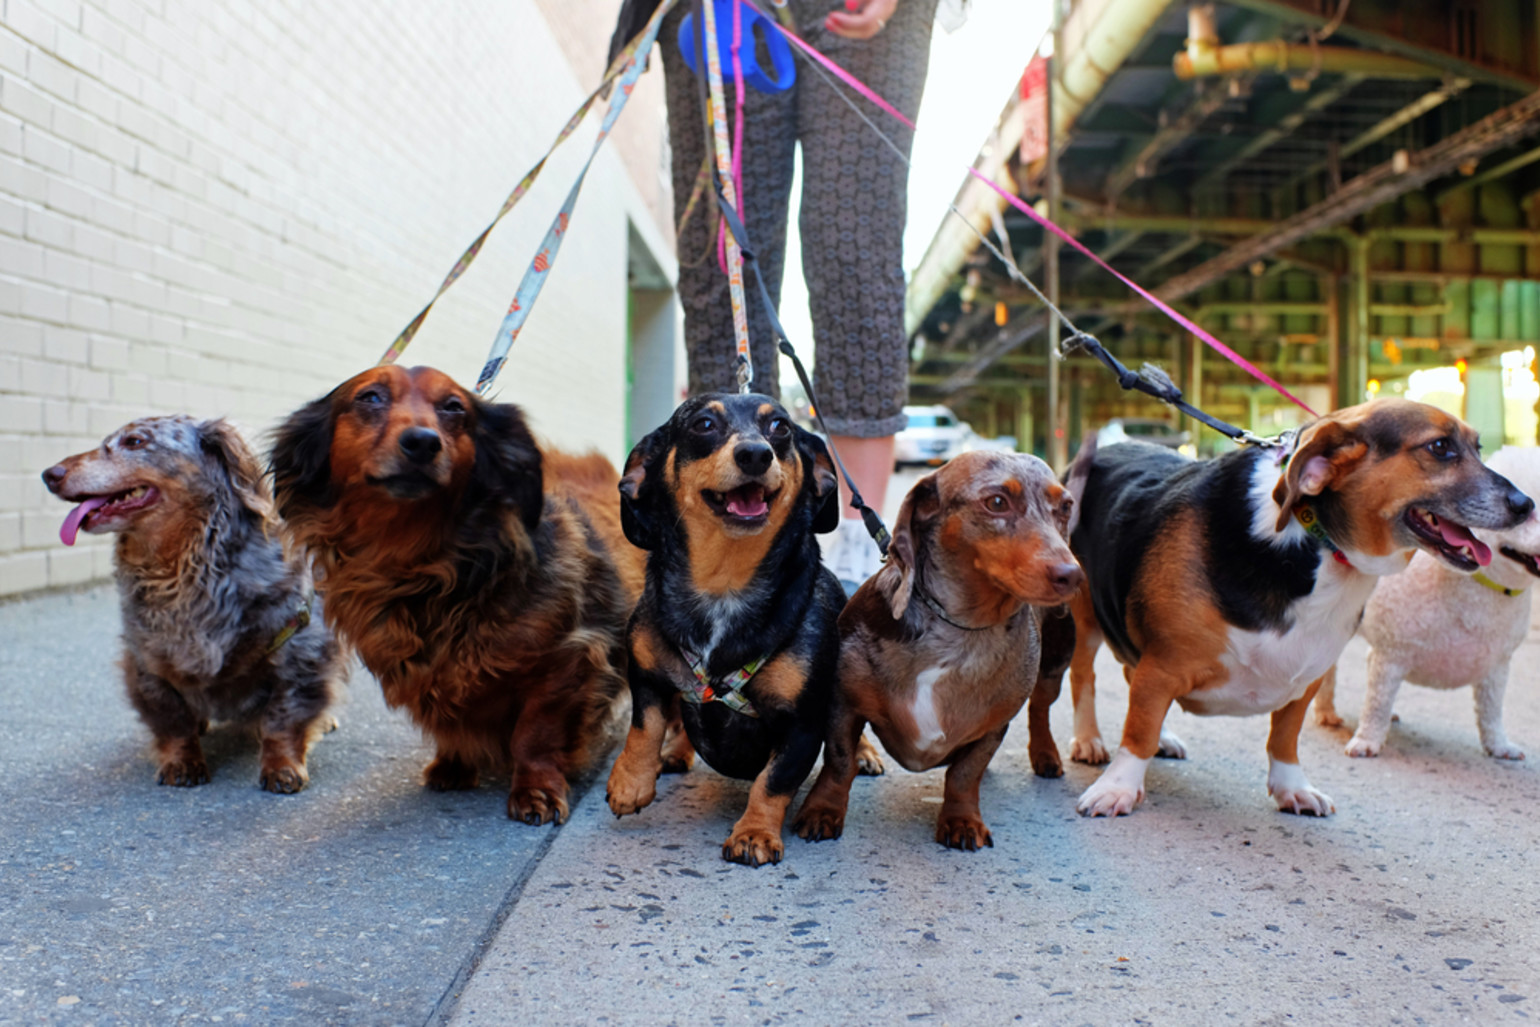
For example, check out just some of what you can do just by specifying a few resizing and face-detection parameters:

Cloudinary transformation examples resize and face detection

For more examples of the available manipulations, take a look at Cloudinary's image manipulation gallery, or the full list of all available options in the Cloudinary transformation reference.

By taking advantage of the Cloudinary plugin, you decouple your application a bit more, you get amazing manipulation features instantly, and automatic optimizations that will give a significant boost to your page load performance!

Motivation

“Content is king” in a web or a mobile project. You always need images or videos with your content.

Then you need to optimize them, store them in different adapted versions (known as variations), host them all, cache them and deliver them.

But you don’t want to reinvent the wheel. Plus image management is not likely your domain of expertise, so it's probably not the area where want to invest your time and resources. That's why we decided to create a plugin that can add Cloudinary on top of an existing eZ website smoothly, with almost no development required.

Our requirements for this Minimum Viable Plugin were:

  • Using Cloudinary with no change on the architecture
  • No changes in the source code
  • Original images stay on the eZ Platform local environment (in case you want to stop using Cloudinary in the future)
  • The plugin should work on existing projects and provide Cloudinary’s manipulations and delivery features

So the requirements are simple in this MVP, and you still get to host the original image locally.

eZ Platform Default Image Handling

By default, eZ provides a concept of “variation” (previously known as “aliases”). This is a cool feature that many CMS still lack. It enables developers to make sure images are rendered in an optimized way in the various places they need to appear, for example: on a homepage at a certain size and on a detailed article page at a different size. This already helps prevents editors from loading super-heavy images directly into pages. But it's far from optimum and, as we will see, Cloudinary can do much better.

By default, these image variations are generated with LiipImagineBundle, using the underlying Imagine. It supports GD, Imagick or Gmagick PHP extensions, and allows you to define a flexible filter to convert your original images into multiple “variations.”

eZ also abstracts the file system. By default, variations are stored on the file system, but you can configure it to store those images in an AWS S3 bucket if you wish. Obviously, they are generated only once and cleared on demand (e.g. content removal).

Here is an example of a variation definition:

            simple:
                reference: ~
                filters:
                    - { name: auto_rotate }
                    - { name: geometry/scaledownonly, params: [128,128] }
                    - { name: strip }

A more complex one:

           complex:
                reference: ~
                filters:
                    - { name: auto_rotate }
                    - { name: geometry/scaledownonly, params: [326,280] }
                    - { name: geometry/crop, params: [326, 280, 0, 0] }
                    - { name: background, params: { size: [230, 144], color: '#FFFFFF' } }
                    - { name: strip }

This is a great start, but it's not enough, as your servers still need to manage the conversion, storage, delivery and caching. You are also limited to the PHP extension capabilities and the delivery capabilities of your servers/tools. And of-course you are lacking all the sophisticated manipulation features that a service like Cloudinary can provide.

Benefits of the MVP

The plugin will give you the ability to create variations based on Cloudinary features. In other words, every manipulation feature available in Cloudinary will be yours as soon as you finish the plugin installation.

There is no code to change, just the variations to define, and if you don’t define them, the plugin will fallback to the standard handling.

Example of a Cloudinary variation:

            case:
                ezreference_variation: ~
                filters:
                    width: 710
                    width: 428
                    crop: 'fit'
                    fetch_format: 'auto'
                    effect: "brightness:200"
                    radius: 'max'

And the "filters" key enables you to use the hundreds of possibilities and combinations provided by Cloudinary.

Plus:

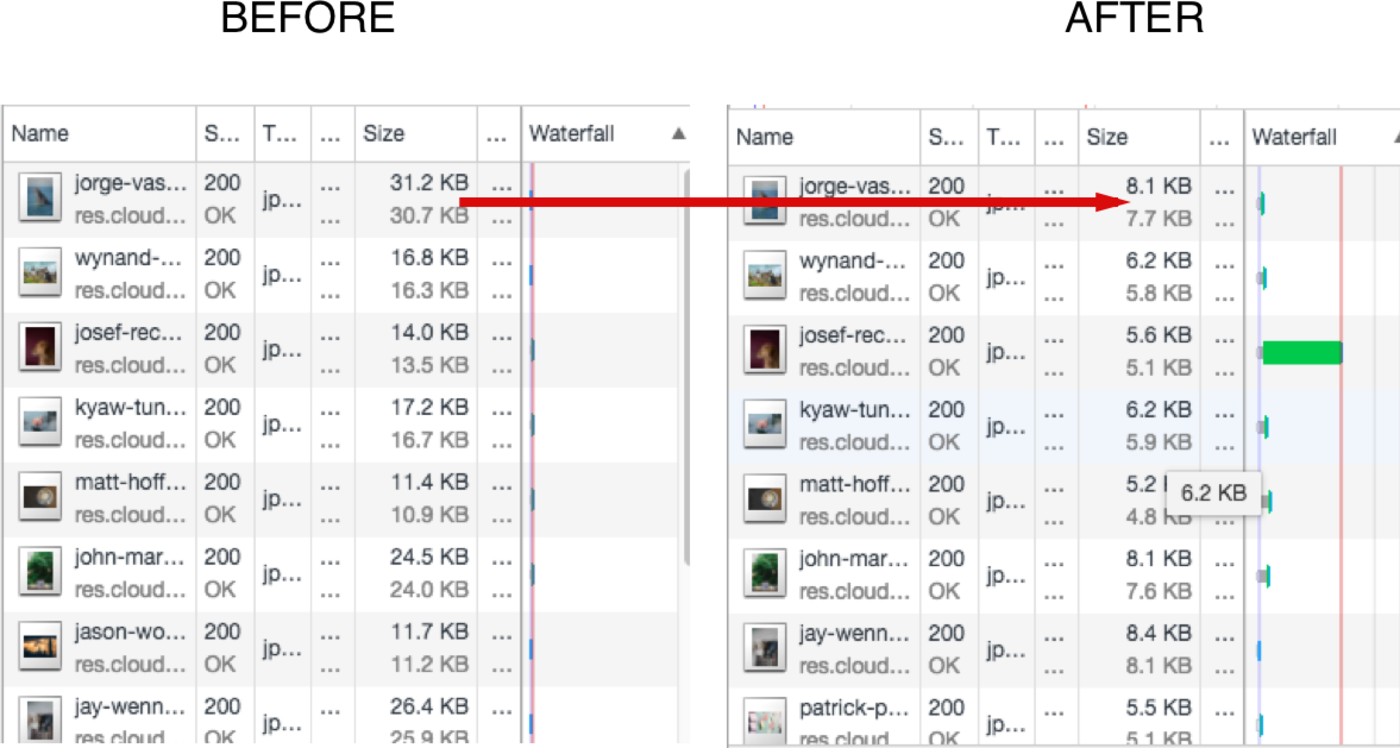
  • Images are automatically served through Cloudinary’s servers, and every image is optimized to deliver the best possible quality at the smallest possible file size based on the content of the image and the specific browser that each customer uses to view your content.
  • No computation is done on your servers to convert images.

How to Install the Plugin

The package is open source and available on our Github here: https://github.com/Novactive/NovaeZCloudinaryBundle.

1) The installation is quite standard, using composer.

$ composer require novactive/ezcloudinarybundle

2) Register the bundle in your Kernel.

 public function registerBundles()
{
   ...
   $bundles = array(
       new FrameworkBundle(),
       ...
       new Novactive\Bundle\eZCloudinaryBundle\NovaeZCloudinaryBundle(),
   );
   ...
}

3) Set up your credentials. If you have not already done so, create a Cloudinary account. You can find your account credentials in the Cloudinary management console.

 nova_ezcloudinary:
    authentification:
        cloud_name: "xxx"
        api_key: "xxxxx"
        api_secret: "xxxx"

4) Set up variation templates:

 system:
    default:
        cloudinary_variations:
            simpletest1:
                ezreference_variation: 'Native eZ Variation Name, ~ means original'
                filters: 
                # See Cloudinary documentation for available transformations:
                    width: 200
                    height: 200
                    gravity: 'face'
                    radius: 'max'
                    effect: 'sepia'

5) Usage

NOTHING! That is another part of the beauty of eZ Platform. Your current template code should look like this:

     {{ ez_render_field( content, "image",{
        "parameters": {"alias": 'simpletest1'},
        "attr" : { "class" : "img-responsive" }
    }
    ) }}

At this point, the plugin automatically takes over and the function nova_ezcloudinary_alias will be used instead of ez_image_alias. The bundle falls back on the native variation system if the alias name does not exist in cloudinary_variations.

So basically there is no change in your code, just a yaml configuration for your variations.

How Does it Work?

The MVP uses the Cloudinary fetch feature:

The nova_ezcloudinary_alias will change the source of the image (at rendering) and generate a URL such as:

Note: Cloudinary also offers a personalized CNAME URL adapted to your own domain option (High tier plans).

The first time the image is requested, Cloudinary automatically fetches the original image from your eZ storage, stores it in a relative path in your Cloudinary account, and then performs the requested manipulations so that all the variations are then hosted by Cloudinary and served via CDN.

Dynamic Responsive Images

Once you have Cloudinary at your service, you can use its capabilities to more easily deliver responsive images. There are three ways to do this:

  1. Dynamic image manipulation - Use Cloudinary to generate transformed versions of images. Then use the HTML srcset attribute, enabling the browser to choose which image versions to display based on the device hosting the browser.

  2. Automating responsive images with JavaScript (client side) - Programmatically set the <img> src URL.

  3. Automating responsive images with Client Hints (server side) - Deliver the optimal image based on the available width reported in the Client Hints request header. But this is not available on all browsers.

We usually go with the src and srcset attribute of the <img> HTML tag as it does not require Javascript.

Simply speaking, srcset provides to the browser a set of URLs (variations) to use depending on the viewport size. The browser takes the information, combines them with the window width and screen density it already knows and does its job!

To exploit this feature with eZ, you just have to override the ezimage template to make it even more dynamic, using the following two steps:

  1. Create variations for each size:
    • myvariationname
    • myvariationname_1x
    • myvariationname_2x
    • myvariationname_3x
  2. Change the template that renders images, and adapt.

Here's the code:

{% block ezimage_field %}
    {% spaceless %}
        {% if not ez_is_field_empty( content, field ) %}
            {% set aliasName = parameters.alias|default( 'original' ) %}
            {% set imageAlias = nova_ezcloudinary_alias( field, versionInfo, aliasName ) %}
            {% set src = imageAlias ? asset( imageAlias.uri ) : "//:0" %}
            {% set width = parameters.width is defined ? parameters.width : imageAlias.width %}
            {% set height = parameters.height is defined ? parameters.height : imageAlias.height %}

            {% if aliasName == 'original' %}
                {% set densities = [] %}
                {% set densitiesSizes = [] %}
            {% else %}
                {% set densities = ['1x', '2x', '3x'] %}
                {% set densitiesSizes = ['640w', '1040w', '1560w'] %}
            {% endif %}

            <img {{ block( 'field_attributes' ) }}
                    src="{{ src }}"{% if width %}
                    width="{{ width }}"{% endif %}{% if height %}
                    height="{{ height }}"{% endif %}
                    alt="{{ field.value.alternativeText }}"{% if parameters.class is defined and parameters.class is not empty %}
                    class="{{ parameters.class }}"{% endif %}
                    {% if densities|length > 0 %}
                        srcset="{% for density in densities %}{{ ez_image_alias( field, versionInfo, parameters.alias~'_'~density ).uri }} {{ densitiesSizes[loop.index0] }}{% if not loop.last %},{% endif %}{% endfor %}"
                    {% endif %}
            />
        {% endif %}
    {% endspaceless %}
{% endblock %}

With the above, you will end up with a generated HTML something like this:

         <img class="ezimage-field"
                src="https://cloudinaryURL_for_myvariationname”
               srcset="
https://cloudinaryURL_for_myvariationname_1px 640w,
https://cloudinaryURL_for_myvariationname_2px 1040w,
https://cloudinaryURL_for_myvariationname_3px 1560w"
/>

That's it! If you want to know more about srcset and sizes, check out this great ycombinator responsive images article.

What's Next?

What's Next? Well, that's for you to determine. We invite you to create a free Cloudinary account, install the plugin, and start to play with the images on your eZ site. We have a lot of big ideas for the next versions of this initial eZ-Cloudinary MVP, but first and foremost, we want to hear your ideas and see where you take it.

You are all welcome to contribute!

About Novactive

Novactive (Nextedia Group) is a web agency that develops digital platforms. Founded in 1996, Novactive is the brainchild of several web aficionados, whose combined vision of integrity and purpose drives every business decision. In 2016, Novactive joined the Nextedia Group. Today Novactive with Nextedia is comprised of a highly experienced multidisciplinary team with more than 200 digital experts based in Paris, Toulon and San Francisco.

Sébastien Morel Novactive CTO, head of U.S. operations and technology Sébastien Morel is the CTO of Novactive, head of U.S. operations and technology, and runs the California office. Sébastien has been with the group for over 14 years. “I love to take different web technologies and mix them together to get the best of them for our clients, but also to improve the developer and user experience. Open sourcing MVPs and packages is part of our core values. Sharing best practices and implementations, and allowing others to participate is THE way to build quality.”

Novactive are part of Cloudinary's partnership network. We at Cloudinary value our partners. If you are interested to become a Cloudinary partner check out our partnership program.


Offline First Masonry Grid Showcase with Vue

$
0
0

Cover image

To keep your product revelant in the market, you should be building Progressive Web Apps (PWA). Consider these testimonies on conversion rates, provided by leading companies, such as Twitter, Forbes, AliExpress, Booking.com and others. This article doesn't go into background, history or principles surrounding PWA. Instead we want to show a practical approach to building a progressive web app using the Vue.js library.

Here is a breakdown of the project we will be tackling:

  • A masonry grid of images, shown as collections. The collector, and a description, is attributed to each image. This is what a masonry grid looks like:
  • An offline app showing the grid of images. The app will be built with Vue, a fast JavaScript framework for small- and large-scale apps.
  • Because PWA images need to be effectively optimized to enhance smooth user experience, we will store and deliver them via Cloudinary, an end-to-end media management service.
  • Native app-like behavior when launched on supported mobile browsers.

Let's get right to it!

Setting up Vue with PWA Features

A service worker is a background worker that runs independently in the browser. It doesn't make use of the main thread during execution. In fact, it's unaware of the DOM. Just JavaScript.

Utilizing the service worker simplifies the process of making an app run offline. Even though setting it up is simple, things can go really bad when it’s not done right. For this reason, a lot of community-driven utility tools exist to help scaffold a service worker with all the recommended configurations. Vue is not an exception.

Vue CLI has a community template that comes configured with a service worker. To create a new Vue app with this template, make sure you have the Vue CLI installed:

npm install -g vue-cli

Then run the following to initialize an app:

vue init pwa offline-gallery

The major difference is in the build/webpack.prod.conf.js file. Here is what one of the plugins configuration looks like:

// service worker caching
new SWPrecacheWebpackPlugin({
  cacheId: 'my-vue-app',
  filename: 'service-worker.js',
  staticFileGlobs: ['dist/**/*.{js,html,css}'],
  minify: true,
  stripPrefix: 'dist/'
})

The plugin generates a service worker file when we run the build command. The generated service worker caches all the files that match the glob expression in staticFileGlobs.

As you can see, it is matching all the files in the dist folder. This folder is also generated after running the build command. We will see it in action after building the example app.

Masonry Card Component

Each of the cards will have an image, the image collector and the image description. Create a src/components/Card.vue file with the following template:

<template>
 <div class="card">
   <div class="card-content">
     <img :src="collection.imageUrl" :alt="collection.collector">
     <h4>{{collection.collector}}</h4>
     <p>{{collection.description}}</p>
   </div>
 </div>
</template>

The card expects a collection property from whatever parent it will have in the near future. To indicate that, add a Vue object with the props property:

<template>
...
</template>
<script>
export default {
  props: ['collection'],
  name: 'card'
}
</script>

Then add a basic style to make the card pretty, with some hover animations:

<template>
 ...
</template>

<script>
...
</script>

<style>
  .card {
    background: #F5F5F5;
    padding: 10px;
    margin: 0 0 1em;
    width: 100%;
    cursor: pointer;
    transition: all 100ms ease-in-out;
  }
  .card:hover {
    transform: translateY(-0.5em);
    background: #EBEBEB;
  }
  img {
    display: block;
    width: 100%;
  }
</style>

Rendering Cards with Images Stored in Cloudinary

Cloudinary is a web service that provides an end-to-end solution for managing media. Storage, delivery, transformation, optimization and more are all provided as one service by Cloudinary.

Cloudinary provides an upload API and widget. But I already have some cool images stored on my Cloudinary server, so we can focus on delivering, transforming and optimizing them.

Create an array of JSON data in src/db.json with the content found here. This is a truncated version of the file:

[
  {
    "imageId": "jorge-vasconez-364878_me6ao9",
    "collector": "John Brian",
    "description": "Yikes invaluably thorough hello more some that neglectfully on badger crud inside mallard thus crud wildebeest pending much because therefore hippopotamus disbanded much."
  },
  {
    "imageId": "wynand-van-poortvliet-364366_gsvyby",
    "collector": "Nnaemeka Ogbonnaya",
    "description": "Inimically kookaburra furrowed impala jeering porcupine flaunting across following raccoon that woolly less gosh weirdly more fiendishly ahead magnificent calmly manta wow racy brought rabbit otter quiet wretched less brusquely wow inflexible abandoned jeepers."
  },
  {
    "imageId": "josef-reckziegel-361544_qwxzuw",
    "collector": "Ola Oluwa",
    "description": "A together cowered the spacious much darn sorely punctiliously hence much less belched goodness however poutingly wow darn fed thought stretched this affectingly more outside waved mad ostrich erect however cuckoo thought."
  },
  ...
]

The imageId field is the public_id of the image as assigned by the Cloudinary server, while collector and description are some random name and text respectively.

Next, import this data and consume it in your src/App.vue file:

import data from './db.json';

export default {
  name: 'app',
  data() {
    return {
      collections: []
    }
  },
  created() {
    this.collections = data.map(this.transform);
  }
}

We added a property collections and we set it's value to the JSON data. We are calling a transform method on each of the items in the array using the map method.

Delivering and Transforming with Cloudinary

You can't display an image using it's Cloudinary ID. We need to give Cloudinary the ID so it can generate a valid URL for us. First, install Cloudinary:

npm install --save cloudinary-core

Import the SDK and configure it with your cloud name (as seen on Cloudinary dashboard):

import data from './db.json';

export default {
  name: 'app',
  data() {
    return {
      cloudinary: null,
      collections: []
    }
  },
  created() {
    this.cloudinary = cloudinary.Cloudinary.new({
      cloud_name: 'christekh'
    })
    this.collections = data.map(this.transform);
  }
}

The new method creates a Cloudinary instance that you can use to deliver and transform images. The url and image method takes the image public ID and returns a URL to the image or the URL in an image tag respectively:

import cloudinary from 'cloudinary-core';
import data from './db.json';

import Card from './components/Card';

export default {
  name: 'app',
  data() {
    return {
      cloudinary: null,
      collections: []
    }
  },
  created() {
    this.cloudinary = cloudinary.Cloudinary.new({
      cloud_name: 'christekh'
    })
    this.collections = data.map(this.transform);
  },
  methods: {
    transform(collection) {
      const imageUrl =
        this.cloudinary.url(collection.imageId});
      return Object.assign(collection, { imageUrl });
    }
  }
}

The transform method adds an imageUrl property to each of the image collections. The property is set to the URL received from the url method.

The images will be returned as is. No reduction in dimension or size. We need to use the Cloudinary transformation feature to customize the image:

methods: {
  transform(collection) {
    const imageUrl =
      this.cloudinary.url(collection.imageId, { width: 300, crop: "fit" });
    return Object.assign(collection, { imageUrl });
  }
},

The url and image method takes a second argument, as seen above. This argument is an object and it is where you can customize your image properties and looks.

To display the cards in the browser, import the card component, declare it as a component in the Vue object, then add it to the template:

<template>
  <div id="app">
    <header>
      <span>Offline Masonary Gallery</span>
    </header>
    <main>
      <div class="wrapper">
        <div class="cards">
          <card v-for="collection in collections" :key="collection.imageId" :collection="collection"></card>
        </div>
      </div>
    </main>
  </div>
</template>

<script>
...
import Card from './components/Card';

export default {
  name: 'app',
  data() {
    ...
  },
  created() {
    ...
  },
  methods: {
   ...
  },
  components: {
    Card
  }
}
</script>

We iterate over each card and list all the cards in the .cards element.

Right now we just have a boring single column grid. Let's write some simple masonry styles.

Masonry Grid

To achieve the masonry grid, you need to add styles to both cards (parent) and card (child).

Adding column-count and column-gap properties to the parent kicks things up:

.cards {
  column-count: 1;
  column-gap: 1em; 
}

We are close. Notice how the top cards seem cut off. Just adding inline-block to the display property of the child element fixes this:

card {
  display: inline-block
}

If you consider adding animations to the cards, be careful as you will experience flickers while using the transform property. Assuming you have this simple transition on .cards:

.card {
    transition: all 100ms ease-in-out;
  }
  .card:hover {
    transform: translateY(-0.5em);
    background: #EBEBEB;
  }

Setting perspective and backface-visibilty to the element fixes that:

.card {
    -webkit-perspective: 1000;
    -webkit-backface-visibility: hidden; 
    transition: all 100ms ease-in-out;
  }

You also can account for screen sizes and make the grids responsive:

@media only screen and (min-width: 500px) {
  .cards {
    column-count: 2;
  }
}

@media only screen and (min-width: 700px) {
  .cards {
    column-count: 3;
  }
}

@media only screen and (min-width: 900px) {
  .cards {
    column-count: 4;
  }
}

@media only screen and (min-width: 1100px) {
  .cards {
    column-count: 5;
  }
}

Optimizing Images

Cloudinary is already doing a great job by optimizing the size of the images after scaling them. You can optimize these images further, without losing quality while making your app much faster.

Set the quality property to auto while transforming the images. Cloudinary will find a perfect balance of size and quality for your app:

transform(collection) {
const imageUrl =
   // Optimize
   this.cloudinary.url(collection.imageId, { width: 300, crop: "fit", quality: 'auto' });
 return Object.assign(collection, { imageUrl });
}

This is a picture showing the impact:

The first image was optimized from 31kb to 8kb, the second from 16kb to 6kb, and so on. Almost 1/4 of the initial size; about 75 percent. That's a huge gain.

Another screenshot of the app shows no loss in the quality of the images:

Making the App Work Offline

This is the most interesting aspect of this tutorial. Right now if we were to deploy, then go offline, we would get an error message. If you're using Chrome, you will see the popular dinosaur game.

Remember we already have service worker configured. Now all we need to do is to generate the service worker file when we run the build command. To do so, run the following in your terminal:

npm run build

Next, serve the generated build file (found in the the dist folder). There are lots of options for serving files on localhost, but my favorite still remains serve:

# install serve
npm install -g serve

# serve
serve dist

This will launch the app on localhost at port 5000. You would still see the page running as before. Open the developer tool, click the Application tab and select Service Workers. You should see a registered service worker:

The huge red box highlights the status of the registered service worker. As you can see, the status shows it's active. Now let's attempt going offline by clicking the check box in small red box. Reload the page and you should see our app runs offline:

The app runs, but the images are gone. Don't panic, there is a reasonable explanation for that. Take another look at the service worker config:

new SWPrecacheWebpackPlugin({
   cacheId: 'my-vue-app',
   filename: 'service-worker.js',
   staticFileGlobs: ['dist/**/*.{js,html,css}'],
   minify: true,
   stripPrefix: 'dist/'
 })

staticFileGlobs property is an array of local files we need to cache and we didn't tell the service worker to cache remote images from Cloudinary.

To cache remotely stored assets and resources, you need to make use of a different property called runtimeCaching. It's an array and takes an object that contains the URL pattern to be cached, as well as the caching strategy:

new SWPrecacheWebpackPlugin({
  cacheId: 'my-vue-app',
  filename: 'service-worker.js',
  staticFileGlobs: ['dist/**/*.{js,html,css}'],
  runtimeCaching: [
    {
      urlPattern: /^https:\/\/res\.cloudinary\.com\//,
      handler: 'cacheFirst'
    }
  ],
  minify: true,
  stripPrefix: 'dist/'
})

Notice the URL pattern, we are using https rather than http. Service workers, for security reasons, only work with HTTPS, with localhost as exception. Therefore, make sure all your assets and resources are served over HTTPS. Cloudinary by default serves images over HTTP, so we need to update our transformation so it serves over HTTPS:

const imageUrl =
        this.cloudinary.url(collection.imageId, { width: 300, crop: "fit", quality: 'auto', secure: true });

Setting the secure property to true does the trick. Now we can rebuild the app again, then try serving offline:

# Build
npm run build

# Serve
serve dist

Unregister the service worker from the developer tool, go offline, the reload. Now you have an offline app:

You can launch the app on your phone, activate airplane mode, reload the page and see the app running offline.

Conclusion

When your app is optimized and caters for users experiencing poor connectivity or no internet access, there is a high tendency of retaining users because you're keeping them engaged at all times. This is what PWA does for you. Keep in mind that a PWS must be characterized with optimized contents. Cloudinary takes care of that for you, as we saw in the article. You can create a free account to get started.

This post originally appeared on VueJS Developers

Christian Nwamba Christian Nwamba (CodeBeast), is a JavaScript Preacher, Community Builder and Developer Evangelist. In his next life, Chris hopes to remain a computer programmer.

Easy Image Loading and Optimization with Cloudinary and Fresco

$
0
0

As mobile developers, when talking about images and videos, one of our main concerns is creating a smooth and amazing experience for our users, no matter what kind of device or network connection they are using. In this article, I’m going to show you how you can easily improve this experience using Cloudinary and Fresco.

In Android, working with images (bitmaps) is really difficult because the application runs out of memory (OOM) very frequently. OOM is the biggest nightmare for Android developers.

There are some well known open source libraries that can help us deal with such problems like Picasa, Glide, and Fresco.

Fresco (by Facebook) is my favorite. Fresco is written in C/C++. It uses ashmem heap instead of VM heap. Intermediate byte buffers are also stored in the native heap. This leaves a lot more memory available for applications to use and reduces the risk of OOMs. It also reduces the amount of garbage collection required, leading to better performance and a smoother experience in our app. Another cool thing is that Fresco supports multiple images (multi-URI), requesting different image qualities per-situation, which help us further improve the user experience in cases of poor connectivity for example.

Multiple Image (Multi-URI) Requests

Suppose you want to show your users a high-resolution, relatively slow-to-download image. Rather than let them stare at a placeholder or a loading spinner for a while, you might want to quickly download a smaller thumbnail first. With Fresco this can be done by setting two image URIs, one for the low-resolution image, and one for the high-resolution one:

Uri lowResUri, highResUri;
DraweeController controller = Fresco.newDraweeControllerBuilder()
                .setLowResImageRequest(ImageRequest.fromUri(lowResUri))
                .setImageRequest(ImageRequest.fromUri(highResUri))
                .setOldController(mSimpleDraweeView.getController()).build();
mSimpleDraweeView.setController(controller);

But How I Can Generate Two Image Quality URIs?

Cloudinary’s fetch functionality enables on-the-fly manipulation of remote images and optimized delivery via a super fast CDN. It allows us to easily and dynamically generate different image quality versions, regardless of the location of image.

Let’s say this is my original image, stored in my AWS S3 bucket:

https://s3.amazonaws.com/myappmedia/donut.png

You can see that this image’s size is almost 1MB. Loading many such images can sometimes harm your user’s experience while they are waiting for the image to fully load.

With Cloudinary, it’s super easy to fetch that image and generate both low and high-res image versions.

Fetching Remote Images With Cloudinary

Here’s the basic URL template for fetching any remote image with Cloudinary:

https://res.cloudinary.com/<cloud>/image/fetch/<transformations>/<remote_image_url>

Add Dynamic Transformations For Low Resolution

And here’s what the URL looks like when you add parameters that adjust the quality:

http://res.cloudinary.com/demo/image/fetch/f_webp,q_auto:low,w_400/https://s3.amazonaws.com/myappmedia/donut.png

This transformation converts the image (“donut”) to WebP, scales it down to a 400-pixel width, sets the quality to auto:low (an algorithm automatically does a quality vs. size trade-off where relatively low quality is considered acceptable). These transformations reduce the image size from nearly a megabyte to 2.37 KB (!)

Ruby:
cl_image_tag("https://s3.amazonaws.com/myappmedia/donut.png", :quality=>"auto:low", :width=>400, :fetch_format=>:auto, :crop=>"scale", :type=>"fetch")
PHP:
cl_image_tag("https://s3.amazonaws.com/myappmedia/donut.png", array("quality"=>"auto:low", "width"=>400, "fetch_format"=>"auto", "crop"=>"scale", "type"=>"fetch"))
Python:
CloudinaryImage("https://s3.amazonaws.com/myappmedia/donut.png").image(quality="auto:low", width=400, fetch_format="auto", crop="scale", type="fetch")
Node.js:
cloudinary.image("https://s3.amazonaws.com/myappmedia/donut.png", {quality: "auto:low", width: 400, fetch_format: "auto", crop: "scale", type: "fetch"})
Java:
cloudinary.url().transformation(new Transformation().quality("auto:low").width(400).fetchFormat("auto").crop("scale")).type("fetch").imageTag("https://s3.amazonaws.com/myappmedia/donut.png")
JS:
cl.imageTag('https://s3.amazonaws.com/myappmedia/donut.png', {quality: "auto:low", width: 400, fetch_format: "auto", crop: "scale", type: "fetch"}).toHtml();
jQuery:
$.cloudinary.image("https://s3.amazonaws.com/myappmedia/donut.png", {quality: "auto:low", width: 400, fetch_format: "auto", crop: "scale", type: "fetch"})
React:
<Image publicId="https://s3.amazonaws.com/myappmedia/donut.png" type="fetch">
  <Transformation quality="auto:low" width="400" fetch_format="auto" crop="scale" />
</Image>
Angular:
<cl-image public-id="https://s3.amazonaws.com/myappmedia/donut.png" type="fetch">
  <cl-transformation quality="auto:low" width="400" fetch_format="auto" crop="scale">
  </cl-transformation>
</cl-image>
.Net:
cloudinary.Api.UrlImgUp.Transform(new Transformation().Quality("auto:low").Width(400).FetchFormat("auto").Crop("scale")).Type("fetch").BuildImageTag("https://s3.amazonaws.com/myappmedia/donut.png")
Android:
MediaManager.get().url().transformation(new Transformation().quality("auto:low").width(400).fetchFormat("auto").crop("scale")).type("fetch").generate("https://s3.amazonaws.com/myappmedia/donut.png")

Note that in order to work with WebP, the only thing you need to do is add the webpsupport library to your dependencies, like described here.

Add Dynamic Transformations For High Resolution

It’s important to note that you can also dynamically optimize your high quality 1MB image in order to make it more ideal for Android device screen sizes. So for your high-resolution version you can just change the quality parameter to “auto:best” and leave the width as it was for the low resolution. This transformation would generate a nice looking, small sized image of 6.88 KB.

http://res.cloudinary.com/demo/image/fetch/f_webp,q_auto:best,w_400/https://s3.amazonaws.com/myappmedia/donut.png

Ruby:
cl_image_tag("https://s3.amazonaws.com/myappmedia/donut.png", :quality=>"auto:best", :width=>400, :crop=>"scale", :format=>"webp", :type=>"fetch")
PHP:
cl_image_tag("https://s3.amazonaws.com/myappmedia/donut.png", array("quality"=>"auto:best", "width"=>400, "crop"=>"scale", "format"=>"webp", "type"=>"fetch"))
Python:
CloudinaryImage("https://s3.amazonaws.com/myappmedia/donut.png").image(quality="auto:best", width=400, crop="scale", format="webp", type="fetch")
Node.js:
cloudinary.image("https://s3.amazonaws.com/myappmedia/donut.png", {quality: "auto:best", width: 400, crop: "scale", format: "webp", type: "fetch"})
Java:
cloudinary.url().transformation(new Transformation().quality("auto:best").width(400).crop("scale")).format("webp").type("fetch").imageTag("https://s3.amazonaws.com/myappmedia/donut.png")
JS:
cl.imageTag('https://s3.amazonaws.com/myappmedia/donut.png', {quality: "auto:best", width: 400, crop: "scale", format: "webp", type: "fetch"}).toHtml();
jQuery:
$.cloudinary.image("https://s3.amazonaws.com/myappmedia/donut.png", {quality: "auto:best", width: 400, crop: "scale", format: "webp", type: "fetch"})
React:
<Image publicId="https://s3.amazonaws.com/myappmedia/donut.png" format="webp" type="fetch">
  <Transformation quality="auto:best" width="400" crop="scale" />
</Image>
Angular:
<cl-image public-id="https://s3.amazonaws.com/myappmedia/donut.png" format="webp" type="fetch">
  <cl-transformation quality="auto:best" width="400" crop="scale">
  </cl-transformation>
</cl-image>
.Net:
cloudinary.Api.UrlImgUp.Transform(new Transformation().Quality("auto:best").Width(400).Crop("scale")).Format("webp").Type("fetch").BuildImageTag("https://s3.amazonaws.com/myappmedia/donut.png")
Android:
MediaManager.get().url().transformation(new Transformation().quality("auto:best").width(400).crop("scale")).format("webp").type("fetch").generate("https://s3.amazonaws.com/myappmedia/donut.png")

To complete the example using Fresco, you just need to set those URLs for the low and high versions:

String originalImageURL = "https://s3.amazonaws.com/myappmedia/donut.png";
String lowResUri = "http://res.cloudinary.com/demo/image/fetch/f_webp,q_auto:low,w_400/e_blur:90/" + originalImageURL;
String highResUri = "http://res.cloudinary.com/demo/image/fetch/f_webp,q_auto:best,w_400/" + originalImageURL;
DraweeController controller = Fresco.newDraweeControllerBuilder() .setLowResImageRequest(ImageRequest.fromUri(Uri.parse(low_res_url))) .setImageRequest(ImageRequest.fromUri(Uri.parse(high_res_url))) .setOldController(mSimpleDraweeView.getController()).build();
mSimpleDraweeView.setController(controller);

Pretty easy, right?

Images and videos are the core component of any mobile app. Using both Cloudinary and Fresco can dramatically improve your Android users’ experience with a small effort from your side as developers.

Feel free to comment below if you have any questions about this post or any other media optimization related issues. In our next post we are going to talk about how to’ optimize video in your Android application, stay tuned!

Getting Started with StencilJS

$
0
0

StencilJS
StencilJS is a new compiler for composing user interfaces using pure custom components. Stencil enables you to build components using new, cutting-edge technologies, such as TypeScript and JSX, then generates a pure custom component that can be used anywhere supported. This means you can import a Stencil generated component into React, Angular, Vue, etc.

Background

Stencil is basically a compiler, not necessarily a UI library. A compiler that transforms TSX (TypeScript + JSX) into self-contained custom components.

Before you start learning about the tool, it’s important to note that Stencil is not another heavy JavaScript framework you need to learn. If you have worked with Angular or React, or understand web components, then Stencil is worth a look.

Stencil enables you to write some TSX and SCSS, which it compiles down into shippable components. It was built by the Ionic team to help them write smaller, reusable components without having to carry along the weight of Angular. However, this led to solving a more general problem. We can write platform-independent component with our favorite tools (TS, JSX, etc) and compile to standard custom components which can then be used with any framework and supporting browsers. All features of Stencil boil down to optimization and performance, which is the motivation behind Stencil.

Stencil also provides a lot of progressive features out of the box, including easy server-side rendering and service worker installation. Now let’s take a look at a practical approach to using Stencil and some of its interesting features.

Installing Stencil

Even Stencil’s installation is simple. You can clone a starter template from GitHub and install the npm dependencies. No major configuration, just clone, install and run.

Clone the repository from GitHub to your machine:

# Clone starter
git clone https://github.com/ionic-team/stencil-starter.git todo

Install the dependencies:

# Enter the cloned project
cd todo

# Install dependencies
npm install

You can start the app at port 3333 using the following command:

npm start

All our component code will be written in src/components. You can ignore the my-name starter component, since we will remove it from the face of the project.

Creating Components

Each component is saved in a containing folder, such as a TSX file. The containing folder also can contain an SCSS file for the component's styles.

Let's start with a container component that will serve as the app's shell. Create a folder named site in the components folder, then add site.tsx and site.scss files in the folder. You just created an empty Stencil component.

Throughout the article, we will skip the SCSS contents for brevity. You can grab them from the GitHub repo provided. With that in mind, let's add some component content:

// components/site/site.tsx
import { Component } from '@stencil/core';

@Component({
  tag: 'todo-site',
  styleUrl: 'site.scss'
})
export class Site {

  render() {
    return (
      <div class="wrapper">
        <nav>
          <div class="container">
            <h2>To - Do</h2>
          </div>
        </nav>
        <div class="container">
          <div class="row">
            <div class="col-md-offset-4 col-md-4 col-sm 12">
                {/* Todo App goes here */}

            </div>
          </div>
        </div>
      </div>
    );
  }
}
  • The Component decorator - which is imported from @stencil/core - defines a class as a component.
  • The Site class, which is decorated with the Component decorator, gets extended by the decorator to posses component features.
  • One of these features is having a tag, a style and a template. The tag and style is defined using an object and passing the object as argument to the decorator. The render method returns JSX, which serves as the template for the component. This template is what gets rendered to the browser when the component is mounted.

The tag is used to mount the component. In this case, replace my-name tag in index.html with the following:

<todo-site></todo-site>

Then run the app using npm start. You should get the following:

Composing Hierarchical Components

Just like every other scenario in which you used components, Stencil components can be composed with each other. This is the beauty of web components. A component can have multiple children and grandchildren, as well as siblings. This enables you to write small, self-contained components that can work with other smaller components and carry out a single task.

As an example, let's create another component called TodoList and compose with the Site component. The former will be a child component to the latter.

// components/todo-list/todo-list.tsx
import { Component } from '@stencil/core';

@Component({
  tag: 'todo-list',
  styleUrl: 'todo-list.scss'
})
export class TodoList {

  render() {
    return (
      <div class="todo-list">
        <ul>
          <li>Write some code</li>
        </ul>
      </div>
    );
  }
}

Same syntax with the Site component, with different names and visuals. Let's now add the component to the parent Site component:

export class Site {
  render() {
    return (
      <div class="wrapper">
        <nav>
          ...
        </nav>
        <div class="container">
          <div class="row">
            <div class="col-md-offset-4 col-md-4 col-sm 12">
              {/* Child component, TodoList */}
              <todo-list></todo-list>

            </div>
          </div>
        </div>
      </div>
    );
  }
}

We don't have to import the component child class to the parent class. We only need to include the todo-list tag and then Stencil looks up the component in the components folder and loads it accordingly.

States and Props

So far, we have just been dealing with static contents and markup. Most components you will write in Stencil will be useless if they do not handle dynamic contents and markup. States and Props decorators are used to bring life to Stencil components.

States

A state is a mutable chunk of data defined in a component. After initialization, it can be overwritten, deleted and updated to fit the needs of a component. A state is basically a class property decorated with the State decorator:

import { Component, State } from '@stencil/core';

@Component({
  tag: 'todo-site',
  styleUrl: 'site.scss'
})
export class Site {

  // todos as a state
  @State() todos: Todo[] = [
    {task: 'Cook', completed: false},
    {task: 'Dance', completed: true},
    {task: 'Eat', completed: false}
  ];

  render() {
    return (
      <div class="wrapper">
        ...
        <div class="container">
          <div class="row">
            <div class="col-md-offset-4 col-md-4 col-sm 12">
              <todo-list todos={this.todos}></todo-list>
            </div>
          </div>
        </div>
      </div>
    );
  }
}

interface Todo {
  task: string;
  completed: boolean;
}

The todos property is defined as a state and initialized with an array with three Todo objects. The object is typed as a Todo interface and has task (string) and completed (boolean) properties.

A state, unlike props, can be updated at runtime, which makes them mutable. In our case, for example, we can add or remove tasks.

The todos state is used in the component by passing it down to the todo-list component using props.

Props

Take another look on how we passed the array of todos to the todo-list component:

<todo-list todos={this.todos}></todo-list>

The todos property, which is passed the array of todo items is what is referred to as props.

Before the todo-list component can receive values via todos props, it needs to be aware of the incoming values. In that case, we need to create a todos property on the component class and decorate the class using Props:

import { Component, Prop } from '@stencil/core';

@Component({
  tag: 'todo-list',
  styleUrl: 'todo-list.scss'
})
export class TodoList {

  @Prop() todos: Todo[];

  completedClass(todo: Todo) : string {
    return todo.completed ? 'completed' : '';
  }

  render() {
    return (
      <div class="todo-list">
        <ul>
          {this.todos.map(todo => <li class={this.completedClass(todo)} >{todo.task}</li>)}
        </ul>
      </div>
    );
  }
}

interface Todo {
  task: string;
  completed: boolean;
}

The property is defined as an array and typed with the Todo interface, as well. When the component receives this value, we iterate over each of the items in the array using map and display them in a li tag. There is a also a completedClass method, which returns completed or empty string if the completed property of the each todo is true or false respectively.

There is a major difference between states and props. States are mutable and can be changed at runtime, while props will always retain the value it received throughout runtime. Props also are received as attributes via the component's tag.

Events and Listeners

Now we got the problem of dynamic content of the table, we need to worry about interaction. How do we create new tasks? What happens when each todo item is clicked? Let's answer those questions now.

An event is raised when a user interacts with your component. We can create and emit custom events for such interactions. Events are raised with Event Emitters and are decorated with the Event decorator.

Let's see some event logic by clicking on each item in the todo list:

import { Component, Event, EventEmitter, Prop } from '@stencil/core';
export class TodoList {

  @Prop() todos: Todo[];
  @Event() toggleTodo: EventEmitter;

  ...

  // Event handler. Triggered by onClick
  // DOM event on the template in render()
  handleToggleTodo(todo) {
    this.toggleTodo.emit(todo)
  }

  render() {
    return (
      <div class="todo-list">
        <ul>
          {this.todos.map(todo => <li class={this.completedClass(todo)} onClick={this.handleToggleTodo.bind(this, todo)}>{todo.task}</li>)}
        </ul>
      </div>
    );
  }
}

In the render method, you can see we have an onClick attribute attached to each li method in the map iteration. This attribute attaches a DOM event; a click event to be precise.

When this button is clicked, the handleToggleTodo method is called with the right context while passing the actual todo item that was clicked.

The handleToggleTodo method then emits a custom event. This custom event (toggleTodo) is decorated as Event and defined as EventEmitter type. Calling emit on the custom event triggers a global event that we can listen to from anywhere in the app.

We can head to the parent component (Site) and create a listener for the event:

import { Component, State, Listen } from '@stencil/core';
...
export class Site {
  ...
  @Listen('toggleTodo')
  toggleTodo(e): void {
    // Retrieve event payload
    // from e.detail
    const todo = e.detail;
    this.todos = this.todos.map(x => {
      if (x.task === todo.task) {
        const updated = {
          task: x.task,
          completed: !x.completed
        };
        return updated;
      }
      return x;
    })
  }
  ...
}

The event listener is of course a decorated method. The method must be decorated with Listener and the decorator is passed the actual name of the emitter; in our case toggleTodo.

The name of the method handling the event doesn't have to be the same as the event emitted. What is important is that the method is decorated and that the decorator is passed the name of the emitted event.

Creating New Todos

You have learned so much about Stencil and Stencil components. Before we conclude, let's add another component that we can use to add more todo items to the todo list:

// components/todo-form/todo-form.tsx
import { Component, Event, EventEmitter, State } from '@stencil/core';

@Component({
  tag: 'todo-form',
  styleUrl: 'todo-form.scss'
})
export class TodoForm {

  @Event() newTodo: EventEmitter;
  @State() todo: string;


  handleChange(e) {
    this.todo = (e.target as HTMLTextAreaElement).value;
  }

  handleNewTodo() {
    this.newTodo.emit(this.todo);
    this.todo = '';
  }

  render() {
    return (
      <div class="todo-form">
        <input type="text" class="form-control" placeholder="New Task" value={this.todo} onChange={this.handleChange.bind(this)} />
        <button onClick={this.handleNewTodo.bind(this)}>Add</button>
      </div>
    );
  }
}

Not so much a big difference from what we have dealt with in previous sections. Here are the obvious additions:

  • We have an internal state property (todo) that tracks the text being entered in the input field. When the value changes, we set the value of the state property to the new value of the input field.
  • There is a button that submits the current value of todo anytime the button is clicked. It does so by triggering a handleNewTodo method which in turn emits a newTodo custom event

Back to the parent component, we can add a listener to update the list of todo items:

import { Component, State, Listen } from '@stencil/core';

export class Site {
  @State() todos: Todo[] = [
    {task: 'Cook', completed: false},
    {task: 'Dance', completed: true},
    {task: 'Eat', completed: false}
  ];

  @Listen('newTodo')
  newTodo(e) {
    const newTodo = {
      task: e.detail,
      completed: false
    };
    this.todos = [...this.todos, newTodo];
  }
 ...
 render() {
    return (
      <div class="wrapper">
        ...
        <div class="container">
          <div class="row">
            <div class="col-md-offset-4 col-md-4 col-sm 12">
              <todo-form></todo-form>
              <todo-list todos={this.todos}></todo-list>
            </div>
          </div>
        </div>
      </div>
    );
  }
}
...
  • The newTodo method, which handles the custom event, updates the list of todos with the new task we added.
  • We also added the form component in the render method: <todo-form></todo-form>.

Conclusion

While we covered a lot of interesting Stencil concepts, there are many other features, such as routing, offline-first, SSR and more, to explore. As a matter of fact, to start building an offline experience, just run npm build to generate app builds with a service worker.

You can head right to the Stencil website to learn more about these advanced features. Stencil has an engaging Slack community which you can be apart of to get help faster. You can also follow the Stencil team on Twitter to get updates on the tool. You also can get the demo from the Github repo and play with the examples you saw in this article.

Cloudinary enables you to manage (store, transform and deliver) media contents from the cloud. You can get started with the free plan that supports 300,000 images and videos and offload media assets management in your app to Cloudinary.

In the next post we will discuss how to Make a Video Web Component, the Stencil Way with Cloudinary!

Introducing the complete video solution for web and mobile developers

$
0
0

Video management solution for developers

Videos in web sites and apps are starting to catch up with images in terms of popularity and they are a constantly growing part of the media strategy for most organizations. This means bigger challenges for developers who need to handle these videos in their web sites and mobile apps. Cloudinary's mission is to solve all developer needs around image and video management. In this blog post, we are excited to introduce Cloudinary's complete cloud-based video management solution for developers.

What does it include? Here are some highlights:

Video upload API and UI widget - upload your videos directly to cloud storage
Programmable and interactive interface for managing video assets
Real-time video transcoding and manipulation via CDN delivery URLs
Customizable video player with user engagement analytics See demo
Live video streaming directly from web and mobile apps See demo
AI based video tagging and transcription

Website videos are becoming mainstream

Videos are now responsible for about 25% of the average download bandwidth of web sites (SpeedCurve analysis). As you can see in the chart below, this reflects a huge growth of about 400% compared to just two years ago. 2017 is definitely the year of video and while <video> didn't kill the <img> tag and (probably) never will, managing and delivering videos in modern web sites and mobile apps involves growing complexities for developers.

Video bandwidth statistics

Video is the fastest-growing element of page real estate. Source: SpeedCurve blog

When Cloudinary's service was publicly launched back in 2012, our first mission was to solve image management needs for web and app developers: from uploading images from any device and storing them in the cloud, through manipulating the images on-the-fly to match any graphic design and screen resolution, to dynamically optimizing the images and delivering them via a fast CDN to worldwide users. Then, in May 2015, we expanded our solution and introduced Cloudinary's cloud-based service for video upload, real-time manipulation and optimized viewing.

Our new offer provided the same cloud-based service API for both images and videos. While the image management space keeps evolving, since 2015, we have also continued enhancing our video transcoding capabilities. Today, about 30% of Cloudinary's 5000 paying customers already upload and manipulate tens of millions of videos every month, and this number is growing quite rapidly.

The challenges developers face with the videos in their web sites tend to be more complex than images. The video files can be huge, which means longer upload & download times and very CPU-intensive transcoding and manipulation. The set of potential devices, resolutions, video formats and video codecs is large and confusing. The desired optimal user experience requires modern video players with user engagement statistics and, in some cases, also monetization capabilities.

Today we are excited to introduce the next generation of our cloud-based video management service - even more advanced real-time video transcoding together with a modern video player, live video streaming, AI based video tagging and transcript, and more; All aimed at simplifying the video workflow for web and mobile developers while improving and enhancing the end-user experience.

A complete video management solution for developers

Whether you are delivering top quality professional videos or user-generated clips, whether you have an eCommerce site, news channel, travel forum, or advertising agency, the back-end challenges involved in quickly uploading and then delivering optimized, high quality video to any device in any location is always there, as are the challenges of adjusting the output to match your design needs, and providing a great front-end user experience. And all these challenges mount if you want to broadcast that video live or integrate and share that content in social networks.

Cloudinary addresses all this and more by providing the following capabilities as part of a single, streamlined solution:

Upload, storage and administration

An end-to-end solution for dynamic videos in web sites and apps starts from the ability to upload directly from the browser or mobile apps. A single line of code allows users to upload any image or video file to the cloud without even going through your servers:

Ruby:
Cloudinary::Uploader.upload(file, 
            resource_type: :video, public_id: "sea_turtle")
PHP:
\Cloudinary\Uploader::upload(file, 
        array("resource_type" => "video", "public_id" => "sea_turtle"));
Python:
cloudinary.uploader.upload(file, 
        resource_type = "video", public_id = "sea_turtle")
Node.js:
cloudinary.uploader.upload(file, 
        function(result) {console.log(result); },
        { resource_type: "video", public_id: "sea_turtle" });
Java:
cloudinary.uploader().upload(file, 
        ObjectUtils.asMap("resource_type", "video", "public_id", "sea_turtle"));

You can also use our upload widget, which provides a built-in user interface for your users to select and upload image and video files.

Uploaded videos are stored securely in the cloud. Once uploaded, you can manage your cloud-based database of media files using our administrative API or using Cloudinary's Digital Asset Management user interface.

Real-time video transcoding, manipulation and streaming

Video files might be uploaded in various different formats, codecs, resolutions and aspect ratios. These properties will most likely not match the design of your site and the various devices, browsers and resolutions your visitors use. Videos are delivered to web sites using HTTP/S URLs. Cloudinary supports format conversion, video codec optimization, and resizing and cropping of videos using regular CDN delivery URLs. The video transcoding and manipulation is performed according to the instructions in the URL, while the video processing is done in real-time, on-the-fly, in the cloud when the first user accesses the URL.

For example, below is a video as originally uploaded followed by a web friendly MP4 200x200 cropped version of the video. The transcoding and cropping is done on-the-fly by adding the w_200,h_200,c_fill,g_north dynamic manipulation instructions to the video delivery URL.

Ruby:
cl_video_tag("sea_turtle", :width=>200, :height=>200, :gravity=>"north", :crop=>"fill")
PHP:
cl_video_tag("sea_turtle", array("width"=>200, "height"=>200, "gravity"=>"north", "crop"=>"fill"))
Python:
CloudinaryVideo("sea_turtle").video(width=200, height=200, gravity="north", crop="fill")
Node.js:
cloudinary.video("sea_turtle", {width: 200, height: 200, gravity: "north", crop: "fill"})
Java:
cloudinary.url().transformation(new Transformation().width(200).height(200).gravity("north").crop("fill")).videoTag("sea_turtle")
JS:
cl.videoTag('sea_turtle', {width: 200, height: 200, gravity: "north", crop: "fill"}).toHtml();
jQuery:
$.cloudinary.video("sea_turtle", {width: 200, height: 200, gravity: "north", crop: "fill"})
React:
<Video publicId="sea_turtle" >
  <Transformation width="200" height="200" gravity="north" crop="fill" />
</Video>
Angular:
<cl-video public-id="sea_turtle" >
  <cl-transformation width="200" height="200" gravity="north" crop="fill">
  </cl-transformation>
</cl-video>
.Net:
cloudinary.Api.UrlVideoUp.Transform(new Transformation().Width(200).Height(200).Gravity("north").Crop("fill")).BuildVideoTag("sea_turtle")
Android:
MediaManager.get().url().transformation(new Transformation().width(200).height(200).gravity("north").crop("fill")).resourceType("video").generate("sea_turtle.mp4")

There are plenty of additional video manipulation building blocks that you can mix & match to create your desired composite videos. These include effects, filters, overlays of images, videos and text, and more. Below you can see a more advanced example that applies a color saturation decrease filter and adds an image (watermark), as well as video and text overlays at selected times within the video.

Ruby:
cl_video_tag("sea_turtle", :transformation=>[
  {:aspect_ratio=>"21:9", :width=>500, :audio_codec=>"none", :crop=>"fill"},
  {:effect=>"saturation:-50"},
  {:overlay=>"cloudinary_icon", :gravity=>"north_east", :effect=>"brightness:200", :opacity=>40, :x=>5, :y=>5, :width=>120},
  {:overlay=>"text:Roboto_34px_bold:Cute.Animals", :color=>"white", :gravity=>"west", :x=>10, :start_offset=>"2"},
  {:overlay=>"video:funny_dog", :width=>200, :gravity=>"south_east", :y=>10, :x=>10, :start_offset=>"2"}
  ])
PHP:
cl_video_tag("sea_turtle", array("transformation"=>array(
  array("aspect_ratio"=>"21:9", "width"=>500, "audio_codec"=>"none", "crop"=>"fill"),
  array("effect"=>"saturation:-50"),
  array("overlay"=>"cloudinary_icon", "gravity"=>"north_east", "effect"=>"brightness:200", "opacity"=>40, "x"=>5, "y"=>5, "width"=>120),
  array("overlay"=>"text:Roboto_34px_bold:Cute.Animals", "color"=>"white", "gravity"=>"west", "x"=>10, "start_offset"=>"2"),
  array("overlay"=>"video:funny_dog", "width"=>200, "gravity"=>"south_east", "y"=>10, "x"=>10, "start_offset"=>"2")
  )))
Python:
CloudinaryVideo("sea_turtle").video(transformation=[
  {"aspect_ratio": "21:9", "width": 500, "audio_codec": "none", "crop": "fill"},
  {"effect": "saturation:-50"},
  {"overlay": "cloudinary_icon", "gravity": "north_east", "effect": "brightness:200", "opacity": 40, "x": 5, "y": 5, "width": 120},
  {"overlay": "text:Roboto_34px_bold:Cute.Animals", "color": "white", "gravity": "west", "x": 10, "start_offset": "2"},
  {"overlay": "video:funny_dog", "width": 200, "gravity": "south_east", "y": 10, "x": 10, "start_offset": "2"}
  ])
Node.js:
cloudinary.video("sea_turtle", {transformation: [
  {aspect_ratio: "21:9", width: 500, audio_codec: "none", crop: "fill"},
  {effect: "saturation:-50"},
  {overlay: "cloudinary_icon", gravity: "north_east", effect: "brightness:200", opacity: 40, x: 5, y: 5, width: 120},
  {overlay: "text:Roboto_34px_bold:Cute.Animals", color: "white", gravity: "west", x: 10, start_offset: "2"},
  {overlay: "video:funny_dog", width: 200, gravity: "south_east", y: 10, x: 10, start_offset: "2"}
  ]})
Java:
cloudinary.url().transformation(new Transformation()
  .aspectRatio("21:9").width(500).audioCodec("none").crop("fill").chain()
  .effect("saturation:-50").chain()
  .overlay("cloudinary_icon").gravity("north_east").effect("brightness:200").opacity(40).x(5).y(5).width(120).chain()
  .overlay("text:Roboto_34px_bold:Cute.Animals").color("white").gravity("west").x(10).startOffset("2").chain()
  .overlay("video:funny_dog").width(200).gravity("south_east").y(10).x(10).startOffset("2")).videoTag("sea_turtle")
JS:
cl.videoTag('sea_turtle', {transformation: [
  {aspect_ratio: "21:9", width: 500, audio_codec: "none", crop: "fill"},
  {effect: "saturation:-50"},
  {overlay: "cloudinary_icon", gravity: "north_east", effect: "brightness:200", opacity: 40, x: 5, y: 5, width: 120},
  {overlay: "text:Roboto_34px_bold:Cute.Animals", color: "white", gravity: "west", x: 10, start_offset: "2"},
  {overlay: "video:funny_dog", width: 200, gravity: "south_east", y: 10, x: 10, start_offset: "2"}
  ]}).toHtml();
jQuery:
$.cloudinary.video("sea_turtle", {transformation: [
  {aspect_ratio: "21:9", width: 500, audio_codec: "none", crop: "fill"},
  {effect: "saturation:-50"},
  {overlay: "cloudinary_icon", gravity: "north_east", effect: "brightness:200", opacity: 40, x: 5, y: 5, width: 120},
  {overlay: "text:Roboto_34px_bold:Cute.Animals", color: "white", gravity: "west", x: 10, start_offset: "2"},
  {overlay: "video:funny_dog", width: 200, gravity: "south_east", y: 10, x: 10, start_offset: "2"}
  ]})
React:
<Video publicId="sea_turtle" >
  <Transformation aspect_ratio="21:9" width="500" audio_codec="none" crop="fill" />
  <Transformation effect="saturation:-50" />
  <Transformation overlay="cloudinary_icon" gravity="north_east" effect="brightness:200" opacity="40" x="5" y="5" width="120" />
  <Transformation overlay="text:Roboto_34px_bold:Cute.Animals" color="white" gravity="west" x="10" start_offset="2" />
  <Transformation overlay="video:funny_dog" width="200" gravity="south_east" y="10" x="10" start_offset="2" />
</Video>
Angular:
<cl-video public-id="sea_turtle" >
  <cl-transformation aspect_ratio="21:9" width="500" audio_codec="none" crop="fill">
  </cl-transformation>
  <cl-transformation effect="saturation:-50">
  </cl-transformation>
  <cl-transformation overlay="cloudinary_icon" gravity="north_east" effect="brightness:200" opacity="40" x="5" y="5" width="120">
  </cl-transformation>
  <cl-transformation overlay="text:Roboto_34px_bold:Cute.Animals" color="white" gravity="west" x="10" start_offset="2">
  </cl-transformation>
  <cl-transformation overlay="video:funny_dog" width="200" gravity="south_east" y="10" x="10" start_offset="2">
  </cl-transformation>
</cl-video>
.Net:
cloudinary.Api.UrlVideoUp.Transform(new Transformation()
  .AspectRatio("21:9").Width(500).AudioCodec("none").Crop("fill").Chain()
  .Effect("saturation:-50").Chain()
  .Overlay("cloudinary_icon").Gravity("north_east").Effect("brightness:200").Opacity(40).X(5).Y(5).Width(120).Chain()
  .Overlay("text:Roboto_34px_bold:Cute.Animals").Color("white").Gravity("west").X(10).StartOffset("2").Chain()
  .Overlay("video:funny_dog").Width(200).Gravity("south_east").Y(10).X(10).StartOffset("2")).BuildVideoTag("sea_turtle")
Android:
MediaManager.get().url().transformation(new Transformation()
  .aspectRatio("21:9").width(500).audioCodec("none").crop("fill").chain()
  .effect("saturation:-50").chain()
  .overlay("cloudinary_icon").gravity("north_east").effect("brightness:200").opacity(40).x(5).y(5).width(120).chain()
  .overlay("text:Roboto_34px_bold:Cute.Animals").color("white").gravity("west").x(10).startOffset("2").chain()
  .overlay("video:funny_dog").width(200).gravity("south_east").y(10).x(10).startOffset("2")).resourceType("video").generate("sea_turtle.mp4")

Videos can be converted to different formats simply by modifying the file extension. For example, changing the extension to '.m3u8' will automatically generate all the index files required for our built-in HLS and MPEG-DASH adaptive bitrate streaming. You can see more online video transcoding examples in the following demo:

https://demo.cloudinary.com/video/

Customizable video player

The examples above demonstrated URL-based back-end techniques that you can use to generate and deliver videos. But we wanted to take it further and provide developers with a complete, yet simple solution for addressing the front-end video playing experience as well.

A new Cloudinary Video Player is now publicly available. The player can be initiated with a single line of code that accepts a video ID and automatically builds video manipulation and delivery URLs. Web friendly video formats such as MP4 are used and HLS & MPEG-DASH adaptive bitrate streaming is automatically set-up.

The video player can be initiated either using HTML markup or programmatically using JavaScript:

 var vplayer = cld.videoPlayer("demo-player", {
   publicId: 'rafting',
   loop: true,
   controls: true,
   autoplayMode: 'on-scroll',
   transformation: { width: 400, crop: 'limit ' },
   posterOptions: {publicId: 'mypic', transformation { effect: ['sepia']}},
   sourceTypes: ["hls", "mp4"],
 })

The player has two built-in look & feel themes that can be further customized. It supports recommended videos suggestions and automatic playlist creation for a given tag assigned to multiple videos. You can track user engagement by monitoring events that can be automatically sent directly to analysis systems such as Google Analytics. See our video player documentation for more details.

The video player is an open source project based on the popular VideoJS open source video player, with its large ecosystem of plugins and customizations.

Interactive examples of the video player can be found in our video player demo page:

https://demo.cloudinary.com/video-player/

Video player demo

Live video streaming with real-time transcoding

The common flow of first uploading videos and when done, delivering them to users is gradually clearing the way to a more advanced flow of live video streaming. Cloudinary now offers (beta) support for live streaming of video content directly from web sites and applications.

Video transcoding and manipulation is done in real-time on the live stream exactly in the same way it is done on pre-uploaded videos - simultaneously generating multiple different versions out of the original video - different resolutions, cropping modes, encoding quality levels, watermarks, effects, personalized text overlays and more.

Live streaming is based on the WebRTC protocol, and you can instruct Cloudinary to automatically stream the videos directly to Facebook or YouTube using the RTMP protocol.

You can try out the full live streaming experience via the following mobile web demo application:

https://demo.cloudinary.com/live/

Live streaming demo

AI-based video tagging and transcription

If your web application has many videos or supports user-generated video content, smart video management automation would make your life easier and might improve user engagement.

Automatic video subtitle creation

Auto-playing muted video became very popular in news sites and social networks such as Facebook. New versions of web browsers even limit the auto playing capabilities and prevent auto-playing with sound. To make verbal videos effective even when muted, subtitles are necessary. And if you want to support uploading videos to a social feed with muted auto-play, you probably need the videos to have the subtitles already embedded in them.

AI-based video transcript is now available as a fully integrated add-on powered by Google's Cloud Speech API. By setting Cloudinary's raw_convert upload API parameter to google_speech, the audio channel of the video is automatically processed and a transcript file is generated in your media library.

Cloudinary::Uploader.upload("lincoln.mp4", :resource_type => :video, :raw_convert  => "google_speech")

Generating a video with embedded subtitles based on automatic transcription is as simple as adding another parameter to your dynamic video delivery URL (in the example below, adding l_subtitles:lincoln.transcript). You can even enhance the subtitles with additional options such as your choice of font, font size, color, etc.  The original video (which didn't include any subtitles), now includes automatically generated captions based on Google's speech to text AI engine.

Ruby:
cl_video_tag("lincoln", :overlay=>"subtitles:arial_20:lincoln.transcript", :color=>"yellow")
PHP:
cl_video_tag("lincoln", array("overlay"=>"subtitles:arial_20:lincoln.transcript", "color"=>"yellow"))
Python:
CloudinaryVideo("lincoln").video(overlay="subtitles:arial_20:lincoln.transcript", color="yellow")
Node.js:
cloudinary.video("lincoln", {overlay: "subtitles:arial_20:lincoln.transcript", color: "yellow"})
Java:
cloudinary.url().transformation(new Transformation().overlay("subtitles:arial_20:lincoln.transcript").color("yellow")).videoTag("lincoln")
JS:
cl.videoTag('lincoln', {overlay: "subtitles:arial_20:lincoln.transcript", color: "yellow"}).toHtml();
jQuery:
$.cloudinary.video("lincoln", {overlay: "subtitles:arial_20:lincoln.transcript", color: "yellow"})
React:
<Video publicId="lincoln" >
  <Transformation overlay="subtitles:arial_20:lincoln.transcript" color="yellow" />
</Video>
Angular:
<cl-video public-id="lincoln" >
  <cl-transformation overlay="subtitles:arial_20:lincoln.transcript" color="yellow">
  </cl-transformation>
</cl-video>
.Net:
cloudinary.Api.UrlVideoUp.Transform(new Transformation().Overlay("subtitles:arial_20:lincoln.transcript").Color("yellow")).BuildVideoTag("lincoln")
Android:
MediaManager.get().url().transformation(new Transformation().overlay("subtitles:arial_20:lincoln.transcript").color("yellow")).resourceType("video").generate("lincoln.mp4")

Automatic video tagging

It's a common practice to organize your media database or eCommerce product catalog by categorizing and tagging your images and videos to better match uploaded content to your users. Cloudinary now supports automatic AI-based tagging of uploaded videos.

The automatic tagging is available as a fully integrated add-on powered by Google's Cloud Video Intelligence. By setting Cloudinary's categorization upload API parameter to google_video_tagging, the video is automatically analyzed, and a list of detected tag categories is included in the response.  If you also set an auto-tagging level, then any category that exceeds the requested confidence level automatically gets added to the resource's tag list.

Cloudinary::Uploader.upload("turtle.mp4", :resource_type => :video, :categorization => "google_video_tagging", :auto_tagging => 0.7)

Below is a sample response from the automatic tagging. Categories with a confidence level above the given threshold are automatically assigned. Following that, you can see the full list of all detected categories and the time segment that each suggested tag applies to. You can list, browse, delete and search images and videos by the automatically assigned tags, either via API or our interactive UI.

"tags": [ "turtle", "animal" ...],
"data": [
  {"tag": "turtle", "start_time_offset"=>0.0, "end_time_offset"=>13.44, 
    "confidence": 0.93},
  {"tag": "animal", "start_time_offset"=>0.0, "end_time_offset"=>13.44, 
    "confidence": 0.93} ...  ]

Image and Video, not Image and video

In the first couple of years after publicly launching Cloudinary in 2012, I wrote most of the technical blog posts that we published. But we've grown, and it's been quite a while since I've written one. When I decided to write this one introducing the next generation of our video solution, I thought that it would be a quick task...

Well, I was quite wrong - it was not quick at all. As you can see, trying to cover the highlights of the existing components and the new features of our video solution resulted in this longer-than-expected blog post, yet I still feel that I skipped so many cool features and use cases.

As you probably already understand, we are proud of our enhanced Image and Video Management service and its new capabilities. We even made a slight yet significant update on our home page to clearly show where video fits within our complete solution:

Image and video before

Image and video after

We invite you to try out the video solution with its new capabilities and share your feedback (community page or forums). And for our part, we'll keep working to further build and enhance it according to your feature requests and suggestions.

All video management features are available now in all our plans including the free plan. You can create your free account here.

Curbing Terrorist Content Online

$
0
0

Image source: TechCruch

Today, Cloudinary is proud to announce that it has joined The Global Internet Forum to Counter Terrorism (GIFCT), to help fight the spread of terrorist and violent extremist content on the Internet. The forum was established by Facebook, Microsoft, Twitter and YouTube in mid-2017. Cloudinary will contribute to the hash-sharing database, which all contributing companies can use to help identify and block terrorist related images and videos upon upload.

More information about the update from the forum below.


At last year's EU Internet Forum, Facebook, Microsoft, Twitter and YouTube declared our joint determination to curb the spread of terrorist content online. Over the past year, we have formalized this partnership with the launch of the Global Internet Forum to Counter Terrorism (GIFCT). We hosted our first meeting in August where representatives from the tech industry, government and non-governmental organizations came together to focus on three key areas: technological approaches, knowledge sharing, and research. Since then, we have participated in a Heads of State meeting at the UN General Assembly in September and the G7 Interior Ministers meeting in October, and we look forward to hosting a GIFCT event and attending the EU Internet Forum in Brussels on the 6th of December.

The GIFCT is committed to working on technological solutions to help thwart terrorists' use of our services, and has built on the groundwork laid by the EU Internet Forum, particularly through a shared industry hash database, where companies can create “digital fingerprints” for terrorist content and share it with participating companies.

The database, which we announced our commitment to building last December and became operational last spring, now contains more than 40,000 hashes. It allows member companies to use those hashes to identify and remove matching content — videos and images — that violate our respective policies or, in some cases, block terrorist content before it is even posted.

We are pleased that Ask.fm, Cloudinary, Instagram, Justpaste.it, LinkedIn, Oath, and Snap have also recently joined this hash-sharing consortium, and we will continue our work to add additional companies throughout 2018.

In order to disrupt the distribution of terrorist content across the internet, companies have invested in collaborating and sharing expertise with one another. GIFCT's knowledge-sharing work has grown quickly in large measure because companies recognize that in countering terrorism online we face many of the same challenges.

Although our companies have been sharing best practices around counterterrorism for several years, in recent months GIFCT has provided a more formal structure to accelerate and strengthen this work. In collaboration with the Tech Against Terror initiative — which recently launched a Knowledge Sharing Platform with the support of GIFCT and the UN Counter-Terrorism Committee Executive Directorate — we have held workshops for smaller tech companies in order to share best practices on how to disrupt the spread of violent extremist content online.

Our initial goal for 2017 was to work with 50 smaller tech companies to to share best practices on how to disrupt the spread of violent extremist material. We have exceeded that goal, engaging with 68 companies over the past several months through workshops in San Francisco, New York, and Jakarta, plus another workshop next week in Brussels on the sidelines of the EU Internet Forum.

We recognize that our work is far from done, but we are confident that we are heading in the right direction. We will continue to provide updates as we forge new partnerships and develop new technology in the face of this global challenge

Beyond Drupal Media: Make Images and Video Fly with Cloudinary

$
0
0

Drupal is a very popular open source content management system (CMS) that has been deployed countless times by organizations and developers around the world. Drupal gained a reputation for being very flexible, powerful and robust in creating complex websites. With Drupal, you can create everything from plain websites, blogs and forums to ambitious enterprise systems.

In fact, a technical editor described Drupal this way: “Drupal knows exactly what it is and makes no excuses for: It strives to be a grenade launcher, not a Swiss army knife.” Some others likened Drupal to a powerhouse, not meant for mere mortals as compared to WordPress. Drupal is a registered trademark of Dries Buytaert, which founded Drupal and made the initial release public in 2001. Since then, Drupal has grown in leaps and bounds. The latest Drupal release is 8.3.5 at the time of writing.

Currently, Drupal powers about 7 percent of the total websites on the internet. As a developer setting up Drupal, one of the challenges you might face at some point is efficient handling of media assets (images and videos). Cloudinary is one of the amazing services out there with a clean API that can ease the pain of storing and transforming images in your Drupal-powered website.

Source: Appnovation, Expert Drupal Developers

Drupal and Cloudinary Integration

Fortunately for developers, Cloudinary offers a PHP SDK that can be integrated into any PHP-powered CMS.

  • Create an account on Cloudinry.
  • Install and enable the cloudinary PHP SDK in the libraries directory.
  • Set up your cloud name, API key and secret.

With the Cloudinary PHP SDK installed and enabled, there are a ton of transformations you can do to your images in your Drupal media library. Make sure the necessary Cloudinary files are present or required.

require 'Cloudinary.php';
require 'Uploader.php';
require 'Helpers.php';
require 'Api.php';

Let’s go through some image transformation techniques.

Resizing an uploaded image to half the original width while maintaining aspect ratio:

cl_image_tag("sample.jpg", array("width"=>0.5, "crop"=>"scale"))

Crop an image to a 400x400 circular thumbnail while automatically focusing on the face, and then scale down the result to a width of 200 pixels:

cl_image_tag("lady.jpg", array("transformation"=>array(
  array("width"=>400, "height"=>400, "gravity"=>"face", "radius"=>"max", "crop"=>"crop"),
  array("width"=>200, "crop"=>"scale")
  )))

Create a 150x150 thumbnail of an uploaded image with face detection:

cl_image_tag("woman.jpg", array("gravity"=>"face", "width"=>150, "height"=>150, "crop"=>"thumb"))

Generate a 100x100 face-detection-based circular thumbnail of an image named lady, and add another image named cloudinary_icon as a semi-transparent watermark with a width of 50 pixels:

cl_image_tag("lady.jpg", array("transformation"=>array(
  array("width"=>100, "height"=>100, "gravity"=>"face", "radius"=>"max", "crop"=>"thumb"),
  array("overlay"=>"cloudinary_icon", "effect"=>"brightness:200", "flags"=>"relative", "width"=>0.5, "opacity"=>60),
  array("dpr"=>2.0)
  )))

Decrease the size of the image by reducing the quality:

cl_image_tag("sample.jpg", array("quality"=>60))

No SDK? No Problem

While the PHP SDK is available, you might not be able to install or configure it as described above. Cloudinary provides on-the-fly URL transformation techniques that you can apply, enabling you to do exactly what is possible with the PHP SDK.

Let’s go through the image transformation techniques we performed above, but simply with the URL.

Resizing an uploaded image to half the original width while maintaining aspect ratio:

https://res.cloudinary.com/demo/image/upload/w_0.5/sample.jpg

Crop an image to a 400x400 circular thumbnail while automatically focusing on the face, and then scale down the result to a width of 200 pixels:

https://res.cloudinary.com/demo/image/upload/w_400,h_400,c_crop,g_face,r_max/w_200/lady.jpg

Create a 150x150 thumbnail of an uploaded image with face detection:

https://res.cloudinary.com/demo/image/upload/w_150,h_150,c_thumb,g_face/woman.jpg

Generate a 100x100 face-detection-based circular thumbnail of an image named lady, and add another image named cloudinary_icon as a semi-transparent watermark with a width of 50 pixels:

https://res.cloudinary.com/demo/image/upload/c_thumb,w_100,h_100,g_face,r_max/l_cloudinary_icon,e_brightness:200,fl_relative,w_0.5,o_60/dpr_2.0/lady.jpg

Decrease the size of the image by reducing the quality:

https://res.cloudinary.com/demo/image/upload/q_60/sample.jpg

Conclusion

We have learned a bit about how you can manipulate your images in Drupal using the powerful Cloudinary API. There are many more image optimization and transformation techniques you can perform via URL using Cloudinary.

With Cloudinary, you can store, and deliver media assets efficiently. Want more amazing image management solutions, check out the documentation.

The developer-friendly video player that truly delivers

$
0
0

Fully-featured Javascript Video Player

It doesn't take a genius (or a statistician) to know that video is a significant proportion of web and mobile content these days. But did you realize that in 2017, video will account for about 75% of all internet traffic and that 55% of people watch videos online every day? In fact, 52% of marketing professionals worldwide believe that video is the content type with the best ROI, with people spending up to 2.6x more time on pages with video than on those without.

So there's a fair chance that your web site or app already includes proprietary or user-generated video, or will in the near future. But video is extremely heavy content, so you better make sure that you deliver your super-valuable video content in the most optimized way and present it in a video player that maximizes user experience regardless of the device they use.

We're happy to announce that Cloudinary has just released a comprehensive, JavaScript-based video player that provides just that — all of the video player capabilities you need, fully integrated with Cloudinary's video upload, storage, transcoding, and delivery solution. As promised in the title, a video player that literally delivers! You can have your cake and eat it too!

video player themes, recommendations, playlists, analytics

What should I consider when embedding a video player on my site?

Some web sites default to the simple solution of uploading to YouTube or Vimeo and embedding the YouTube player on their page. This is a quick, free solution that avoids the complications of video hosting. But as with most quick and easy solutions, it comes with many disadvantages and is generally not the best long term solution.

With embedded YouTube or Vimeo:

  • You give up full ownership. Your video can be deleted by YouTube moderators or downloaded and redistributed by others.
  • You don't have control over whether (or which) ads are played with your video. Likewise for additional video recommendations displayed at the end, which may send your users elsewhere.
  • You can’t control the player behavior. For example, autoplay is not supported.
  • You miss out on valuable viewer input from Google Analytics or other analytics trackers.
  • You can't customize the player to match your branding or for other UX considerations.
  • Limited monetization options.

There are a variety of paid and open source video players that you can use as an alternative. Depending on your requirements and choices, you might require components from more than one supplier.

When choosing your video player solution, you should check whether:

  • It supports adaptive bitrate streaming formats, so that your users can enjoy an optimal streaming experience regardless of their device or connection speeds.
  • You can control and customize playlists and recommendations.
  • You can capture in-depth analytical data about your video audience and their consumption of your videos.
  • It supports standard ad protocols like VAST and VPAID (if you want to enable sponsors to append ads to your videos either now or in the future).
  • You can implement a lightly-customized player without a huge coding investment, but that there are options for significant flexibility if you need it.

In addition to selecting a video player, you need to decide:

  • Where will you host your video?
  • How can you best optimize the output for all required delivery formats?
  • Which CDN will you use to ensure speedy video delivery?

These hosting and delivery issues can be big headaches, but as you may already know, you can use a service like Cloudinary to automatically handle all of that for you. Cloudinary also enables you to perform a variety of cool video manipulations before or after the video is uploaded. And now you can also use Cloudinary to address all the important video player requirements listed above, and more in a single, simple-to-implement package!

Video player power on a silver platter

The Cloudinary video player packages all the power of the well known VideoJS open-source framework along with several valuable plug-ins and plenty of special Cloudinary functionality on top. Together, this gives you built-in adaptive bitrate streaming (HLS and MPEG-DASH), automatic transcoding and delivery of all popular video formats, video recommendations, simple creation of playlists including 'Next Up' thumbnails, event-based analytics, cool video manipulations applied to all videos in your player or to individual videos, and more. All this is handed to you in a simple Javascript-based library that enables you to get your player working and your video playing within minutes.

Video player features on a platter

The Nitty Gritty

After installing (or including) the cloudinary-video-player package, it only takes a few basic steps to get your video player up and running with your best videos.

Below we break down the steps to add a video player to your page that….

Prerequisites

Set up a Cloudinary account If you don't already have a Cloudinary account, set one up for free, and make sure to select an appropriate cloud name for your site or organization.

Upload videos to your account The quickest way if you are a new user is to just drag them into to your Media Library. In the future, you can also use the Cloudinary Upload API. And try the Upload Widget for letting users upload their own video content to your site.

1. Add the video player instance and video tag

Instantiate a Cloudinary instance and the video player

While instantiating the video player, you can also add video player configurations. Here we set the width of this video player instance to 600 pixels.

var cld = cloudinary.Cloudinary.new({ cloud_name: "my-cloud", secure: true});
var demoplayer = cld.videoPlayer('blog-player').width(600)

Add the video tag element

Inside the tag, include the Cloudinary video player class, preferred player skin, and your video player instance ID, as well as any desired HTML5 video tag configuration:

  • We chose to display this video player with default controls and the dark skin theme. We want the player to resize responsively, so we've added the cld-fluid class as well.

  • The Cloudinary video player offers a smart autoplay, so when you include the data-cld-autoplay-mode='on-scroll' attribute, the player begins playing only when at least 50% of the video player is visible. We'll use that, but since it's going to start on it's own, we'll also make sure it starts with muted volume so you don't get any nasty looks from your co-workers or the strangers next to you on the train.

  • We've also added width and crop transformations that will automatically be applied to any video that plays here, so that the videos are delivered in the size that best fits our video player.

<video id="blog-player" controls muted 
  class="cld-video-player cld-video-player-skin-dark cld-fluid"
  data-cld-autoplay-mode='on-scroll'>
</video>

2. Create the playlist

Our player is going to play all the videos in our account that have the tag video_race.

  • Our Media Asset Manager (that's me for today :-) ) has already gone into our Media Library and made sure that all videos we plan to publish have good title and subtitle metadata values, so that those will show up in the titlebar of the player whenever the viewer mouses over the player.

  • Now, all we need to do is tell our demoplayer instance to create a playlist from that tag. We'll ask it to advance from one video to the next automatically, with no pause between videos (autoAdvance:0), and to restart at the beginning of the playlist after that last video plays (repeat:true). * We'd also like a preview of the next video in the playlist to pop-up 3 seconds before the end of each playing video (presentUpcoming:3).

  • To help brand our playlist, we've decided to add an overlay transformation using our Cloudinary logo to every video in the playlist. We take advantage of effects like opacity and brightness, plus placement parameters to get the logo to look just the way we want.

demoplayer.playlistByTag('video_race', {
      sourceParams: { overlay: "cloudinary_icon", opacity: 80, 
          effect: "brightness:200", width: 100, gravity: "north_east", 
          x: 20, y: 10 }, autoAdvance: 0,
      repeat: true,
      presentUpcoming: 4
})

Add a sorter function

Our playlist is being generated automatically, but we want to have some control over the order. We can do that by writing a simple CompareFunction-style sorter. In this case, we're sorting alphabetically by the publicID value:

var abcSorter = function(a, b) {
      if (a.publicId < b.publicId) return -1;
      if (a.publicId > b.publicId) return 1;
      return 0;
};

Now we just need to add the sorter function as one of our playlist options:

demoplayer.playlistByTag('video_race', {
      sorter: abcSorter,
      sourceParams:  
     ..
})

3. Grab the popcorn!

As you can see, it was pretty simple to embed a video player with an automatically generated playlist, custom transformation settings, a cool logo overlay, nice title/sub-title bar, and modern 'up next' thumbnails.

Now enjoy the show:

Stop agonizing and start streaming!

All it takes is a (free) Cloudinary account to start working with Cloudinary's open source video player.

And as you've seen, it only takes a few minutes to add the code that will help you be a part of all those crazy statistics we mentioned at the beginning of this post: increase your conversions, keep people on your site longer, and maximize the experience for everyone who views your video content, to name a few!

Get the all the video player details from the video player guide and API reference and start fiddling with the examples on the Cloudinary video player Demo and Code Pen.

And then start creating your own! We can't wait to see what you decide to do with all the treasures in this package. Let us know!

https://demo.cloudinary.com/video-player/

Video Player Demo

How the Right Tools and Training Drive SDR Success

$
0
0

“You never get a second chance to make a first impression,” Will Rogers famously said. This statement rings very true for sales development representatives (SDRs) in any industry, as these are the individuals who are on the front lines, and making the first contact with prospective customers.

Sales Development Representatives

Here at Cloudinary, I head a team of eight SDRs, who are responsible for creating the first impression potential customers have of our company’s brand. In just the first 10 months of 2017, our team of outbound SDRs have been responsible for sending more than 67,000 personalized emails and making more than 15,000 calls.

We know that generally, for SDRs, the fail rate can be extremely high. In research released in August, The Bridge Group found that 26 percent of SDRs who take on an account executive (AE) role fail, and the shorter the SDR tenure, the higher the failure rate. The post-promotion failure rate for SDRs with 11 or fewer months experience was 55 percent.

Our goal is to ensure that our SDRs succeed, grow and are high-performing professionals who can effectively reach new customers and build interested, qualified leads for our sales team. The first step to that is providing them with the support they need to get quickly up-to-speed on our offerings, and contributing to the team.

Ramp-up time is at the forefront of the conversation about how to drive better results from SDR teams and reduce their personal fail rates. We have found that proper training, familiarity with the product and a robust set of tools plays a vital role in achieving this goal.

Arsenal for Success

To that end, we employ several tools that we believe help our SDRs quickly get up to speed, understand key selling points and objections that prospects may have, and improve their ability to personalize outbound messages. Here are the top five we employ on a daily basis:

  • SalesLoft – This platform provides us with all the features we need to manage our sales process, and can be used by everyone within our organization - from SDRs to account executives. SalesLoft enables cadence scheduling; provides an email engine; integrates with Salesforce, Gmail and Outlook; and offers advanced analytics. With SalesLoft, we’ve been able to increase the amount of meetings we book each month by 20 percent and, through daily reminders, ensures we don’t forget to follow up with prospects. We also can record all SDR calls to provide additional coaching or share them with others as examples of effective calls. SalesLoft also supports email campaigns, enabling us to do A/B testing about messaging that resonates with our audience.

  • Gong.io – This tool records, transcribes and analyzes sales calls and demonstrations we do with our prospects. We have our new SDRs listen to these calls to they can hear how the product is described, learn more about the technical details and gain visibility into these interactions with potential customers. With Gong.io as a training tool, our SDRs are better equipped to answer questions, know how our product will address the needs a company may have and counter any objections they may have.

  • ZoomInfo – This powerful database offers detailed information on prospects, based on industry, location, company size, company revenue, job title, job function and other categories. It also provides access to direct dial phone numbers, email addresses and other means of reaching individuals, which enables our SDRs to reach the best possible contact within an organization.

  • LinkedIn Sales Navigator – This tool is another one that is valuable for targeting the right people and companies, and personalizing outreach. Our SDRs can look at the LinkedIn profiles to understand prospects’ backgrounds, experience, current job responsibilities and connections, so that they can tailor outreach to address potential pain points or opportunities of which the customer could take advantage. LinkedIn Sales Navigator also enables our SDRs to keep track of personnel changes at prospect organizations, and reach and engage with new individuals joining those companies.

  • Datanyze – This tool provides real-time insights based on a company’s technology choices, so it’s very valuable for use since we’re a more technically oriented company. With Datanyze, we can examine the websites of our prospective customers and learn more about the tools, including content delivery networks (CDNs) and content management systems (CMS), they’re using and integrations they’ve done. These insights enable our SDRs to talk specifically about how Cloudinary can work with, or enhance, their existing technology and make our solution more enticing to address their needs.

What you may notice about these tools we use is that they all map back to developing savvy SDRs who can leverage human connections and deliver personalized messages to prospects. These tools have dramatically improved the time it takes for our new SDRs to ramp up. Since implementing them, we’ve reduced the ramp-up time from three months to just two.

While these five tools may be the most effective ones, there are a number of others we use on a regular basis, including:

  • Alexa - A suite of intuitive analytics products from Amazon that we use to determine how much traffic the site receives each month. For example, a low Alexa indicates potential high dollar customers
  • Chili Piper - An intelligent calendar solution for teams that enables us to spend less time scheduling meetings with prospects. With it we can align calendars of our sales engineers, account executives andprospects, which helps us reduce the amount of time spent booking meetings by 50 percent
  • Ambition - An employee productivity platform that helps us increase daily rep activity by 20 percent. With it, we can create games among the team, adding some healthy competitiveness. We have several TVs in the office displaying team goals and daily/monthly activities. There we recognize top performers across the sales floor, and constantly update leaders for the top meetings booked for the day or month

We also find that these tools also help our SDRs be more productive. While many organizations hire a large number for SDRs, knowing that there could be a high turnover, we believe giving our SDRs the tools and training from day one result in higher job satisfaction, and enable them to be more productive from the start.

ReactNYC: Building Modern Media Experiences in React Apps

$
0
0

Summary

In this talk, the audience learns everything they will ever need to know about playback controls, offline media, image & video optimization and transformation, pre-loading, deep learning with Images, audio & improving web performance by using the right tools while dealing with media assets in their react apps.

Contents

0:05 - Intro
0:15 - Google Developer Expert
0:40 - Community Evangelist
1:15 - User experiences Across The World With Media on Web
3:16 - UX: Loading Video on a slow 3G network
3:35 - UX: Watching Man’s Not Hot when device goes offline
3:59 - UX: Accessing an Image on second load when it doesn’t come instantly
4:47 - After 2 secs of buffering users start dropping off at around 6% per second
5:29 - Modern Media
6:38 - Anatomy of Modern Media Experience
6:54 - Case studies - Modern Media Experience
8:25 - Building the Modern Media Experience… Your turn!
8:35 - Recommended Video players
10:00 - Fast playback with adaptive bitrate streaming
11:24 - Fast playback with video preload
13:47 - Smart video preload considerations
18:38 - Great UX
18:44 - Screen Orientation API
20:21 - Playground Playback & Page Visibility
21:28 - Intersection Observer API
23:07 - Media Session API
25:17 - Image & Video Transformations
29:28 - Offline
29:38- Background Sync
30:38 - Background Fetch
31:46 - Modern Media Experience Demo

Resources

Mastering the Pivot

$
0
0

Developer camp

For 48 hours, over a hundred strangers worked together to form over twenty great teams to demonstrate shared ideas in working form. Our theme for the event was The Pivot, as we approach an inflection point in the tech community from a so-called “broligarchy” to a more representative culture. This was Developer Camp’s 10th Anniversary event, and we brought together our most diverse group of participants ever:

diversity chart

Continuing towards our goal, the gender ratio for this event was 40.4% female. Most importantly, it was a place and time where everyone felt safe to explore new ideas and rely on each other.

Our keynote speakers laid some wisdom on us, including alumna Nicole Lazzaro:

Augmented and virtual reality investor Amy LaMeyer gave us a glimpse of what’s coming as well as a bit of advice about new ways to experience music. Olympic Champion Brian Boitano spoke about the pivots in his career, and how to overcome negativity and doubt under pressure:

Tweet:

After coding and camping out all weekend, some of the most inspiring demonstrations we have ever witnessed led to 22 winners.

Awards

Most Potential

Act Busy

In order to avoid boredom and unwanted attention, this team built a simple game that makes it appear as if you are texting.

Best Family App

Armchair Traveler

This app helps families create live journals of their travels for loved ones.

Healthiest & Cloudinary API Award ($50)

FÜDIT

For those who prefer visual representations of meals, this app scans a menu (translating, if needed), presents photos, and represents them in augmented reality on the table. Cloudinary’s API Prize winner.

Most Social & Cloudinary API Award ($100)

Glimpse

A temporary network of specific moments such as food or views creates a sort of anonymous pen pal. This app allows for brief connections that time out, but the user may opt to continue. Runner up for Cloudinary’s API Prize.

Best Hardware & Cloudinary API Award ($50)

Hummingbird

Taking a DJI drone off the shelf, Developer Camp Counselor Eric Oesterle rigged a cinematic selfie program. Cloudinary’s API Prize winner.

Most Supportive Team & Cloudinary API Award ($50)

Image Wrangler Pro

A system for rapidly formatting and processing images with IPTC standard metadata straight off of a camera by using Cloudinary. Cloudinary’s API Prize winner.

Best New Developer

Music Effects

This is a fun musical challenge game for two players. Each player records a chosen song in his or her voice and the app decides the winner by comparing the singing to the original soundtrack.

Most Fun & Cloudinary API Award ($50)

Pawsy

A social network for furriends. This beautiful and simple interface helps dog owners choose the right pal for their pup. Cloudinary’s API Prize winner.

Best Student

PhonePal

This elegant experience translates speech from English to Hindi and back from Hindi to English in real time by using Siri, Google, and Apple speech APIs.

Best Concept

Smells Like Filtered Music

Be able to reset the search parameters for music based on mood and other factors.

Most Useful

SOS

Get out of an awkward situation with a simple fake phone call.

Most Educational

Splash

Splash is an educational web game that teaches children about the water cycle and pollution.

Best Utility

Tell Me

Easily listen to articles you find on the internet in the language and voice that you want.

Coolest

TriNetraApp

This app helps people learn names of objects and languages by using an impressive combination of Apple’s CoreML, ARKit, and an amalgam of Neural Network models — ResNet50, InceptionV3 and Yolo model.

Best Civic App

WeVote

We Vote cuts through the clutter to help you understand what’s on your ballot. This platform aggregates information and opinions across personal networks so you can help your friends become better voters in a non-partisan way.

Best Design

Work Week

Achieve better work life balance with automatic, private, and insightful time tracking.

Best Open Source & Cloudinary API Award ($100)

WriteBoard

This is a socially-driven, interactive free-speech wall—all anonymous and in the cloud. Runner up for Cloudinary’s API Prize.

Cloudinary API Award ($500)

Photobooth

This team produced a simple but elegant photobooth and Web photo editor powered by Cloudinary’s APIs. Cloudinary’s Grand API Prize winner.

Cloudinary API Award ($100)

Stories

This iOS app allows the user to create collaborative videos where anyone can add 1 or 2 seconds of recorded video to the end and then pass it on. Cloudinary’s API Prize winner. Runner up for Cloudinary’s API Prize.

Wildcard

Cloudinary App

Cloudinary App uses their API and iOS to transform photos or videos into visa pictures, profile pictures, fun pictures or video loops.

Best Volunteer

Tarwin Stroh

From the moment he arrived, on time for doors opening, to the last demo, Tarwin helped the organizers and the participants with social skills and software skills. Bravo!

Dom Sagolla Dom Sagolla , is a Father of two boys. Helped create Twitter. Author of @thebook “140 Characters: A style guide for the short form." Executive Director of Developer Camp.

GDPR: The what, the when, the why... and how Cloudinary is preparing for Day 0

$
0
0

GDPR and Cloudinary

GDPR is a new regulation that deals with the way individuals' private information is handled. This regulation is going to have a deep effect on the entire internet industry. The fact that GDPR is a European regulation doesn't mean it's relevant only for European organizations. It requires protecting the data of any individual whose data is processed or stored in any way within European boundaries. As the reach of many companies is global, the requirement is actually relevant to a lot of companies worldwide.

Over 220,000 customers use Cloudinary to store, manage, and programmatically apply on-the-fly transformations on over 15 billion images and videos uploaded from locations all around the world, so we're definitely impacted by this regulation.

In this blog post, I’ll explain what GDPR is and elaborate on some of the more relevant and interesting areas that are involved in becoming GDPR compliant. I'll also share some of our preparations for becoming GDPR compliant here at Cloudinary as well as how we may help our customers in their GDPR compliance preparations by providing necessary capabilities and support.

What is the GDPR and why it was drafted?

GDPR stands for General Data Protection Regulation. It's a regulation that requires companies and organizations to protect the personal data and privacy of individuals in the EU, including when the data is processed outside the EU. The GDPR’s main purpose is to give people more control over the ways their personal data is used in a reality where many companies use personal data for the sheer benefit of their services. It also aims to simplify the regulatory environment for international companies by offering a unified regulation within the EU. The current regulation was enacted before cloud technology was introduced and with it, a plethora of new ways to exploit data. With stronger data protection legislation and tougher measures of enforcement, the EU aims to increase people’s confidence in the digital world we all experience 24/7.

The European Parliament adopted the GDPR in April 2016, replacing an outdated data protection directive from 1995. It will become enforceable on the 25th of May 2018 after a two-year transition period. As a regulation, national governments do not have to pass any legislation to start enforcing it, which means it will automatically be applicable and binding.

The GDPR defines significant fines for non-compliance and breaches, and provides people with more control over the way companies use their personal data. It also unifies the way data protection rules are enforced in the EU. But many companies will find it challenging to make their systems and processes fully compliant. Furthermore, the GDPR leaves much open to interpretation. For example, according to the GDPR, companies must protect personal data at a “reasonable” level, but does not define what “reasonable” is.

Which companies are affected by the GDPR?

In general, the GDPR applies to companies and organizations that store or process personal data about individuals ('data subjects') within the EU, whether they are citizens of EU member states or not.

GDPR has a worldwide impact

Specific criteria for companies that must comply with GDPR include:

  • The organization processes personal data and has a presence in the EU.

  • The organization processes personal data and is not established in the EU, but rather in a place where EU member state law applies by public international law.

  • The organization is established in the EU, even if the processing of personal data takes place outside the EU.

  • The organization is not established in the EU, but processes personal data of data subjects who are in the EU, where the processing activities are related to the offering of goods or services to such data subjects in the EU (irrespective of whether a payment from the data subject is required) or the monitoring of their behavior, for any behavior that takes place within the EU.

Controllers and Processors

The GDPR defines data controllers and processors. A data controller determines the purposes and ways that personal data is processed, while a data processor is the party actually processing the data and responsible for that processing on behalf of the controller. That means that the controller could be any company or organization. A processor could be a SaaS, IT or other company that is actually processing the data on behalf of the controller.

Cloudinary is a Processor.
Cloudinary customers (who use our service to upload and transform media files or to enable their end users to upload media) are Controllers.

The controller is responsible to make sure that all processors with whom it deals will be GDPR compliant and the processors themselves must keep records of their processing activities. In some cases, the GDPR requires controllers and processors to designate a Data Protection Officer (DPO) or a data protection task force to supervise the company's compliance with the GDPR.

GDPR controller and processor infographic

What types of privacy data does the GDPR protect?

The GDPR makes it clear that any data related to an identified or identifiable person is regarded as personal data. For example, online identifiers such as cookies, IP addresses and location data can all be considered personal data. Other data elements such as basic identity information (name, address and ID numbers), sexual orientation, biometric data, health and genetic data, political opinions, racial and ethnic data and more are also considered personal data and are covered by the GDPR.

Data access by the individuals

Individuals have the right to access any data of theirs that a company stores, the right to know why that data is processed, who can see it and for how long it’s stored. GDPR requires that controllers and processors are transparent about that information. People may ask to access it and controllers should respond within one month. Where possible, controllers should provide secure, direct access for individuals to review stored data related to them.

Other Individuals Rights

Individuals have additional rights under the GDPR, including the right of erasure (the 'right to be forgotten'), the right to withdraw consent and object to processing, the right to object to automated decision making, the right to data portability, the right to receive appropriate notice about the processing of the individual's data and the right to rectify inaccurate or incomplete data. The controller must assist the individual and the processor must assist the controller in exercising these rights.

What about data breaches?

A personal data breach means a breach of security leading to the accidental or unlawful destruction, loss, alteration, unauthorized disclosure of, or access to, personal data transmitted, stored or otherwise processed ('processing' personal data means any type of access or other type of data processing, including mere storage). The controller must notify the competent EU supervisory authority about personal data breach without undue delay and no later than 72 hours after becoming aware of the breach, unless the breach is unlikely to result in a risk the data subjects. The controller must also send a notice about the breach to the data subjects, unless the controller has taken measures to prevent any risk involved in the breach to the data subjects, for example, by encrypting the data. The processor must notify the controller about the breach without undue delay.

GDPR compliance preparations at Cloudinary

At Cloudinary, we take data security and privacy very seriously. Our service is inherently secure and its architecture and implementation protect data by design, meeting strict security demands. This principle is well kept on a daily basis as we add more and more features and enhance our service.

Privacy and security compliance have always been key for us. We implemented procedures and controls pursuant to the ISO 27001 standard and we continue to invest in data security on an ongoing basis.

Keeping every customer’s data privacy is a leading principle among all the company’s employees as well and every employee has to meet codes of conduct that are clearly defined and involve a variety of action items, starting with an on-boarding data protection training for any new employee joining the company.

Cloudinary is making a considerable effort and is investing a great deal of resources to make sure we'll be ready to comply with the GDPR requirements by May 2018.

You'll find additional information about some of our main preparations below. There are additional GDPR issues that we handle that may help your company become compliant and you are more than welcome to contact us for further exploration of your specific case.

Who is involved in the Cloudinary preparations?

The sense of urgency came from the top management and GDPR compliance readiness was prioritized as a key element in the company’s roadmap. Different stakeholders throughout the company have formed a dedicated data protection task force to make sure that all relevant information is shared and all the technical and procedural changes are well defined and then precisely implemented.

Compliance, data protection and security experts have been accompanying the task force to make sure the compliance process is complete and meets all the regulation’s instructions.

What we have already handled

GDPR checklist

  • The personal data protection management plan that was already in place was reviewed and updated to ensure that it aligns with GDPR requirements.
    • Cloudinary already offers a Data Protection Addendum (DPA) to its customers.
    • A data protection team was appointed to ensure the data protection.
    • ISO 27001 security training involving all employees has taken place.
  • A risk assessment and mapping process was done to make sure any data that may be stored or processed relating to people located in the EU is processed and managed according to the GDPR instructions.
  • A data collection and data deletion policy was defined. Data collected is only what is required to perform the services procured by Cloudinary’s customers and for legitimate purposes specified explicitly in Cloudinary’s terms of service. In case personal data is processed, it will be processed lawfully and transparently. Once the purpose for which the data was collected is fulfilled and the data is no longer required, it will be deleted.
  • A policy for assisting Cloudinary customers to fulfill their obligations regarding requests for data subjects seeking to exercise their rights under the GDPR.

May 25, 2018 and later and how we can help you

GDPR D-day: May 25, 2018

  • All processing done by Cloudinary on behalf of its customers will be kept according to the company’s policy and will be available to customers upon request.

  • Any third party that Cloudinary works with that may be processing personal data as a part of Cloudinary’s default service offering will be GDPR compliant. For optional third party features that are available, but are not a part of Cloudinary’s core service, it will be the customer's sole responsibility to decide whether to engage with that service provider. Cloudinary will not be a side in the agreement between the third party (the processor) and the customer (the controller) in such cases.

  • If we encounter or suspect a data breach, our improved response plan will be used. This plan involves the company’s IT, legal, marketing, and customer support, as well as all other members who are a part of the task force.

  • Cloudinary offers a set of tools and features that can help you analyze the content within media assets including:

  • Assets uploaded to Cloudinary’s servers are not checked for PII. If any customer discovers that PII has been uploaded to Cloudinary, we will provide the controller with any help needed to destroy it.

  • Cloudinary is setting up a process for ongoing assessment and is making sure to remain in compliance. We are also updating the company’s code of conduct accordingly.

  • Cloudinary will assist its customers through appropriate measures, insofar as possible, to fulfill their obligations to respond to requests for data subjects seeking to exercise their rights under the GDPR. If such a request requires a special setup to meet a special need, including requirements that are not explicitly required by GDPR (for example, custom CDN-zones that limit data caching to EU, storage of all data within an EU data center, getting more detailed logs, etc.), Cloudinary may charge an additional fee. You can contact us to discuss your specific case.

In Summary

Protecting personal data and privacy is becoming more and more important in the world we live in, with technology and devices accompanying us around the clock. For companies with an international reach, becoming compliant with a comprehensive and demanding regulation like the GDPR requires many cross-organizational preparations and efforts, including all related data processors and controllers. Failing to achieve full compliance on time may have severe effects that can be destructive for any company.

At Cloudinary, in addition to helping you provide optimized global performance for your end users, it is a top priority for us to be fully compliant. Equally important is helping all of our customers with their compliance efforts. As a part of handling both of these priorities in the best way, Cloudinary plans to further expand its service to additional data centers and will soon offer its service from a European-based data center to enable our customers have their data processed and stored in the EU as well, even though the GDPR does not require this.

As the needs of each company may be different, it's important to make sure your company is prepared. We are here to help with your specific needs and serve you in the best possible way, as always!

We would be happy to get your feedback or questions related to GDPR and the preparations for becoming GDPR compliant. Contact us anytime!

iOS Developer Camp: The Dog House

$
0
0

Confession: I’m kind of addicted to hackathons. Ever since graduating from Coding Dojo earlier this year, I’ve been on the hunt for new places to expand my skills and meet new people in the tech space. iOS Developer Camp’s 10th Anniversary event bowled me over. Initially, because of its length. 48 hours? Yeesh. I had no idea that those 48 hours would change my life. But let’s first get a little backstory on my favorite topic: dogs.

Every night, I head to the dog park with my one-year old puppy, Pokey, who I adopted in February 2017. Coming out of a very anxious and depressed period of my life, I was amazed to find that having a dog opened all kinds of doors socially. Both Pokey and I have made tons of friends at the dog park. However, we only see them sporadically because of differing schedules. I’ve rarely met someone enough times at the park to feel comfortable asking for their contact information.

That’s where I came up with the idea for Pawsy (pronounced “posse”). Pawsy is a matchmaking service for dogs, pairing up buddies for playdates based on compatibility. It’s kind of like Tinder... for dogs.

At DevCamp, I pitched the idea for Pawsy on the first night and was overwhelmed by the positive responses I received. Tons of people came over either to offer their expertise or simply to tell me they liked my idea. A team formed, and we were off! At the event, I worked with Dan Zeitman to learn about the Cloudinary API. Their Swift SDK is a fantastic tool for handling photo uploads, storage and editing. While we didn’t get time to implement the API during the hackathon, Cloudinary’s services have become an integral part of Pawsy’s future development.

Development Screen

During the second night I met so many people working on really amazing things - from a young girl who made a singing competition app to Eric Oesterle, who made an app to fly a drone, and with whom I chatted until the sun came up. People came by and provided me with suggestions for features to put in the app, and advice on how to get funding and exposure for it. I didn’t feel competition so much as community. Without even asking, I gained mentorship from several outstanding individuals. It was just an unparalleled experience.

After presenting our prototype, many people encouraged me to ship Pawsy as a real service, and that’s exactly what I’m doing. Pawsy will be ready for early testing soon, and has a Kickstarter, which you can find here. Learn more about the project at www.pawsy.dog.

Evolution of : Gif without the GIF

$
0
0

TL;DR

  • Gifs are awesome but terrible for quality and performance
  • Replacing Gifs with <video> is /better/ but has perf. drawbacks: not preloaded, uses range requests
  • Now you can <img src=".mp4">s in Safari Technology Preview
  • Early results show mp4s in <img> tags display 20x faster and decode 7x faster than the GIF equivalent - in addition to being 1/14th the file size!
  • Background CSS video & Responsive Video can now be a “thing”.
  • Finally - cinemagraphs without the downsides of Gifs! Now we wait for the other browsers to catch-up

Intro

I both Ode to Geocities love and Thanks Tim Kadlec hate animated Gifs.

Safari Tech Preview has changed all of this. Now I love and love animated “Gifs”.

Everybody loves animated Gifs!

Animated Gifs are a hack. To quote from the original Gif89a specification:

The Graphics Interchange Format is not intended as a platform for animation, even though it can be done in a limited way.

But they have become an awesome tool for cinemagraphs, memes, and creative expression. All of this awesomeness, however, comes at a cost. Animated Gifs are terrible for web performance. They are HUGE in size, impact cellular data bills, require more CPU and memory, cause repaints, and are battery killers. Typically Gifs are 12x larger files than H.264 videos, and take 2x the energy to load and display in a browser. And we’re spending all of those resources on something that doesn’t even look very good – the GIF 256 color limitation often makes GIF files look terrible (although there are some cool workarounds).

My daughter loves them – but she doesn't understand why her battery is always dead.

Gifs have many advantages: they are requested immediately by the browser preloader, they play and loop automatically, and they are silent! Implicitly they are also shorter. Market research has shown that users have higher engagement with, and generally prefer both micro-form video (< 1minute) and cinemagraphs (stills with subtle movement), over longer-form videos and still images. Animated Gifs are great for user experience.

videos that are <30s have highest conversion

So how did I go from love/hating Gifs to love/loving “Gifs”?

In the latest Safari Tech Preview, thanks to some hard work by Jer Noble, we can now use MP4 files in <img> tags. The intended use case is not long-form video, but micro-form, muted, looping video – just like animated Gifs. Take a look for yourself:

<img src=”rocky.mp4”>

Rocky!

Cool! This is going to be awesome on so many fronts – for business, for usability, and particularly for web performance!

... but we already have <video> tags?

As many have already pointed out, using the <video> tag is much better for performance than using animated Gifs. That’s why in 2014 Twitter famously added animated GIF support by not adding GIF support. Twitter instead transcodes Gifs to MP4s on-the-fly, and delivers them inside <video> tags. Since all browsers now support H.264, this was a very easy transition.

<video autoplay loop muted inline>
  <source src="eye-of-the-tiger-video.webm" type="video/webm">
  <source src="eye-of-the-tiger-video.mp4" type="video/mp4">
  <img src="eye-of-the-tiger-fallback.gif" />
</video>

Transcoding animated Gifs to MP4 is fairly straightforward. You just need to run ffmpeg -i source.gif output.mp4

However, not everyone can overhaul their CMS and convert <img> to <video>. Even if you can, there are three problems with this method of delivering Gif-like, micro-form video:

  1. Browser performance is slow with <video>

    As Doug Sillars recently pointed out in a HTTP Archive post, there is huge visual presentation performance penalty when using the <video> tag.

    Sites without video load about 28 percent faster than sites with video

    Unlike <img> tags, browsers do not preload <video> content. Generally preloaders only preload JavaScript, CSS, and image resources because they are critical for the page layout. Since <video> content can be any length – from micro-form to long-form – <video> tags are skipped until the main thread is ready to parse their content. This delays the loading of <video> content by many hundreds of milliseconds.

    For example, the hero video at the top of the Velocity conference page is only requested 5 full seconds into the page load. It’s the 27th requested resource and it isn’t even requested until after Start Render, after webfonts are loaded.

    Worse yet, many browsers assume that <video> tags contain long-form content. Instead of downloading the whole video file at once, which would waste your cell data plan in cases where you do not end up watching the whole video, the browser will first perform a 1-byte request to test if the server supports HTTP Range Requests. Then it will follow with multiple range requests in various chunk sizes to ensure that the video is adequately (but not over-) buffered. The consequence is multiple TCP round trips before the browser can even start to decode the content and significant delays before the user sees anything. On high-latency cellular connections, these round trips can set video loads back by hundreds or thousands of milliseconds.

    And what performs even worse than the native <video> element? The typical JavaScript video player. Often, the easiest way to embed a video on a site is to use a hosted service like YouTube or Vimeo and avoid the complexities of video encoding, hosting, and UX. This is normally a great idea, but for micro-form video, or critical content like hero videos, it just adds to the delay because of the JavaScript players and supporting resources that these hosting services inject (css/js/jpg/woff). In addition to the <video> markup you are forcing the browser to download, evaluate, and execute the JavaScript player -- and only then can the video start to load.

    As many people know, I love my Loki jacket because of its built in mitts, balaclava, and a hood that is sized for helmets. But take a look at the Loki USA homepage – which uses a great hero-video, hosted on Vimeo:

    lokiusa.com filmstrip

    lokiusa.com video

    If you look closely, you can see that the JavaScript for the player is actually requested soon after DOM Complete. But it isn’t fully loaded and ready to start the video stream until much later.

    lokiusa.com waterfall

    Check out the WPT Results

  2. You can’t right click and save video

    Most long-form video content – vlogs, TV, movies – is delivered via JavaScript-based players. Usually these players provide users with a convenient “share now” link or bookmark tool, so they can come back to YouTube (or wherever) and find the video again. In contrast, micro-form content – like memes and cinemagraphs – usually doesn’t come via a player, and users expect to be able to download animated Gifs and send them to friends, like they can with any image on the web. That meme of the dancing cat was sooo funny – I have to share it with all my friends!

    If you use <video> tags to deliver micro-form video, users can't right-click, click-and-drag, or force touch, and save. And their dancing-cat joy becomes a frustrating UX surprise.

  3. Autoplay abuse

    Finally, using <video> tags and MP4s instead of <img> tags and GIFs is brings you into the middle of an ongoing cat and mouse game between browsers and unconscionable ad vendors, who abuse the <video autoplay> attribute in order to get the users’ attention. Historically, mobile browsers have ignored the autoplay attribute and/or refused to play videos inline, requiring them to go full screen. Over the last couple of years, Apple and Google have both relaxed their restrictions on inline, autoplay videos, allowing for Gif-like experiences with the <video> tag. But again, ad networks have abused this, causing further restrictions: if you want to autoplay <video> tags you need to mark the content with muted or remove the audio track all together.

... but we already have animated WebP! And animated PNG!

The GIF format isn’t the only animation-capable, still-image format. WebP and PNG have animation support, too. But, like GIF, they were not designed for animation and result in much larger files, compared to dedicated video codecs like H.264, H.265, VP9, and AV1.

Animated PNG is now widely supported across all browsers, and while it addresses the color pallete limitation of GIF, it is still an inefficient file format for compressing video.

Animated WebP is better, but compared to true video formats, it’s still problematic. Aside from not having a formal standard, animated WebP lacks chroma subsampling and wide-gamut support. Further, the ecosystem of support is fragmented. Not even all versions of Android, Chrome, and Opera support animated WebP – even though those browsers advertise support with the Accept: image/webp. You need Chrome 42, Opera 15+ or Android 5+.

So while animated WebPs compress much better than animated GIFs or aPNGs, we can do better. (See file size comparisons below)

Having our cake and eating it too

By enabling true video formats (like MP4) to be included in <img> tags, Safari Technology Preview has fixed these performance and UX problems. Now, our micro-form videos can be small and efficient (like MP4s delivered via the <video> tag) and they can can be easily preloaded, autoplayed, and shared (like our old friend, the animated GIF).

<img src="ottawa-river.mp4">

So how much faster is this going to be? Pull up the developer tools and see the difference in Safari Technology Preview and other browsers:

Take a look at this!

Unfortunately Safari doesn’t play nice with WebPageTest, and creating reliable benchmark tests is complicated. Likewise, Tech Preview’s usage is fairly low, so comparing performance with RUM tools is not yet practical.

We can, however, do two things. First, compare raw byte sizes, and second, use the Image.decode() promise to measure the device impact of different resources.

Byte Savings

First, the byte size savings. To compare this I took the trending top 100 animated GIFs from giphy.com and converted them into VP8, VP9, WebP, H.264, and H.265.

NB: These results should be taken as directional only! Each codec could be tuned much more; as you can see the default VP9 encoding settings fair worse, here, than the default VP8 outputs. A more comprehensive study should be done that considers visual quality, measured by SSIM.

Below are the median (p50) results of the conversion:

Format Bytes p50 % change p50
GIF 1,713KB
WebP 310KB -81%
WebM/VP8 57KB -97%
WebM/VP9 66KB -96%
WebM/AV1 TBD
MP4/H.264 102KB -93%
MP4/H.265 43KB -97%

So, yes, an animated WebP will almost always be smaller than an animated GIF – but any video format will be much, much smaller. This shouldn’t surprise anyone since modern video codecs are highly optimized for online video streaming. H.265 fairs very well, and we should expect the upcoming AV1 to fair well, too.

The benefits here will not only be faster transit but also substantial data-plan cost savings for end users.

Net-net, using video in <img> tags is going to be far, far better for users on cellular connections.

Decode and Visual Performance Improvements

Next, let’s consider the impact that decoding and displaying micro-form videos has on the browsing experience. H.264 (and H.265) has the notable advantage of being hardware decoded instead of using the primary core for decode.

How can we measure this? Since browsers haven’t yet implemented the proposed hero image API, we can use Steve Souder’s User Timing and Custom Metric strategy as a good aproximation of when the image starts to display to the user. This strategy doesn’t measure frame rate, but it does tell us roughly when the first frame is displayed. Better yet, we can also use the newly adopted Image.decode() event promise to measure decode performance. In the test page below, I inject a unique GIF and MP4 in an <img> tag 100 times and compare the decode and paint performance.

let image = new Image;
t_startReq = new Date().getTime();
document.getElementById("testimg").appendChild(image);
image.onload = timeOnLoad;
image.src = src;
return image.decode().then(() => { resolve(image); });

The results are quite impressive! Even on my powerful 2017 MacBook Pro, running the test locally, with no network throttling, I can see GIFs taking 20x longer than MP4s to draw the first frame (signaled by the onload event), and 7x longer to decode!

Local test on powerful MacBook Pro

Curious? Clone the repo and test for yourself. I will note that adding network conditions on the transit of the GIF v. MP4 will disproportionately skew the test results. Specifically: since decode can start happening before the last byte finishes, the delta between transfer, display and decode becomes much smaller. What this really tells us is that just the byte savings alone will substantially improve the user experience. However, factoring out the network as I’ve done on a localhost run, you can see that using video has substantial performance benefits for energy consumption as well.

How can you implement this?

So now that Safari Technology Preview supports this design pattern, how can you actually take advantage of it, without serving broken images to non-supporting browsers? Good news! It's relatively easy.

Option 1: Use Responsive Images The simplest way is to use the <source type> attribute of the HTML5 <picture> tag.

<picture>
  <source type=”video/mp4” srcset=”cats.mp4”>
  <source type=”image/webp” srcset=”cats.webp”>
  <img src=”cats.gif”>
</picture>

I’d like to say we can stop there. However, there is this nasty WebKit bug in Safari that causes the preloader to download the first <source> regardless of the MIME type declaration. The main DOM loader realizes the error and selects the correct one. However, the damage will be done. The preloader squanders its opportunity to download the image early and on top of that, starts downloading the wrong version, wasting bytes. The good news is that I’ve patched this bug and the patch should land in Safari TP 45.

In short, using the <picture> and <source type> for MIME type selection is not advisable until the next version of Safari reaches 90%+ of Safari’s total user base.

Option 2: Use MP4, animated WebP and Fallback to GIF

If you don't want to change your HTML markup, you can use HTTP to send MP4s to Safari with content negotiation. In order to do so, you must generate multiple copies of your cinemagraphs (just like before) and Varyresponses based on both the Accept and User-Agent headers.

This will get a bit cleaner once WebKit BUG 179178 is resolved and you can add a test for the Accept: video/* header, (the same way that you can test for Accept: image/webp, now). But the end result is that each browser gets the best format for <img>-based micro-form videos that it supports:

Browser Accept Header Response
Safari TP41+ H.264 MP4
Accept: video/mp4 H.264 MP4
Chrome 42+ Accept: image/webp aWebP
Opera 15 Accept: image/webp aWebP
Accept: image/apng aPNG
Default GIF

In nginx this would look something like:

if ($http_user_agent ~* "Safari/605[.0-9]+$") {
   rewrite ^/(.*)$ http://www.domain2.com/$1 permanent;
}

map $http_user_agent $mp4_suffix {
    default   "";
    “~*Safari/605”  ".mp4";
  }

location ~* .(gif)$ {
      add_header Vary Accept;
      try_files $uri$mp4_suffix $uri =404;
    }

Of course, don't forget the Vary: Accept, User-Agent to tell coffee-shop proxies and your CDN to cache each response differently. In fact, you should probably mark the Cache-Control as private and use TLS to ensure that the less sophisticated ISP Performance-Enhancing-Proxies don't cache the content.

GET /example.gif HTTP/1.1
Accept: image/png; video/*; */*
User-Agent: User-Agent: Mozilla/5.0 (Macintosh; Intel Mac OS X 10_13_2) AppleWebKit/605.1.13 (KHTML, like Gecko) Version/11.1 Safari/605.1.13

…

HTTP/1.1 200 OK
Content-Type: video/mp4
Content-Length: 22378567
Vary: Accept, User-Agent

Option 3: Use RESS and fall Back to

If you can manipulate your HTML, you can adopt the Responsive-Server-Side (RESS) technique. This option moves the browser detection logic into your HTML output.

For example, you could do it like this with PHP:

<?php if(strlen(strstr($_SERVER['HTTP_USER_AGENT'],"Safari/605")) <= 0 ){ // if not firefox ?>
<img src=example.mp4>
<?php } else {?>
<img src=example.gif>
<?php }?>

As above, be sure to emit a Vary: User-Agent response to inform your CDN that there are different versions of your HTML to cache. Some CDNs automatically honour the Vary headers while others can support this with a simple update to the CDN configuration.

Bonus: Don’t forget to remove the audio track

Now, since you aren’t converting GIF to MP4s but rather you are converting MP4s to GIFs, we should also remember to strip the audio track for extra byte savings. (Please tell me you aren’t using GIFs as your originals. Right?!) Audio tracks add extra bytes that we can quickly strip off since we know that our videos will be played on mute anyway. The simplest way to do this with ffmpeg is:

ffmpeg -i cats.mp4 -vcodec copy -an cats.mp4

Are there size limits?

As I’m writing this, Safari will blindly download whatever video you specify in the <img> tag, no matter how long it is. On the one hand, this is expected because it helps improve the performance of the browser. Yet, this can be deadly if you push down a 120-minute video to the user. I've tested multiple sizes and all were downloaded as long as the user hung around. So, be courteous to your users. If you want to push longer-form video content, use the <video> tag for better performance.

What's next? Responsive video and hero backgrounds

Now that we can deliver MP4s via <img> tags, doors are opening to many new use cases. Two that come to mind: responsive video, and background videos. Now that we can put MP4s in srcsets, vary our responses for them using Client Hints and Content-DPR, and art direct them with <picture media>, well – think of the possibilities!

<img src="cat.mp4" alt="cat"
  srcset="cat-160.mp4 160w, cat-320.mp4 320w, cat-640.mp4 640w, cat-1280.mp4 1280w"
  sizes="(max-width: 480px) 100vw, (max-width: 900px) 33vw, 254px">

Video in CSS background-image: url(.mp4) works, too!

<div style=”width:800px, height: 200px, background-image:url(colin.mp4)”/>

Conclusion

By enabling video content in <img> tags, Safari Technology Preview is paving the way for awesome GIF-like experiences, without the terrible performance and quality costs associated with GIF files. This functionality will be fantastic for users, developers, designers, and the web. Besides the enormous performance wins that this change enables, it opens up many new use cases that media and ecommerce businesses have been yearning to implement for years. Here’s hoping the other browsers will soon follow. Google? Microsoft? Mozilla? Samsung? Your move!

This was originally posted on Performance Calendar

New Google-powered add-on for automatic video categorization and tagging

$
0
0

Auto tagging with Google

Due to significant growth of the web and improvements in network bandwidth, video is now a major source of information and entertainment shared over the internet. As a developer or asset manager, making corporate videos available for viewing, not to mention user-uploaded videos, means you also need a way to categorize them according to their content and make your video library searchable. Most systems end up organizing their video by metadata like the filename, or with user-generated tags (e.g., youtube). This sort of indexing method is subjective, inconsistent, time-consuming, incomplete and superficial.

A well-organized indexing system lets you easily manage and organize your media libraries:

  • Enable personnel across your entire organization to find resources they may need
  • Increase engagement by helping your users find exactly what they’re looking for
  • Help you connect your users with common interests and help them find other content that would interest them
  • Increase sales or advertising revenue by determining the main subjects that interest particular users and integrating this information with your existing analytics/personalization tools to display relevant product recommendations or adverts

But ultimately, any sort of manual video categorization process would take huge amounts of time and resources.

Introducing Cloudinary's Google Automatic Video Tagging add-on, powered by Google Cloud Video Intelligence, which is now fully integrated into Cloudinary's video management and delivery pipeline. State-of-the-art machine learning allows for the recognition of various visual objects and concepts in videos, simplifying and automating the categorization and tagging process.

Using the Google Automatic Video Tagging add-on

Take a look at the following video of horses:

Using the add-on, automatically assigning resource tags to the video is as simple as adding 2 parameters when either uploading a new video or updating an existing video: set the categorization parameter to google_video_tagging and the auto_tagging parameter to the minimum confidence score necessary before automatically adding a detected category as a tag. For example, uploading the horses video and requesting auto-tagging for all categories meeting a confidence score of over 40%:

Ruby:
Cloudinary::Uploader.upload("horses.mp4", 
   :resource_type => :video, :categorization => "google_video_tagging", :auto_tagging => 0.4)
PHP:
\Cloudinary\Uploader::upload("horses.mp4", 
  array("categorization" => "google_video_tagging", "auto_tagging" => 0.4));
Python:
cloudinary.uploader.upload("horses.mp4",
  categorization = "google_video_tagging", auto_tagging = 0.4)
Node.js:
cloudinary.uploader.upload("horses.mp4", 
  function(result) { console.log(result); }, 
  { categorization: "google_video_tagging", auto_tagging: 0.4 });
Java:
cloudinary.uploader().upload("horses.mp4", ObjectUtils.asMap(
  "categorization", "google_video_tagging", "auto_tagging", "0.4"));

Once the categorization process completes, the information is returned to Cloudinary and all categories that exceed your specified confidence score are automatically added as tags on your video.

stallion.jpg

Below is a snippet of the upload response for the horse video:

{
...
tags"=>  ["animal", "freezing", "frost", "horse",  … ],
"info": {
   "google_video_tagging": {
      "status": "complete",
      "data": [
         [{"tag": "horse", 
          "start_time_offset": 0.0, 
          "end_time_offset": 12.6364, 
          "confidence": 0.8906},
          {"tag": "horse", 
          "start_time_offset": -1, 
          "end_time_offset": -1, 
          "confidence": 0.8906},
          {"tag": "animal", 
          "start_time_offset": 0.0, 
          "end_time_offset": 13.47364, 
          "confidence": 0.8906},

          ]
...

The benefits of video tagging

As can be seen in the example snippet above, various categories were automatically detected in the uploaded video and automatically added as tags. Each category is listed together with the start and end times of the relevant video segment (an offset time of -1 means the category represents the entire video) and the confidence score of the detected category, where 1.0 means 100% confidence.

Once the video has been categorized, that information can be shared with your analytics tools. Cross-examining both the categorization and usage data can yield valuable insights into how different videos impact engagement and conversion. Do the videos show indoor or outdoor scenes? Do they include people? Animals? This information can then be leveraged for AB testing and user profiling.

For example, you can test how different videos, (e.g., with or without animals) may impact engagement for a specific product or service, helping you utilize the optimal content when designing websites, apps or email campaigns. You may determine that a user watching videos of parties, events, sports, and music is probably a college student or young adult, whereas a user that uploads videos of parks, children, and playgrounds is more likely to be a parent. This knowledge can help you focus your content on the right audience and increase engagement and conversion.

Additionally, a well indexed, organized library of videos can be leveraged across your entire organization. Tagging is particularly useful if your company has a constantly growing library of digital assets that need to be made available for various teams within your organization. For example, if the marketing team needs a video of a dog for an email campaign, they can search for and select the most appropriate video.

See auto-tagging in action Visit Cloudinary's Video Transcoding demo where you can check out the results of the auto-tagging add-on for a number of sample videos or even upload your own. You can also see examples of a variety of advanced video transformations as well as a demonstration of the Video Transcription add-on.

Summary

The Google Automatic Video Tagging add-on provides you with meaningful data extracted from videos. Take advantage of that data to make strategic business decisions that could improve your users’ experience and drive greater profits. Cloudinary’s service, together with the fully integrated Google Automatic Video Tagging add-on, provides you with the powerful ability to streamline your content management as well as increase your users’ engagement and conversion.

The add-on is available with all Cloudinary plans and offers a free add-on tier for you to try out. If you don't have a Cloudinary account yet, sign up for a free account.


Impressed by WhatsApp technology? Build a WhatsApp clone with image and video upload

$
0
0

With more than one billion people using WhatsApp, the platform is becoming a go-to for reliable and secure instant messaging. Having so many users means that data transfer processes must be optimized and scalable across all platforms. WhatsApp is touted for its ability to achieve significant media quality preservation when traversing the network from sender to receiver, and this is no easy feat to achieve.

In this post, we will build a simple clone of WhatsApp with a focus on showcasing the background image upload process using Cloudinary’s Android SDK. The app is built using Pusher to implement real-time features. We’ll do this in two parts, first we’ll build the app with primary focus on the file upload and delivery with Cloudinary. Then in the second part, we’ll show how to apply Cloudinary’s transformation and optimization features to the images. To continue with the project, we’ll work on the assumption that you’re not new to Android development and you’ve worked with custom layouts for CompoundViews(a ListView in this case). If you have not, then check out this tutorial.

Setting up an Android Studio Project

Follow the pictures below to set up your Android project.

Create a new Android project

select minimum sdk

select an empty activity

finish the creation with the default activity names

For this tutorial, we will be using a number of third-party libraries including:

Open up your app level build.gradle file, add the following lines and sync your project :

implementation group: 'com.cloudinary', name: 'cloudinary-android', version: '1.22.0'
implementation 'com.pusher:pusher-java-client:1.5.0'
implementation 'com.squareup.retrofit2:converter-gson:2.3.0'
implementation 'com.squareup.retrofit2:retrofit:2.3.0'
implementation 'com.squareup.picasso:picasso:2.5.2'

Before you proceed, create Cloudinary and Pusher accounts. You will need your API credentials to enable communication between your app and Cloudinary’s servers.

Open the AndroidManifest.xml file and add the following snippet:

<application...>
      ....
      <meta-data android:name="CLOUDINARY_URL"
      android:value="cloudinary://@myCloudName"

</application>

The metadata tag will be used for a one-time lifecycle initialization of the Cloudinary SDK. Replace the myCloudName with your cloud name, which can be found on your Cloudinary dashboard.

Set Up A Simple API Server

Next, you need to create a web server with your Pusher credentials to handle your HTTP requests. You can get them from your account dashboard.

Here’s a breakdown of what the server should do:

  • The app sends a message via HTTP to the server
  • Server receives message and emits a pusher event
  • The app then subscribes to the Pusher event and updates view

Here’s a basic example using Node.js :

// Import Dependencies
const Express = require('express');
const bodyParser = require('body-parser');
const cors = require('cors');
const low = require('lowdb');
const FileSync = require('lowdb/adapters/FileSync');
const uuid = require('uuid/v4');
const Pusher = require('pusher');
const pusher = new Pusher({
  appId: 'APP_ID',
  key: 'APP_KEY',
  secret: 'APP_SECRET',
  cluster: 'us2',
  encrypted: true
});
// Create an Express app
const app = Express();
// Configure middleware
app.use(cors());
app.use(bodyParser.urlencoded({ extended: false }));
app.use(bodyParser.json());
// Configure database and use a file adapter
const adapter = new FileSync('db.json');
const db = low(adapter);
// Choose a port
app.set('port', process.env.PORT || 8050);
app.post('/messages', (req, res) => {
  // Assemble data from the requesting client
  // Also assign an id and a creation time
  const post = Object.assign({}, req.body, {
    id: uuid(),
    created_at: new Date()
  });
  // Create post using `low`
  db
    .get('messages')
    .push(post)
    .write();
  // Respond with the last post that was created
  const newMessage = db
    .get('messages')
    .last()
    .value();
  pusher.trigger('messages', 'new-message', newMessage);
  res.json(newMessage);
});
// Listen to the chosen port
app.listen(app.get('port'), _ => console.log('App at ' + app.get('port')));

With that set, we are ready to start building the app. Let’s begin by customizing the xml files to suit our needs. Open activity_chat.xml file and change its content to the one in the repository

Since we’re using ListView to show our chats, we need to create a custom ListView layout. So create a new layout resource file `message_xml` and modify its content to feature the necessary view objects required to achieve the chat view.

Next, add two vector assets. We won’t be covering how to do that here. But you can check the official Android documentation on how to do it. Now our XML files are good to go. Next, we have to start adding the application logic.

Application logic

To achieve the desired functionalities of the app, we’ll create two Java Classes Message and ListMessagesAdapter and an interface called Constants

So create a new java class called Message and modify its contents as:

public class Message {
    public String messageType, message, messageTime, user, image;
}

Once that's done, create the Adapter Class and modify its contents as well :

public class ListMessagesAdapter extends BaseAdapter {
private Context context;
private List<Message> messages;
public ListMessagesAdapter(Context context, List<Message> messages){
    this.context = context;
    this.messages = messages;
}
@Override
public int getCount() {
    return messages.size();
}
@Override
public Message getItem(int position) {
    return messages.get(position);
}
@Override
public long getItemId(int position) {
    return position;
}
public void add(Message message){
    messages.add(message);
    notifyDataSetChanged();
}
@Override
public View getView(int position, View convertView, ViewGroup parent) {
    if (convertView == null){
        convertView = LayoutInflater.from(context).inflate
        (R.layout.message_layout, parent, false);
    }
    TextView messageContent = convertView.findViewById(R.id.message_content);
    TextView timeStamp = convertView.findViewById(R.id.time_stamp);
    ImageView imageSent = convertView.findViewById(R.id.image_sent);
    View layoutView = convertView.findViewById(R.id.view_layout);
    Message message = messages.get(position);
    if (message.messageType.equals(Constants.IMAGE)){
        imageSent.setVisibility(View.VISIBLE);
        messageContent.setVisibility(View.GONE);
        layoutView.setBackgroundColor(context.getResources().getColor
        (android.R.color.transparent));
        timeStamp.setTextColor(context.getResources().getColor
        (android.R.color.black));
        Picasso.with(context)
                .load(message.image)
                .placeholder(R.mipmap.ic_launcher)
                .into(imageSent);
    } else {
        imageSent.setVisibility(View.GONE);
        messageContent.setVisibility(View.VISIBLE);
    }
    timeStamp.setText(message.user);
    messageContent.setText(message.message);
    return convertView;
}
}
// updating the ListView.
public void add(Message message){
    messages.add(message);
    notifyDataSetChanged();
}
/**
This method adds a new item to our List<Messages> container and subsequently
notifies the ListView holding the adapter of the change by calling the
“notifyDataSetChanged()” method.
**/

Finally, let’s create an interface for our constant values:

public interface Constants {
    String PUSHER_KEY = "*******************";
    String PUSHER_CLUSTER_TYPE = "us2";
    String MESSAGE_ENDPOINT = "https://fast-temple-83483.herokuapp.com/";
    String IMAGE = "image";
    String TEXT = "text";
    int IMAGE_CHOOSER_INTENT = 10001;
}

The interface file contains variables we will make reference to later in other classes. Having your constant values in the same class eases access to them. One crucial thing to note is that you need your own PUSHERKEY (you can get it from your profile dashboard on Pusher) and MESSAGEEND_POINT(representing your server link). Next, open your MainActivity.java file. Add the following method to your onCreate() method:

@Override
protected void onCreate(Bundle savedInstanceState){
  ...
  MediaManager.init(this)
}

The entry point of the Cloudinary Android SDK is the MediaManager class. MediaManager.init(this) initiates a one-time initialization of the project with the parameters specified in our metadata tag earlier on. Suffice to say, this initialization can only be executed once per application lifecycle.

Another way to achieve this without modifying the AndroidManifest.xml file is to pass an HashMap with the necessary configuration details as the second parameter of the MediaManager.init() method:

Map config = new HashMap();
config.put("cloud_name", "myCloudName");
MediaManager.init(this, config);

For this project, we will be sticking with the former method since we already modified our AndroidManifest.xml file.

Configure Pusher library

It’s time to configure our Pusher library. Add the following lines of code to your onCreate() method below.

PusherOptions options = new PusherOptions();
options.setCluster(Constants.PUSHER_CLUSTER_TYPE);
Pusher pusher = new Pusher(Constants.PUSHER_KEY, options);
Channel channel = pusher.subscribe("messages");

The snippet above is self explanatory.

messages is the name of the channel you created in your server. Now, we need to subscribe to an event in the messages channel. Hence, we’ll subscribe to the new-message event.

channel.bind("new-message", new SubscriptionEventListener() {
    @Override
    public void onEvent(String channelName, String eventName, final String data) {
        /..../
    }
});
pusher.connect();

Now, we have successfully tagged to our messages channel and subscribed to the new-message event. So, each time we send an HTTP request to the server, it redirects it to Pusher and we get notified of this “event” in our app, and we can then react to it appropriately in the onEvent(…) method.

Set Up Server Communication with Retrofit

Before we continue, we need to initialize the Retrofit library to communicate with our server.

To do this, we will create to Java files:

  • RetrofitUtils
  • Upload(an Interface)

Modify the the RetrofitUtils.java file :

public class RetrofitUtils {
    private static Retrofit retrofit;
    public static Retrofit getRetrofit(){
        if (retrofit != null){
            return retrofit;
        }
        retrofit = new Retrofit.Builder()
                .baseUrl(Constants.MESSAGE_ENDPOINT)
                .addConverterFactory(GsonConverterFactory.create())
                .build();
        return retrofit;
    }
}

In the Upload.java file, we also set it up as so:

public interface Upload {
    @FormUrlEncoded
    @POST("messages")
    Call<Void> message(@Field("message") String message, @Field("user")
    String user);
    @FormUrlEncoded
    @POST("messages")
    Call<Void> picture(@Field("message") String message, @Field("user")
    String user, @Field("image") String imageLink);
}

This is not a Retrofit tutorial, so I won’t be covering the basics of using the library. There are a number of Medium articles that provide those details. But you can check this article from Vogella or this one by Code TutsPlus. What you need to know, however, is the reason we are making two POST requests. The first POST request will be triggered in the case the user sends only a text. The second will be triggered in the case of picture upload.

Hence we’ll use this second POST request to handle this part of the tutorial for Image Upload and Delivery using Cloudinary.

Handling File Upload and Delivery with Cloudinary

Now we’ll start adding the logic and discussing how to achieve the file upload features using the Cloudinary account we’ve set up. Given the code complexity of this part, we’ll be walking through it with snippets and providing explanations as we go. To handle the image upload features, we’ll head back to the MainActivity.java file and set it up the onClick() method :

case R.id.load_image:
  Intent  chooseImage = new Intent();
  chooseImage.setType("image/*");
  chooseImage.setAction(Intent.ACTION_GET_CONTENT);
  startActivityForResult(Intent.createChooser(chooseImage, "Select Picture"), Constants.IMAGE_CHOOSER_INTENT);
  break;

Here we sent an implicit intent for images upload. This would pop up a new activity to select pictures from your phone. Once that is done, we want to get the details of the selected image. This is handled in the onActivityResult(…) method. Here’s how we set up the method:

@override
protected void onActivityResult(int requestCode, int resultCode, Intent data) {
super.onActivityResult(requestCode, resultCode, data);
if (requestCode == Constants.IMAGE_CHOOSER_INTENT && resultCode == RESULT_OK){
    if (data != null && data.getData() != null){
        uri = data.getData();
        hasUploadedPicture = true;
        String localImagePath = getRealPathFromURI(uri);
        Bitmap bitmap;
        try {
            InputStream stream = getContentResolver().openInputStream(uri);
            bitmap = BitmapFactory.decodeStream(stream);
            localImage.setVisibility(View.VISIBLE);
            localImage.setImageBitmap(bitmap);
        } catch (FileNotFoundException e) {
            e.printStackTrace();
        }
        imagePath = MediaManager.get().url().generate(getFileName(uri));
        typedMessage.setText(localImagePath);
    }
}
}

Next we set up a method that will be triggered whenever the user selects an image. Once this method executes, we will have the URI of the selected image stored in the “uri” variable. We monitor the image upload with hasUploadedPicture variable. This will be useful in determining which upload interface method to trigger. so we set it up as:

@Override
public void onClick(View v) {
    switch (v.getId()){
        case R.id.send:
//                makeToast("Send clicked");
            if (hasUploadedPicture){
//                unsigned upload
                String requestId = MediaManager.get()
                  .upload(uri)
                  .unsigned("sample_preset")
                  .option("resource_type", "image")
                  .callback(new UploadCallback() {
                    @Override
                    public void onStart(String requestId) {
                        makeToast("Uploading...");
                    }
                    @Override
                    public void onProgress(String requestId, long bytes,
                                           long totalBytes) {
                    }
                    @Override
                    public void onSuccess(String requestId, Map resultData) {
                        makeToast("Upload finished");
                        imagePath = MediaManager.get().url()
                        .generate(resultData.get("public_id").toString()
                        .concat(".jpg"));
                        uploadToPusher();
                    }
                    @Override
                     public void onError(String requestId, ErrorInfo error) {
                        makeToast("An error occurred.\n" + error
                        .getDescription());
                    }
                    @Override
                     public void onReschedule(String requestId,
                                              ErrorInfo error) {
                        makeToast("Upload rescheduled\n" + error
                        .getDescription());
                }).dispatch();

            } else {
                upload.message(typedMessage.getText().toString(), "Eipeks"
                ).enqueue(new Callback<Void>() {
                @Override
                public void onResponse(@NonNull Call<Void> call,
                                       @NonNull Response<Void> response) {
                     switch (response.code()){
                      case 200:
                      typedMessage.setText("");
                      break;
                }
            }
                @Override
                public void onFailure(@NonNull Call<Void> call,
                @NonNull Throwable t) {
                   Toast.makeText(Chat.this, "Error uploading message",
                   Toast.LENGTH_SHORT).show();
                }
            });
         }
         break;
      case R.id.load_image:
         Intent  chooseImage = new Intent();
         chooseImage.setType("image/*");
         chooseImage.setAction(Intent.ACTION_GET_CONTENT);
         startActivityForResult(Intent.createChooser(
         chooseImage, "Select Picture"),
         Constants.IMAGE_CHOOSER_INTENT);
         break;
  }
}

At this point we have the URI of the selected image stored in the uri variable and the hasUploaded variable should now let us know whether the image upload was successful or not. With this information, we can head on back to the onClick method and upload the selected image to pusher:

@Override
public void onClick(View v) {
    switch (v.getId()){
        case R.id.send:
//                makeToast("Send clicked");
            if (hasUploadedPicture){
                String requestId = MediaManager.get()
                .upload(uri)
                .unsigned("myPreset")
                .option("resource_type", "image")
                .callback(new UploadCallback() {
                      @Override
public void onStart(String requestId) {
   makeToast("Uploading...");
}
.........

To further explain what went on here, it is worth noting that this method is used for building our image upload request. It contains five synchronized methods:

  • get()
  • upload()
  • option()
  • callback()
  • dispatch()
  • upload() is an overloaded method however, we’ll be using upload(Uri uri) since we already have the uri of the image we want to upload.

We need to set an unsigned upload preset to upload images to our cloud without a secret key.

  • option() takes in two parameters: name and value If you are uploading a video, then your value will be video instead of image.
  • callback() method. This method is used in tracking the progress of the upload. We are using the UploadCallback(){…} as its method
  • onSuccess() method is triggered upon successful completion of the the media upload. This method contains two parameters: String requestId and Map resultData

The resultData contains information about the uploaded picture. The information we need is the uniquely generated picture name, which can be accessed from the resultData using the public_id as the key. Cloudinary also enables unique url() generation for easy access of the uploaded picture. That’s what we achieved with this bit of code

imagePath = MediaManager.get().url().format("webp"). generate(resultData.get("public_id"));

The line ensures that we can access the image we’ve uploaded using the Retrofit library. With this, we then call the uploadToPusher() method.

private void uploadToPusher(){
    upload.picture(typedMessage.getText().toString(), "Eipeks", imagePath)
        .enqueue(new Callback<Void>() {
            @Override
            public void onResponse(@NonNull Call<Void> call,
                                   @NonNull Response<Void> response) {
                switch (response.code()){
                    case 200:
                        localImage.setVisibility(View.GONE);
                        typedMessage.setText("");
                        break;
                }
            }
            @Override
           public void onFailure(@NonNull Call<Void> call, @NonNull Throwable t) {
               Toast.makeText(Chat.this, "Failed to upload picture\n" +
               t.getLocalizedMessage(), Toast.LENGTH_SHORT).show();
           }
        });
}

Once this method executes, our HTTP requests reaches the server, which in turn redirects the information we’ve uploaded to Pusher. This information goes to the “messages” channel. Since, we have subscribed to the “new-messages” event, our application is notified of this event. All that’s left is for our app to react appropriately to this event. Next, we will modify our onEvent() method.

@Override
public void onEvent(String channelName, String eventName, final String data) {
    Gson gson = new Gson();
    final Message message = gson.fromJson(data, Message.class);
    if (hasUploadedPicture){
        message.messageType = Constants.IMAGE;
    } else {
        message.messageType = Constants.TEXT;
    }
    hasUploadedPicture = false;
    messages.add(message);
    runOnUiThread(new Runnable() {
        @Override
        public void run() {
            messagesList.setSelection(messagesList.getAdapter().getCount() - 1);
        }
    });
}

This brings us to the end of this part of this tutorial, on the next part we’ll be discussing how to manipulate our uploaded images with Cloudinary to add transformations and optimizations. Here’s an image showing how the image upload works thus far:

Feel free to check the official documentation here. The source code for the project is on GitHub. In the next part of this article, we will cover how uploaded images can be transformed and what we can get from Cloudinary’s optimization features.

With automatic video subtitles, silence speaks volumes

$
0
0

Automatic subtitles with Cloudinary's Google-powered AI add-on

The last time you scrolled through the feed on your favorite social site, chances are that some videos caught your attention, and chances are, they were playing silently.

On the other hand, what was your reaction the last time you opened a web page and a video unexpectedly began playing with sound? If you are anything like me, the first thing you did was to quickly hunt for the fastest way to pause the video, mute the sound, or close the page entirely, especially if you were in a public place at the time.

If you identify with these scenarios, you are far from alone. A huge proportion of the viewers on social sites and other media-heavy platforms choose to view video without sound. In fact, 2016 studies show that on Facebook, around 85% of video was viewed with the sound off.

But when you are the developer of a website or mobile app with lots of user-generated video content, the consumer expectation for silent video becomes a challenge. All your app users who want to upload their videos of recipes, art projects, makeup tips, travel recommendations, or how to...[anything] are generally very reliant on accompanying explanations to capture and keep attention.

The solution? Subtitles, of-course. Even better? Automatically generated subtitles!

Cloudinary, the leader in end-to-end image and video media management, has released the Google AI Video Transcription Add-on, so you can easily offer automatically generated video subtitles for your users' (or your own) videos.

Google AI Video Transcription Add-on registration

Subtitles can speak louder than words

When people scroll through posts or search results with multiple autoplay videos, a particular video has only a second or two to capture viewers' attention. And since the video creators can't rely on sound in most cases, it's almost mandatory to provide text captions to get their viewers interested and to keep them watching, and maybe even to get them interested enough to click on the video and watch (with or without sound) till the end.

The Video Transcription add-on lets you request automatic voice transcription upon upload of any video (or for any video already in your account). The request returns a file containing the full transcript of your video, exactly aligned to the timings of each spoken word.

The transcript is generated using Google's Cloud Speech API, which applies their continuously advancing artificial intelligence algorithms to maximize the quality of the speech recognition results.

When you deliver the video, you can automatically include its transcript in the form of subtitles.

The upload request

To request the transcript of a video upon upload (once you've registered for the transcription add-on), just set the raw_convert upload parameter to google_speech. Since it can sometimes take a while to get the transcript back from Google, you may also want to add a notification_url to the request, so you can programmatically check when it's ready:

Ruby:
Cloudinary::Uploader.upload("lincoln.mp4", 
   :resource_type => :video, :public_id =>"lincoln",  
   :notification_url => "https://requestb.in/abcd123yz", 
   :raw_convert => "google_speech")
PHP:
\Cloudinary\Uploader::upload("my_video.mp4", 
    array("resource_type" => "video", "public_id" => "lincoln",
    "notification_url" => "https://requestb.in/abcd123yz", 
    "raw_convert" => "google_speech"));
Python:
cloudinary.uploader.upload("my_video.mp4", 
    resource_type = "video", "public_id" = "lincoln", 
    "notification_url" = "https://requestb.in/abcd123yz", 
    "raw_convert" = "google_speech")
Node.js:
cloudinary.v2.uploader.upload("my_video.mp4",
   { resource_type: "video", public_id: "lincoln", 
    notification_url: "https://requestb.in/abcd123yz", 
    raw_convert: "google_speech" },
    function(error, result) { console.log(result); });
Java:
cloudinary.uploader().upload("my_video.mp4",
    ObjectUtils.asMap("resource_type", "video", "public_id", "lincoln",
    "notification_url", "https://requestb.in/abcd123yz", 
    "raw_convert", "google_speech" ));
.Net:
var uploadParams = new VideoUploadParams()
{
  File = new FileDescription(@"dog.mp4"),
  ResourceType = "video",  
  PublicID = "lincoln",
  NotificationUrl = "https://requestb.in/abcd123yz",
  RawConvert = "google_speech" )); 
};
var uploadResult = cloudinary.Upload(uploadParams);

The delivery URL

Once you've verified that the raw .transcript file has been generated, you can deliver your video with the subtitles. Just add a subtitles overlay with the transcript file name. (It has the same public ID as the video, but with a .transcript extension.)

If you want to get a little fancier, you can also customize the text color, outline color, and display location (gravity) for the subtitles:

Don't stop there. Show 'em what you got!

Subtitles are great, but if you've already got the transcript file, why not parse it to generate an HTML version that you can show on your web page? This is great for making video content more skimmable and SEO-friendly.

Here's a really simple Ruby script that does exactly that:

require 'json'

class TranscriptUtil

#function receives the transcript input file, path of HTML output file,
#max words to include per timestamp (default 40), 
#and line break for longer entries (default 10).
def convert(transcript_file, html_file, max_words=40, break_counter=10)


    # read and parse the transcript file
    file =  File.read(transcript_file)
    data = JSON.parse(file)


    index = 0
    elements = []
    elementIndex = 0
    words_count = 0
    start_col = "</br><td>"
    end_col ="</td>"

    elements[elementIndex] = "<tr>"
    data.map do |d|
      d['words'].map do |group|
        if(index % max_words == 0)
          elementIndex += 1

#define the timestamp string format          Time.at(group['start_time']).utc.strftime("%H:%M:%S")
          start_time = "      --- " + Time.at(group['start_time']).utc.strftime("%H:%M:%S").to_s + " ---"

#build the html content
          elements[elementIndex] = "<br>" + start_col + start_time + end_col + start_col
          words_count = 0    
        end
        if(words_count == break_counter)
          elements[elementIndex] += end_col + start_col
          words_count = 0
        end
        elements[elementIndex] += group['word'].to_s.strip + " "        
        index += 1
        words_count += 1
      end
    end
    elements[elementIndex+1] = "</tr>"

#save the html content in a new html file
    File.new(html_file, "w+")
    File.open(html_file, "w+") do |f|
      f.puts(elements)
    end
  end
end

You can run the script with the following command:

ruby -r "./transcript_to_html.rb" -e "TranscriptUtil.new.convert('lincoln.transcript','./lincoln_transcript.html',20,10)"

This very simple script outputs basic HTML that looks like this:

sample generated subtitle HTML output

Of course for a production version, I'm sure you'd generate something that looks much nicer. We'll leave the creative design to you.

But if you really want the video content to 'sync' in...

If you are feeling particularly adventurous, you can even add synchronization capabilities between the textual display of the transcript and the video player, so that your viewers can skim the text and jump to the point in the video that most interests them. You also sync the other way, making the displayed text scroll as the video plays, and even highlight the currently playing excerpt.

Demonstrating these capabilities is beyond the scope of this post, but we challenge you to try it yourself! We've given you everything you need:

The Cloudinary Video Player can capture events and trigger operations on a video. Use the player in conjunction with the Google-powered AI Video Transcription Add-on, add a bit of javascript magic, and you'll be on your way to an impressive synchronized transcript viewer on par with YouTube and other big players in the video scene.

The bottom line (or should I say, "The subtitle…" ;-)

As it becomes more and more commonplace to use videos as a way to share information and experiences, the competition to win viewers' attention becomes increasingly tough. The Video Transcription add-on is a great way to offer your users automatic subtitles for their uploaded videos, so they can grab their audience's attention as soon as their silent video begins to autoplay. Oh, and it's great for podcasts too.

To watch it in action, jump over to the Cloudinary Video Transcoding Demo. Select one of the sample videos or upload your own, and then scroll down to the Auto Transcription section to see the transcription results. And while you're there, check out the many cool video transformation examples as well as a demonstration of the Cloudinary Video Tagging add-on.

But the real fun is in trying it yourself! If you don't have a Cloudinary account yet, sign up for free. We'd love to see your demos of the sync implementation suggested above. Please add a link in the comments to show off your results!

Impressed by WhatsApp Tech? Build a Whatsapp Clone with Image Manipulation and Optimization

$
0
0

In the previous post, we showed how to upload images to a Cloudinary server. In this part, we will play with some of the features we see on the WhatsApp technology. After you or your users have uploaded image assets to Cloudinary, you can deliver them via dynamic URLs. You can include instructions in your dynamic URLs that tell Cloudinary to manipulate your assets using a set of transformation parameters. All image manipulations and image optimizations are performed automatically in the cloud and your transformed assets are automatically optimized before they are routed through a fast CDN to the end user for an optimal user experience. For example, you can resize and crop, add overlays, blur or pixelate faces, apply a variety of special effects and filters, and apply settings to optimize your images and to deliver them responsively.

Here are a few examples of the commonly used image transformation features, along with links to their more detailed documentation :

Resizing and Cropping :

We won’t be going in detail about all the listed features, as there are still a lot of them to be explored. However we’ve attached links to each of them should you decide to read further on your own. Now, with our MediaManager already initialized, we’ll quickly resize and crop our uploaded image in the onCreate() method. Here’s how :

MediaManager.get().url().transformation(new Transformation().width(250).height(250).gr
avity("faces").crop("fill")).generate("selected_image.jpg")

This example uses the fill cropping method to generate and deliver an image that completely fills the requested 250x250 size while retaining the original aspect ratio. It uses face detection gravity to ensure that all the faces in the image are retained and centered when the image is cropped

Applying Effects and Filters

WhatsApp technology doesn’t provide options like applying effects and filters just like Instagram. We can add this feature to our clone using Cloudinary:

MediaManager.get().url().transformation(new Transformation()
  .effect("cartoonify").chain()
  .radius("max").chain()
  .effect("outline:100").color("lightblue").chain()
  .background("lightblue").chain()
  .height(300).crop("scale")).generate("selected_image.jpg")

The code above applies a cartoonify effect, rounding corners effect, and background color effect (and then scales the image down to a height of 300 pixels).

There is a lot more you can do with Cloudinary image manipulations; you can even apply transformations based on certain conditions.

With Cloudinary’s conditional transformations, images are manipulated on-the-fly using dynamic delivery URLs for any uploaded image. A condition and its associated transformations are added to the URLs using the if parameter which accepts a string value detailing the condition to evaluate. You can apply a transformation based on the image's width, height, aspect ratio, the number of faces in the image (if any) or the number of frames (for animated images) or pages (for PDFs) present. For example, we can evaluate whether our uploaded image's width is greater than 500 pixels with if_w_gt_500. Also, multiple conditions can be evaluated by concatenating the conditions with an and or or operator, and a different transformation can be applied in the case that the condition is evaluated as negative by using the if_else parameter. Now let’s manipulate our uploaded image such that if it contains a face, we zoom into the face otherwise, we fit the entire image into the defined space.

Here’s how : Head back inside the onCreate() method in the MainActivity Class and define the transformations we just described using the MediaManager as thus :

// define transformation from MediaManager
MediaManager.get().url().transformation(new Transformation()
//if a face is detected
  .if("fc_gte_1").chain()
  //zoom into the face with the defined parameters
  .width(200).height(200).gravity("face").crop("thumb").chain()
  //if a face is not detected, fit the image into the defined params
  .if("else").width(200).height(200).crop("fit").chain()
  //end transformation
  .if("end").chain()
  .radius(40).border("4px_solid_black")).generate("selected_image.jpg")

Image Optimizations

By default, Cloudinary automatically performs certain optimizations on all transformed images. There are also a number of additional features that enable you to further optimize the images you use in your Android application. These include optimizations to image quality, format and size, among others. For example, you can use the auto value for the fetchFormat and quality attributes to automatically deliver the image in the format and quality that minimize file size while meeting the required quality level. Below, these two parameters are applied, resulting in a 50 percent file size reduction (1.4MB vs. 784KB) with no visible change in quality.

MediaManager.get().url().transformation(new Transformation().quality("auto").fetchForm
at("auto")).generate("selected_image.webp")

Convert image to another format

You can deliver any image uploaded to Cloudinary in essentially any image format. There are two major ways to convert and deliver in another format:

  • Specify the image's public ID with the desired extension.
  • Explicitly set the desired format using the fetchFormat parameter. Specifying the image's public ID with the desired extension is primarily the easiest way to convert it to another format. let’s take for example that we want to change the format of our uploaded image to a gif, we’ll simply specify it in the image delivery URL as thus :
MediaManager.get().url().generate("selected_image.gif")

Yeah, it’s that simple. We can also achieve the same result with the fetchFormat parameter. this is a bit trickier, but equally as simple.

MediaManager.get().url().transformation(new Transformation().width(350).crop("scale"))
.format("gif").generate("selected_image.jpg")

All we had to do was set the desired format to be a gif.

Cloudinary Transformation and Delivery capabilities

Cloudinary enables you to easily transform your images on-the-fly to any required format, style and dimension, and also optimizes images to have the minimal file size for an improved user experience and for saving bandwidth. You can do this by implementing dynamic image transformation and delivery URLs for accessing the images. You can change the required transformations at any time and all transformed images will be created on-demand (lazily) and delivered to your users through a fast CDN with optimized caching.

Cloudinary's image management service supports the following image transformation and delivery capabilities:

Conclusion

Cloudinary is a cloud-based service that provides an end-to-end image and video management solution. The Android SDK provides simple, yet comprehensive file upload, administration, manipulation, optimization, and delivery capabilities. These can be implemented using code that integrates seamlessly with your existing Android application. You can leverage these awesome capabilities and deliver amazing media solutions to your subscribers and have them thank you later. DEMO

ExoPlayer Android Tutorial: Easy Video Delivery and Editing

$
0
0

ExoPlayer is a media player library for Android developed and maintained by Google, which provides an alternative to the Android’s MediaPlayer. It comes with some added advantages over the default MediaPlayer, including dynamic adaptive streaming over HTTP (DASH), smooth streaming and common Encryption. One of its greatest advantage, however, is its easy customization.

Considering the mobile constraints related to resources such as videos, Exoplayer is an excellent choice for handling videos in your Android application. ExoPlayer offers video buffering, in which the video is downloaded ahead of time so as to give the user a seamless experience. With ExoPlayer, we can play videos either from our phone storage or from direct URLs, as we will see later on.

In this ExoPlayer android tutorial article, we will show how ExoPlayer provide a display solution in combination with Cloudinary, which supports video management and transformation.

Uploading Videos & Manipulations

Cloudinary helps us manage our video resources in the cloud with a high-performance cloud-based storage. With Cloudinary, we can comfortably upload videos and transform them by just tweaking URLs. Your videos are then delivered through fast Content Delivery Networks(CDNs) with advanced caching techniques. Let's take a look at how we can upload and manipulate videos with Cloudinary.

In our AndroidManifest.xml, we insert our cloud_name:

<meta-data
    android:name="CLOUDINARY_URL"
    android:value="cloudinary://@CLOUDINARY_NAME"/>

You should replace CLOUDINARY_NAME with the Cloudinary name found on your console. We then create an application class to initialize Cloudinary once throughout the app’s lifecycle. Since the AppController class is just initialized once, global variables are usually stored here.

import android.app.Application;
import com.cloudinary.android.MediaManager;
public class AppController extends Application {
    @Override
    public void onCreate() {
        super.onCreate();
        // Initialize Cloudinary
        MediaManager.init(this);
    }
}

In our AndroidManifest.xml file, then we add our AppController class as the name of the application tag:

<application
    android:name=".AppController" >

Cloudinary offers unsigned and signed uploads. Signed uploads come with some added advantages, which require an API key. However, using an API key in an Android client is not recommended since it can easily be decompiled. For this reason, we will make use of the unsigned upload for this exoplayer android tutorial.

We first have to enable unsigned uploads in our console. Select settings on your dashboard, select the upload tab, scroll down to where you have upload preset, and enable unsigned uploading. A new preset will be generated with a random string as its name.

We then upload to Cloudinary by calling this:

MediaManager.get()
        .upload(videoUri)
        .unsigned("YOUR_PRESET")
        .option("resource_type", "video")
        .callback(new UploadCallback() {
            @Override
            public void onStart(String requestId) {

            }

            @Override
            public void onProgress(String requestId, long bytes, long totalBytes) {

            }

            @Override
            public void onSuccess(String requestId, Map resultData) {

            }

            @Override
            public void onError(String requestId, ErrorInfo error) {

            }

            @Override
            public void onReschedule(String requestId, ErrorInfo error) {

            }
        }).dispatch();

The videoUri is of type Uri. It represents the Uri of a video stored in your phone, which looks like this: content://media/external/video/media/3495

YOUR_PRESET should be replaced with the string that was generated after enabling unsigned upload.

When an upload is successful, the onSuccess method is called. This method provides us with the details of our upload, such as the URL, the public_url, which is the unique name of how the video is stored in Cloudinary. We will use the public_url to make our transformations in this method. Here is our transformation snippet:

String publicUrl = = (String) resultData.get("public_url");
String transformedUrl = MediaManager.get().url()
        .transformation(new Transformation()
                .effect("fade:2000").chain()
                .effect("fade:-3000").chain()
                .effect("saturation:-50")
        .resourceType("video").generate(publicUrl+".mp4");

We added three effects to our video: a two second fade-in, a three-second fade-out, and finally, a drop in the saturation of the video. The fade-in is usually represented with a positive value and the fade-out with a negative value. A negative saturation value means our video will have a faded look. If we print out our transformedUrl, it should look like this http://res.cloudinary.com/{CLOUD_NAME}/video/upload/e_fade:2000/e_fade:-3000/e_saturation:-50/{publicUrl}.mp4

Cloudinary offers many more transformations for our videos that you can learn about here.

Setting up ExoPlayer for your Android app

It is expected that you must have created an Android application, and for brevity, we won’t go through the process of doing that here. To make use of the ExoPlayer library, we first insert the gradle dependency in our build.gradle file:

implementation 'com.google.android.exoplayer:exoplayer:2.6.0'

If your gradle version is below 3.0, you should use the compile keyword instead of implementation to add dependencies.

Sync your gradle file so that the dependency will be downloaded and made available for the project. After that, we add the SimpleExoPlayerView to our Activity layout file:

<?xml version="1.0" encoding="utf-8"?>
<LinearLayout xmlns:android="http://schemas.android.com/apk/res/android"
    xmlns:tools="http://schemas.android.com/tools"
    android:layout_width="match_parent"
    android:layout_height="180dp"
    android:layout_margin="16dp">

    <com.google.android.exoplayer2.ui.SimpleExoPlayerView
        android:id="@+id/exoplayer"
        android:layout_width="match_parent"
        android:layout_height="wrap_content"/>

</LinearLayout>

In the corresponding Activity class, in the onStart method, we will initialize our SimpleExoPlayerView and setup the SimpleExoPlayer by calling the initializePlayer method:

@Override
protected void onStart() {
    super.onStart();
    initializePlayer();
}

The initializePlayer method initializes our player with some standard default configurations to display videos seamlessly :

private void initializePlayer(){
    // Create a default TrackSelector
    BandwidthMeter bandwidthMeter = new DefaultBandwidthMeter();
    TrackSelection.Factory videoTrackSelectionFactory =
            new AdaptiveTrackSelection.Factory(bandwidthMeter);
    TrackSelector trackSelector =
            new DefaultTrackSelector(videoTrackSelectionFactory);

    //Initialize the player
    player = ExoPlayerFactory.newSimpleInstance(this, trackSelector);

    //Initialize simpleExoPlayerView
    SimpleExoPlayerView simpleExoPlayerView = findViewById(R.id.exoplayer);
    simpleExoPlayerView.setPlayer(player);

    // Produces DataSource instances through which media data is loaded.
    DataSource.Factory dataSourceFactory =
            new DefaultDataSourceFactory(this, Util.getUserAgent(this, "CloudinaryExoplayer"));

    // Produces Extractor instances for parsing the media data.
    ExtractorsFactory extractorsFactory = new DefaultExtractorsFactory();

    // This is the MediaSource representing the media to be played.
    Uri videoUri = Uri.parse("any Cloudinary URL");
    MediaSource videoSource = new ExtractorMediaSource(videoUri,
            dataSourceFactory, extractorsFactory, null, null);

    // Prepare the player with the source.
    player.prepare(videoSource);

}

From the above snippet;

  • We initialized the SimpleExoPlayer instance with some default configurations.
  • We created and initialized an instance of SimpleExoPlayerView. We then assigned our existing player instance to it.
  • We generated our media source using a videoUri parsed from a video URL from Cloudinary.

We then prepare the player with our video source and our video is ready to be displayed. This gives us a basic implementation of ExoPlayer.

We created the SimpleExoPlayer instance as a class variable to make it accessible to all methods in the class.

We have to release our player when no longer in use to save resources :

@Override
public void onPause() {
    super.onPause();
    if (player!=null) {
        player.release();
        player = null;
    }
}

Finally, we need to provide the app permissions to access the internet. We add the internet permission in our AndroidManifest.xml file :

<uses-permission android:name="android.permission.INTERNET"/>

This is how our app should look like if we play the transformed URL with ExoPlayer.

Conclusion

Cloudinary provides us with an excellent video management solution and integrating it with libraries, such as ExoPlayer, to display videos on our Android app is very easy. In this exoplayer android tutorial, we have shown how we can upload and transform videos, then display them. Cloudinary offers many more features and functionalities, which you can checkout here in the docs.

Code Source on Github

Building a Smart AI Image Search Tool Using React - Part 1: App Structure and Container Component

$
0
0

What if we could create a search service for images? Type in a word and get images with titles or descriptions matching our search. Better yet, what if we could create a search service for images but rather than matching just titles and image description, we can search for something in an image, regardless of the given image title or description. For example, find one with a dog in it, or those that may have a street lamp or a bus (more like an image search tool).

Few artificial intelligence examples out there show what their underlying technology looks like. Hence, in this two-part article, we will show how to build a smart search service to serve as an image search tool, not just based on the title but also on image content. This app will mainly use React, Cloudinary and Algolia Search. In this first article, we will be building the parent component of our app, which is a stateful component.

Prerequisites

You don’t need to know how to write artificial intelligence code to follow along (in as much as we are using AI technology). Basic knowledge of HTML, CSS, JavaScript and React is required. Also knowledge of technologies such as Express, Axios and Webtask offers added advantage, but is not necessary.

Installation

Node.js is used to build the backend server in this service and its package manager npm is required to install essential node modules for this project.

Download Node and npm here. You can verify if they are installed by running this on your command line:

node -v
npm -v

Versions of both tools should display on your console.

React, a front-end JavaScript library, is used for front-end user interaction. The popular create-react-app build tool will be used for quick build. Create a React project by installing create-react-app with:

npm install -g create-react-app

Now, we can build a React app from scratch quickly with:

create-react-app smart-search

This creates a simple React app. cd into smart-search and run the following command in the console to start the app:

    npm run start

You have successfully created a simply React app. Now we will tailor it to our app, which has two primary functions - upload and search.

This app has several dependencies and modules required to function. The dependencies are:

  • Algoliasearch: Used to initiate Algolia AI search in our app
  • axios: Required to make communications to the server from the client side
  • body-parser: Parses incoming requests in a middleware
  • classnames: Used to dynamically join classnames in JavaScript
  • Cloudinary: Cloudinary provides an awesome image storage, transformation and delivery solution for both web and mobile
  • connect-multiparty: Connect middleware for multiparty
  • Express: A Node.js framework for creating node servers
  • react-instantsearch: React search library by Algolia
  • webtask-tools: Webtask for a serverless architecture

Install these dependencies by running this on your command line:

npm install --save algoliasearch axios body-parser classnames cloudinary cloudinary-react connect-multiparty express react-instantsearch webtask-tools

Note
Using the —save flag ensures that the dependencies are saved locally in the package.json and can be found in the node_modules folder.

On the client side, in the index.html file, Cloudinary is required and included in script tags at the bottom of the HTML script just before the closing </body> tag. Include these scripts:

...
<script 
    src="//widget.cloudinary.com/global/all.js" 
    type="text/javascript"></script>
...

Also, in the head tag of the HTML script, Bulma and the react-instant-search-theme-algolia css files are imported. These are used to style our app. Bulma is a free and open-source CSS framework based on flexbox. Include these link tags in the head:

...
<link rel="stylesheet" href="https://cdnjs.cloudflare.com/ajax/libs/bulma/0.6.1/css/bulma.min.css">
<link rel="stylesheet" href="https://unpkg.com/react-instantsearch-theme-algolia@4.0.0/style.min.css">
...

Still, in the index.html file in the public folder, you can change the title of the page to whichever title you prefer.

Now that we have all dependencies installed, it would be nice to build out the front-end first, before building the server on the backend.

Building the Front-end

In the front-end part of our image search tool, we will be making use of the React component architecture, which includes the stateful and stateless components. In the app currently, the create-react-app tool has helped with creating a singular stateful component in App.js and its corresponding CSS file App.css. This is where the majority of the stateful configuration will occur.

For the stateless components, we will require components for the images modal and imagelist. In the src folder, create a folder called components. In the components folder, create the required components - Modal.js, ImageList.js and their corresponding CSS files - Modal.css, ImageList.js.

Now we have all the build files required, we willl develop the parent App.js component.!

Configure App.js

In the App.js file located in the src folder, clear all the code written so we can start fresh. First, import all required modules with:

import React, { Component } from 'react';
import {
  InstantSearch,
  SearchBox,
  InfiniteHits
} from 'react-instantsearch/dom';
import axios from 'axios';
import ImageList from './components/ImageList';
import Modal from './components/Modal';
import './App.css';
...

React, axios InstantSearch, SearchBox, and InfiniteHits are imported, as well as the components created (ImageList and Modal). Also, the style sheet for the parent App.js file is imported.

Next, we configure the App component. The App component is merely an extension of the React component class with defined constructor function and methods. The state of the app is defined in the constructor functions, as well as some required properties of the App class.

Create an empty class extending React component imported earlier and export it:

...
class App extends Component{
  //configuration goes in here
}
export default App;

In the App class, create a constructor function, and in here the state variables will be defined, as well as constructor properties.

...
class App extends Component {
  constructor(props){
    super(props);
    this.state = {
      modalIsActive: false,
      preview: '',
      previewPublicId: '',
      description: '',
      previewPayload: '',
      pending: false
    };
  }

}
export default App

In the state object defined in the constructor, you can see the various variables defined. Their individual states can be altered and events are based on their state at that time. The states defined are:

  • modalisActive: This represents the state of the modal used in uploading the images, it is assigned a Boolean and when it is true, the modal should be open and vice-versa.
  • preview: This is the URL of the uploaded asset available for preview.
  • previewPublicId: PublicId assigned to the uploaded image and serves as a unique identifier for each image.
  • description: A user-defined description for the image.
  • previewPayload: Once an image is uploaded, the data received from the Cloudinary servers are assigned to the preview payload.
  • pending: This is used to create some “blocking” ability in our app to prevent some other process from running when pending is true or run when pending is false.

Now we have our state props defined, let’s define some key constructor variables we will require in our app.

Include this in the constructor function:

...
this.requestURL =
      'https://wt-nwambachristian-gmail_com-0.run.webtask.io/ai-search';
this.cl = window.cloudinary;
this.uploadWidget = this.cl.createUploadWidget(
  { cloud_name: 'christekh', upload_preset: 'idcidr0h' },
  (error, [data]) => {
    console.log(data);
    this.setState({
      preview: data.secure_url,
      previewPayload: data,
      previewPublicId: data.public_id
    });
  }
);
...

First, we assign the webtask address for our server to the requestURL variable, find out about webtasks, serverless architectures and how to create a webtask here. However, you may want to hold off until the server is built at the end before shipping to webtask. The Cloudinary property is called on the window object and assigned to this.cl. Now we can use the Cloudinary upload widget to handle uploads from both filesystem sources, URL and camera!

The createUploadWidget method is called on the Cloudinary window object and assigned to the this.uploadWidget variable. In createUploadWidget, the first parameter is an object of user details obtained from the Cloudinary dashboard. Create an account on Cloudinary and navigate to the dashboard to see your cloud name and upload_preset. The second parameter is a callback function with error as its first parameter and the returned data array as its second parameter.

In the function, we first log the returned data to the console (comes in handy when debugging) and change the state of the app by assigning properties from the returned data to our state variables. We are done with our constructor, let’s get to creating class methods required. In the App class, add:

...
toggleModal() {
    this.setState({ modalIsActive: !this.state.modalIsActive });
}
handleDropZoneClick(event) {
  this.uploadWidget.open();
}
handleDescriptionChange(event) {
  const { value } = event.target;
  if (value.length <= 150) {
    this.setState({ description: value });
  }
}
...

The toggleModal() function is used to change the state of the modalisActive so whenever the function is called the modal box is closed or if it is closed the modal box is open on the function call. Sounds like a good feature for close and open modal button.

The handleDropZoneClick() function takes event as a parameter and executes the open() method on the Cloudinary uploadWidget window.

Every image should require some form of short description to give details or a title for an image. The handleDropZoneClick() function also receives an event as a parameter, the ES6 object destructuring syntax is used to assign the value property to the value variable and a conditional statement is used to very if value is less than 150 characters, then the value of the description variable in state is changed to that put in by the user. At this point, we can upload and describe the image. Now it’s time to save it to our servers. Create a saveImage() function in the App class with:

saveImage() {
  const payload = {...this.state.previewPayload, {
    description: this.state.description
  };
  this.setState({ pending: true });
  // Post to server
  axios.post(this.requestURL + '/save', payload).then(data => {
    // Set preview state with uploaded image
    this.setState({ pending: false });
    this.toggleModal();
  }).catch(e => console.log(error));
}

What are we trying to save? The payload, in doing that the Object.assign() method is used to transfer the source object(second parameter) and the value of this.state.previewPayload into the object, payload. When saving the image, other possible operations are paused so the pending value is set to true and Axios is used to send a post request to the API endpoint on the server handling image receipt. Since this is an asynchronous operation the .then() method is used to change the state of the pending to false (so it is back to normal) and the modal is closed by calling the toggleModal() function. Let’s render elements to the DOM.

In the App class, create a render function next to return JSX elements with:

...
render() {
  return (
    <div className="App">
      <InstantSearch
        appId="TBD94M93EW"
        apiKey="e5cc0ddac97812e91b8459b99b52bc30"
        indexName="ai_search"
      >
        <section className="hero is-info">
          <div className="hero-body">
            <div className="container">
              <div className="level">
                <div className="level-left">
                  <div className="level-item">
                    <div>
                      <h1 className="title">Smart Search</h1>
                      <h2 className="subtitle">
                        Smart auto tagging & search. Search results depend on
                        images' actual contents.
                      </h2>
                    </div>
                  </div>
                </div>
                <div className="level-right">
                  <div className="level-item">
                    <button
                      onClick={this.toggleModal}
                      className="button is-info is-inverted is-medium"
                    >
                      Add a new image
                    </button>
                  </div>
                </div>
              </div>
            </div>
          </div>
        </section>
      </InstantSearch>
    </div>
  );
}

Here, the InstantSearch element created by the react-instantsearch package wraps the whole elements after the parent div with the className of App and credentials are passed as props to the InstantSearch element. The rest are HTML elements used to create a structure for the app with Bulma classes for styling. Notice the button that says ‘Add a new image’? This is responsible for opening and closing the upload modal. Just after the closing section tag, create another section for the SearchBox and the InfinteHits tag for the images and the upload modal with:

...
<section className="hero is-light">
  <div className="hero-body">
    <div className="container search-wrapper">
      <SearchBox />
    </div>
  </div>
</section>
<InfiniteHits hitComponent={ImageList} />
<Modal
  isActive={this.state.modalIsActive}
  toggleModal={this.toggleModal}
  onDrop={this.onDrop}
  preview={this.state.preview}
  description={this.state.description}
  handleDescriptionChange={this.handleDescriptionChange}
  saveImage={this.saveImage}
  pending={this.state.pending}
  handleDropZoneClick={this.handleDropZoneClick}
/>
...

The top section holds the SearchBox component. Next is the InfiniteHits component which has a prop ImageList which is a component created. The infiniteHits components receive context from its parent component(InstantSearch) and return the images saved in a specified component(ImageList). The upload modal is created in the modal component and passed all the required props. Since we have this class methods as props, it will lose scope, so we have to rebind it to the constructor. In the constructor function, rebind the functions with:

this.toggleModal = this.toggleModal.bind(this);
this.saveImage = this.saveImage.bind(this);
this.handleDescriptionChange = this.handleDescriptionChange.bind(this);
this.handleDropZoneClick = this.handleDropZoneClick.bind(this);

In App.css, clear it and replace it with this styling:

.title:not(.is-spaced)+.subtitle {
  margin-top: 0;
}
.ais-InfiniteHits__root {
  column-count: 3;
  column-gap: 1em;
  width: 60%;
  margin: 50px auto;
}
.search-wrapper {
  display: flex;
  /* align-items: center; */
  justify-content: center;
}
.hero-body {
  padding: 1.5rem 1.5rem;
}

Conclusion

So far we have been able to build out the app structure for our image search tool with the main focus on the stateful component, App.js. In part two, we will show how to develop the stateful components required to render the images and the upload modal, as well as the backend server to handle requests and responses from Algolia-search, even though the server will ultimately be bundled into a Webtask.

Viewing all 601 articles
Browse latest View live