
It does not have to be that way ― with Shopify and Cloudinary, you are just one step away from having the perfect e-commerce store. In this article, you will learn the basics of creating your store with Shopify and integrating it with Cloudinary, so you can manage your images.
With Cloudinary managing your images, you are assured of optimized media content delivery which leads to improved performance, shorter website load times, and more conversion.
What is Shopify?
Shopify is an e-commerce platform that enables you to set up your own online shop. It supports uploading products and setting up payments and shipping, among other activities.
What is Cloudinary?
Cloudinary is a SaaS offering that provides solutions for image and video management, including server or client-side upload, a huge range of on-the-fly image and video manipulation options, quick CDN delivery, and powerful asset management options.
Cloudinary enables web and mobile developers to address all their media management needs with simple bits of code in their favorite programming languages or frameworks, leaving them free to focus primarily on their own product's value proposition.
Getting Started with Shopify
To create a Shopify platform, follow this step-by-step process:
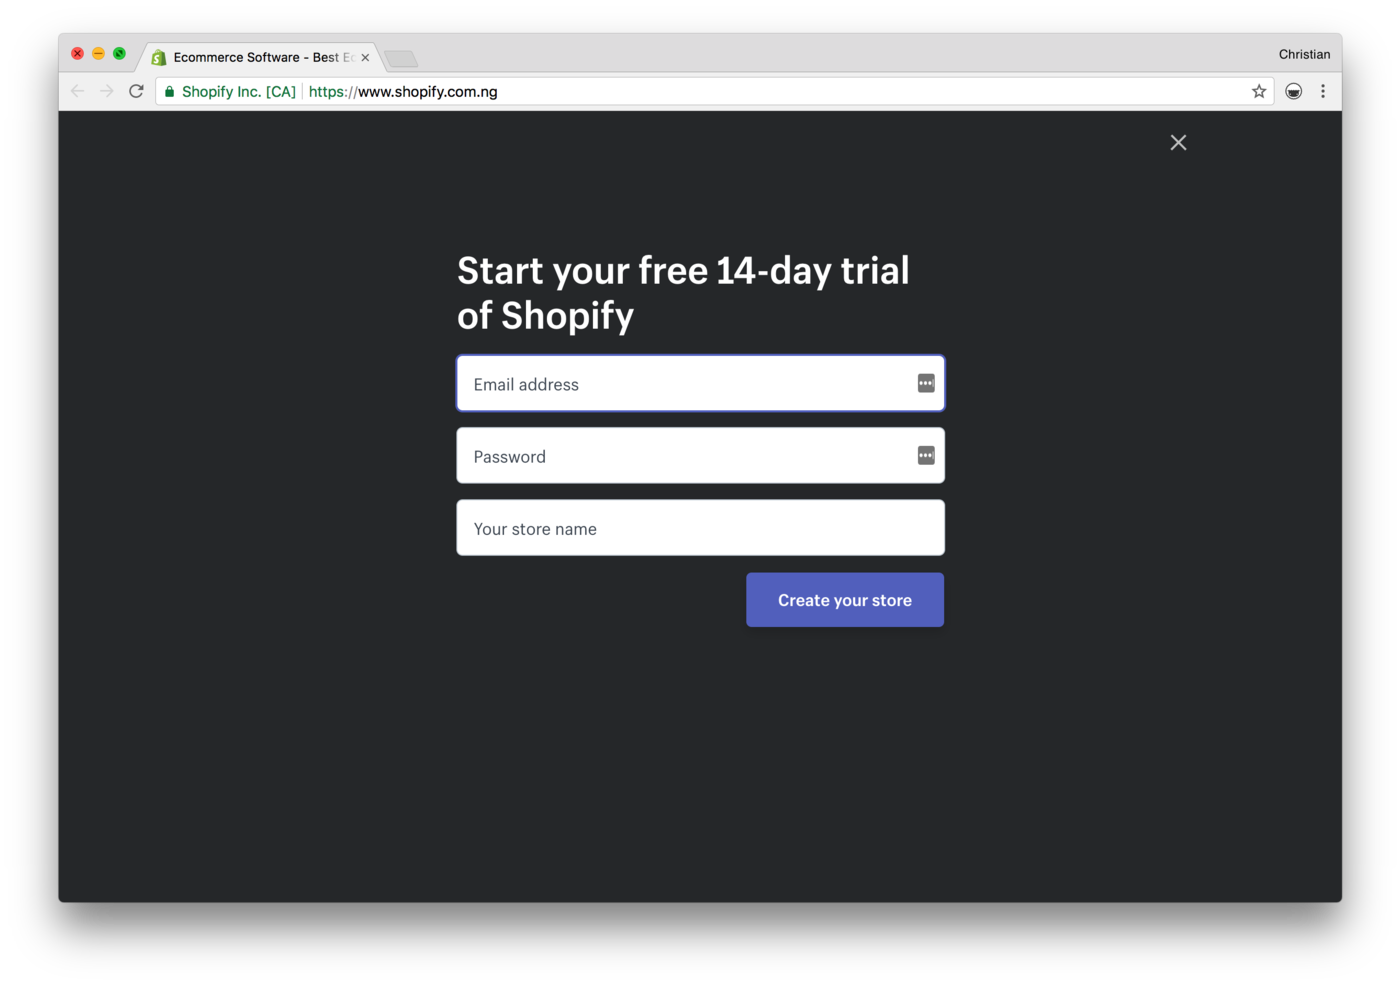
1. Sign Up with Shopify
Visit Shopify and create an account using the signup form. Fill in the necessary details where required.
2. Start Setting Up Your Online Shop
After signing up, you will be directed to your store admin screen. From there, you can modify what your store looks like, upload products, set up payments and shipping.

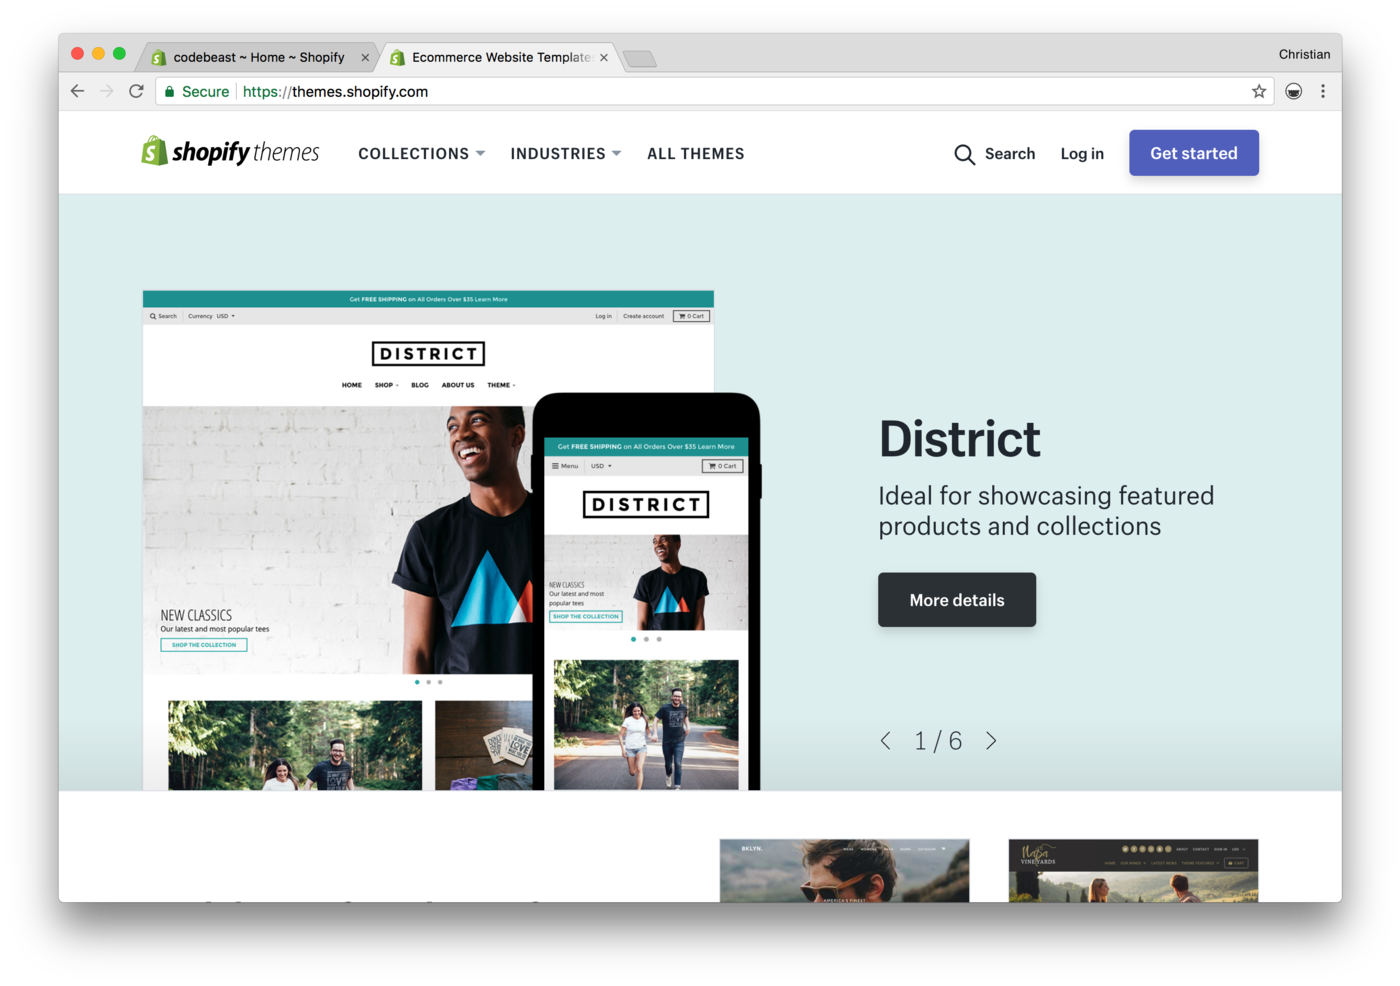
3. Pick a Theme
You can choose a theme from Shopify’s theme store. Themes can be modified by editing their HTML and CSS files.
For a more detailed tutorial about how to build an online store with Shopify, check out this cool article here.
Integrating Cloudinary with your Store
What’s a store without descriptive images? What’s your product if you can’t successfully manipulate images to tell your audience a convincing story? Even if you already took care of having the best images, how frustrating it can be if these are loaded so slowly and your potential customers leave the store before becoming real customers. You can solve all these using Cloudinary. In addition to creating light-weight images that reduce the loading time of your page, Cloudinary’ offers other awesome features from which you can benefit..
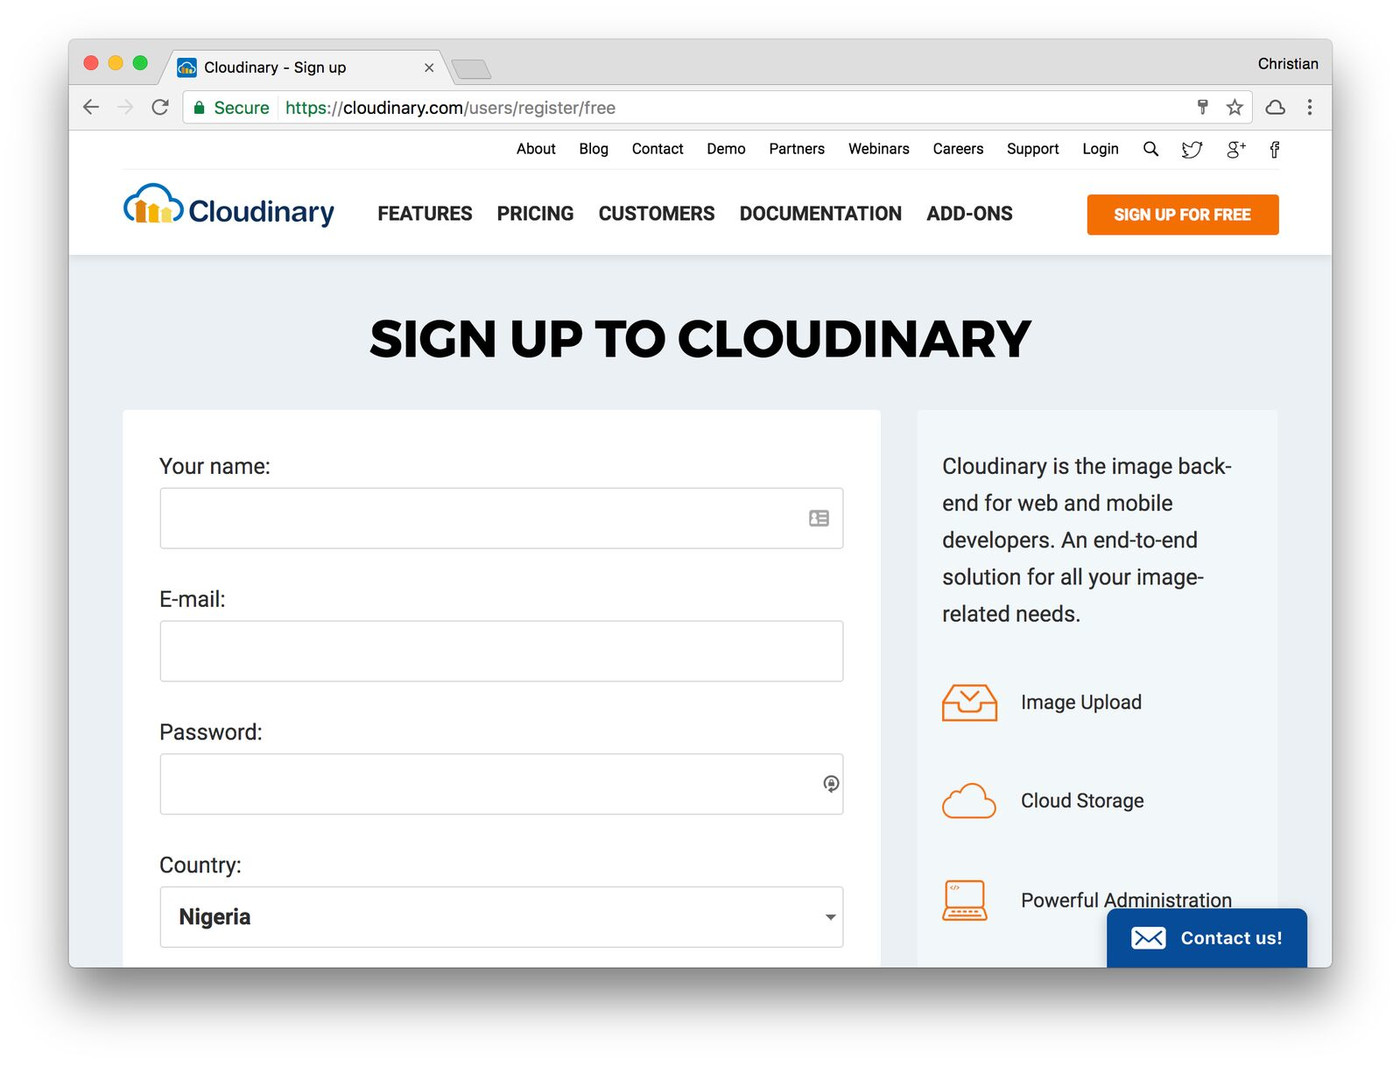
To get our fetch URL, which we will need later, we’ll have to sign up for a free Cloudinary account:
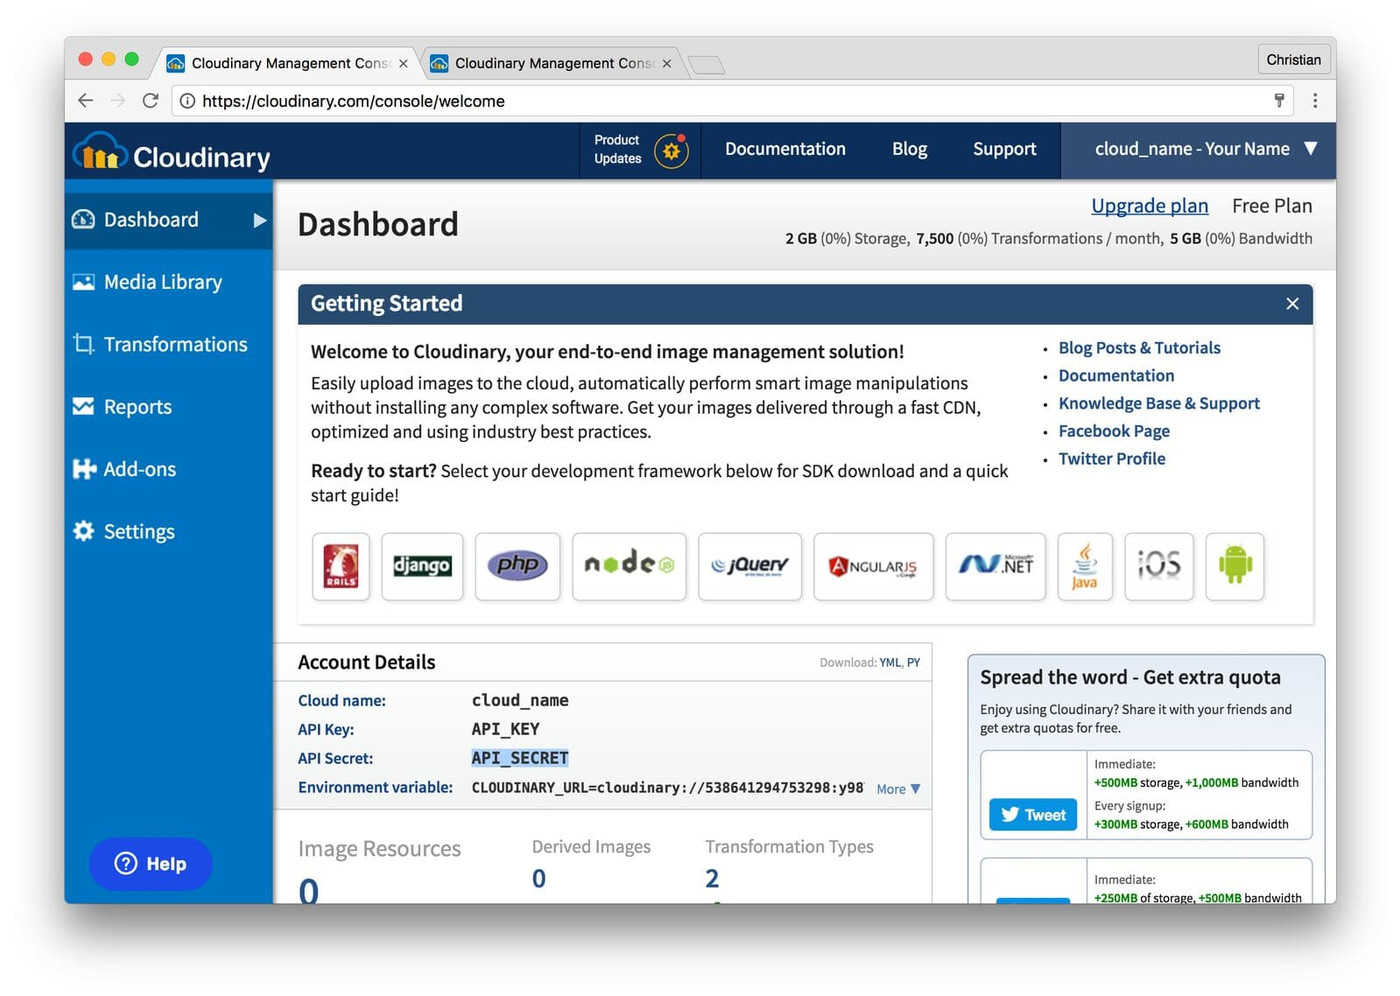
Cloudinary also offers a dashboard where you can manage your media contents that are uploaded to your cloud. You can also apply transformations to these images via the Media Library page on the dashboard.
Bearing in mind that the integration is technical and requires editing our Shopify Theme code, let’s take the following steps to set up Cloudinary:
STEP 1: Edit your “settings_schema.json” file
On the homepage of your store, navigate to: Online Store > Themes > Actions > Edit Code > Config.
Open the settings_schema.json file:
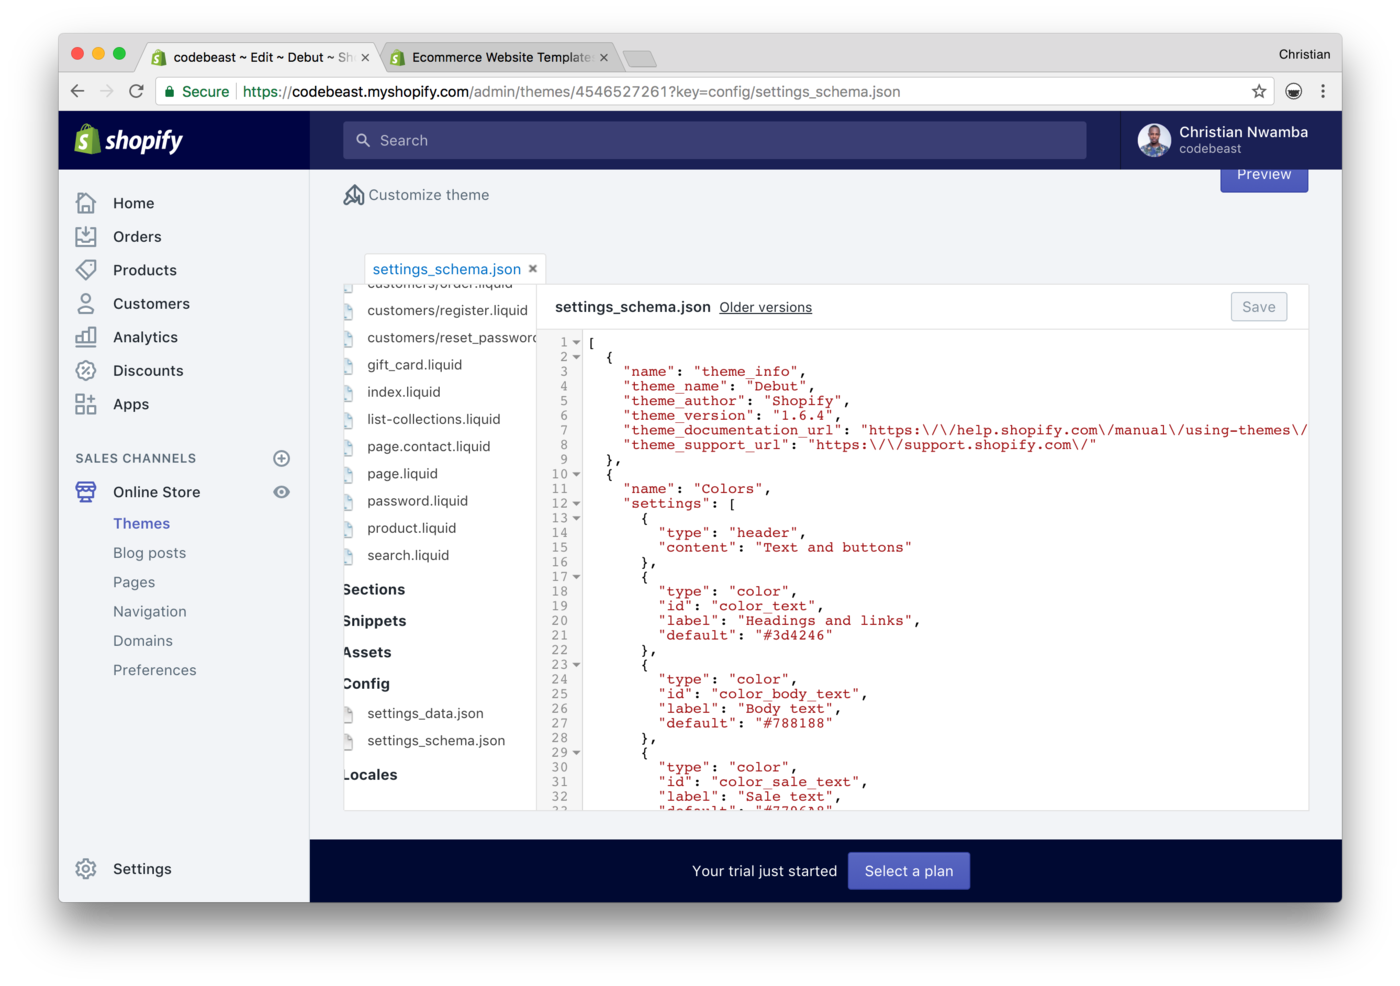
In between the very first "[" and the "{", insert the following code into settings_schema.json. Then go to the next line and insert a comma right before the start of the next opening "{":
    {
      "name": "Cloudinary",
      "settings": [
        {
          "type": "paragraph",
          "content": "Load all your images leveraging Cloudinary's remote image Fetch for best page load performance."
        },
        {
          "type": "checkbox",
          "id": "enableCloudinary",
          "label": "Enable Cloudinary"
        },
        {
          "type": "text",
          "id": "cloudinaryUrl",
          "label": "Cloudinary Fetch URL",
          "info": "Your Cloudinary Fetch url containing your domain, cloud name, and global transformations to apply to all images (ex:
          `\/\/res.cloudinary.com\/myAcct\/image\/fetch\/q_auto,f_auto,fl_lossy\/`)."
        }
      ]
    }
STEP 2: Add a New “Snippet”
On your store’s homepage, navigate to: Online Store > Themes > Actions > Edit Code > Snippets.
Add a new snippet and name it cloudinary.liquid
Insert the following code into cloudinary.liquid and hit the Save button.
    {% if img %}
            {%if settings.enableCloudinary and settings.cloudinaryUrl != blank %}
        {% assign baseUrl = settings.cloudinaryUrl %}
        {%if img contains "?" %}
          {% assign imgUrl = img | split: "?" %}
          {% assign fetchQuery = "?" | append: imgUrl.last | url_encode %}
          {% assign fetchUrl = imgUrl.first | append: fetchQuery %}
        {% else %}
          {% assign fetchUrl = img %}
        {% endif %}
        {%if transformation and transformation !=blank %}
          {% assign imgTransformation = transformation | append: '/|' | prepend:'|/' | replace        :'//','/' %}
          {% assign baseUrl = baseUrl | append: '/|' | append: transformation | replace:'fetch        //', 'fetch/' %}
        {% endif %}
        {% assign imgUrl = baseUrl | append: '/https:' | append:fetchUrl | replace: 'https:htt       p','http' | replace:'/|/','/' | replace:'//|','/' |
    replace:'/|','/' %}
        {{ imgUrl | img_tag: img_tag, img_class}}
      {% else %}
        {{img | img_tag: img_tag, img_class}}
      {% endif %}
    {% endif %}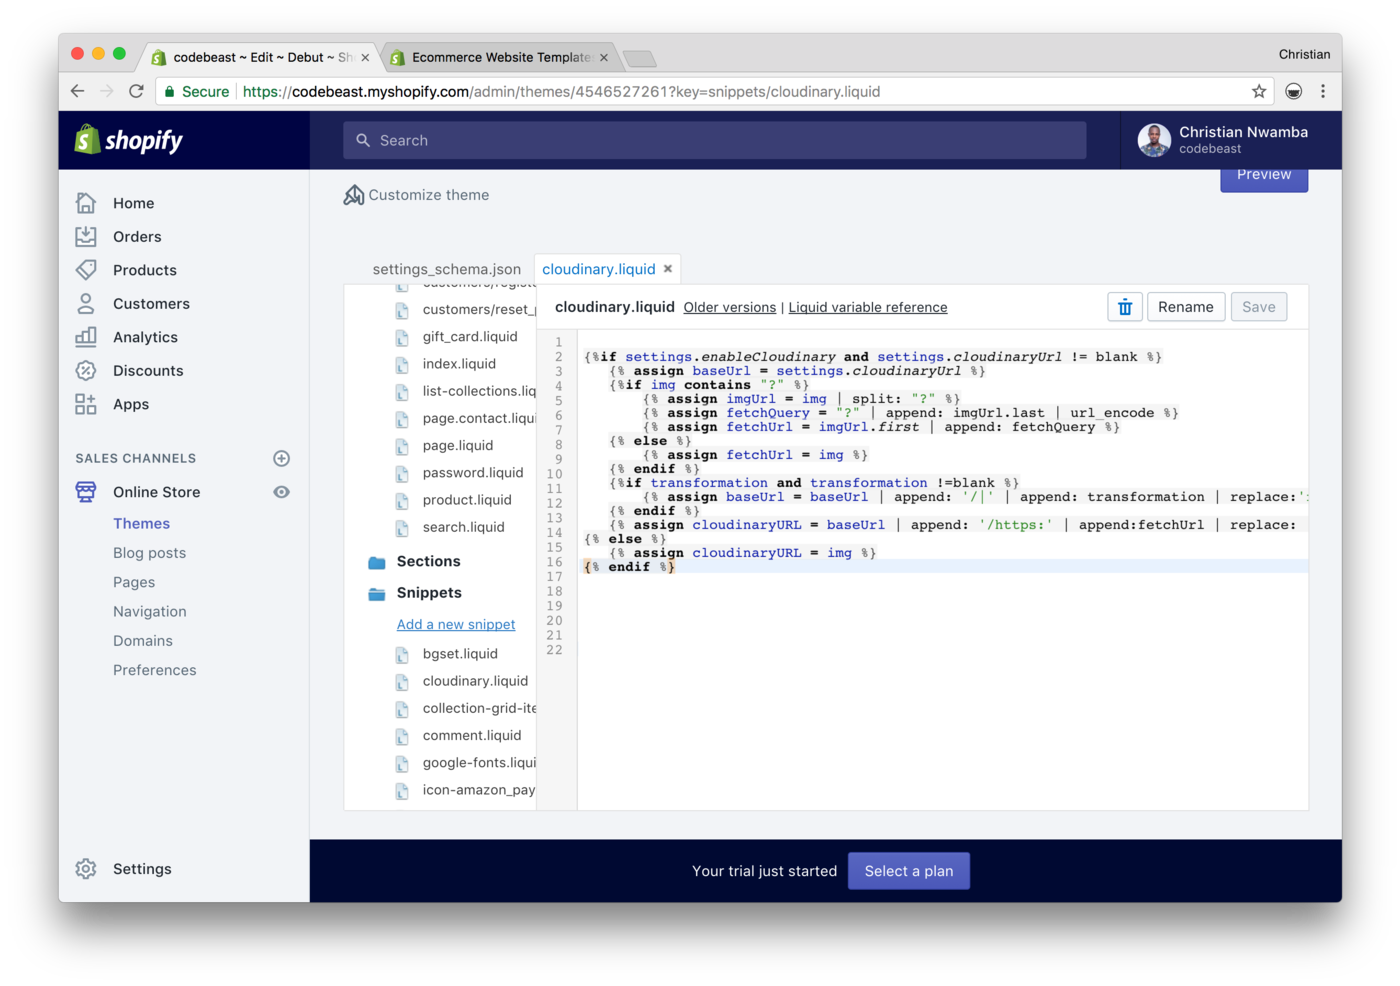
STEP 3: Configure Your Cloudinary Settings
From the store homepage, navigate to: Online Store > Themes > Customize > General Settings
Click on the Cloudinary section

Tick the Enable Cloudinary checkbox
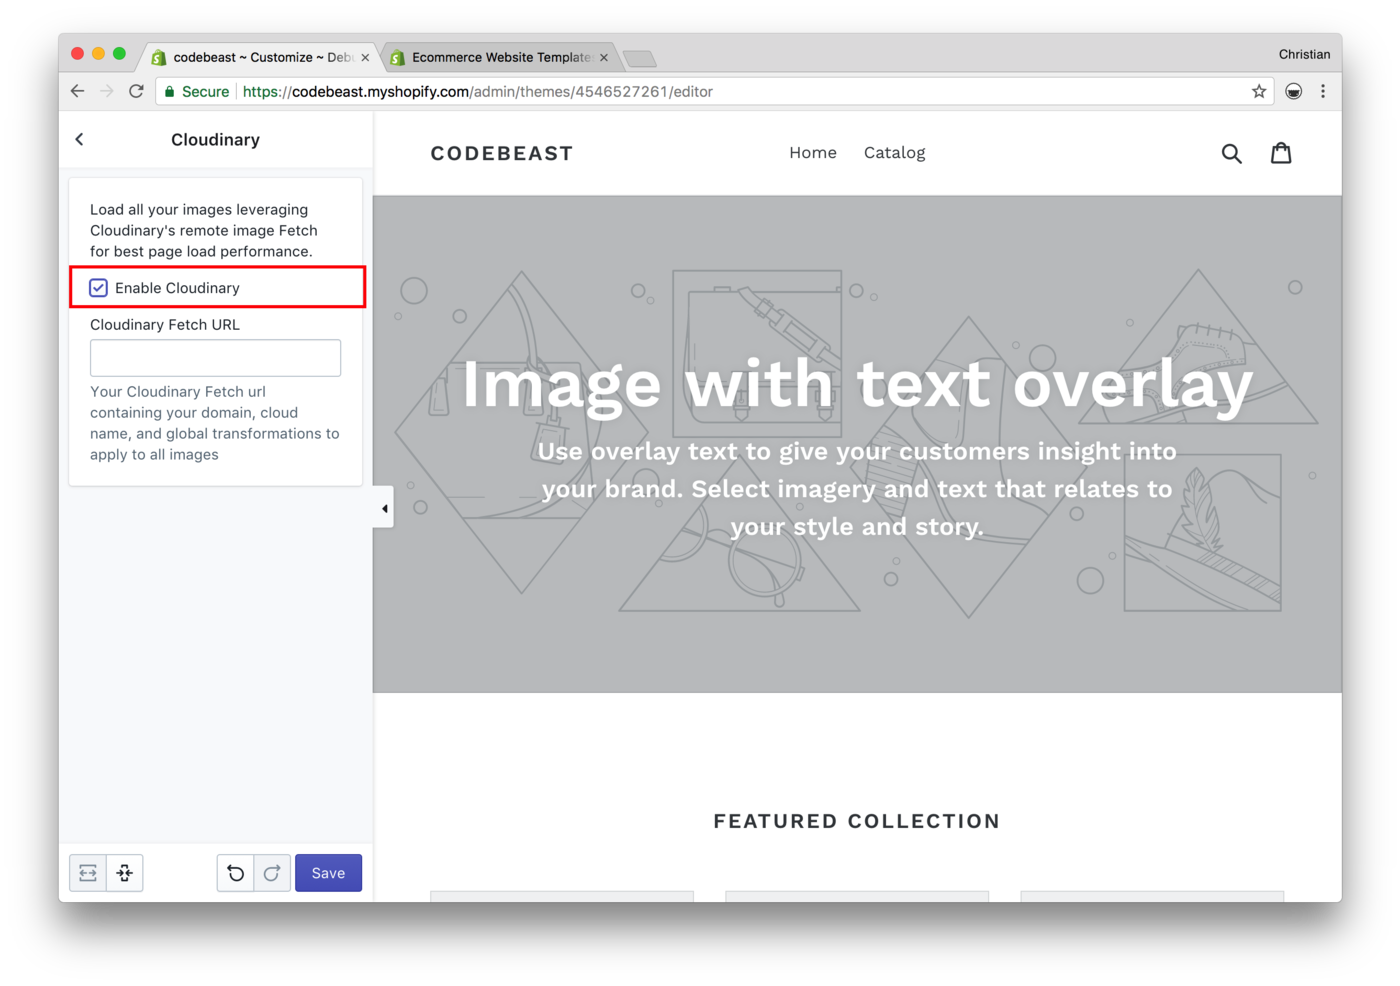
Insert the Cloudinary fetch URL, which is below the input box and hit the Save button
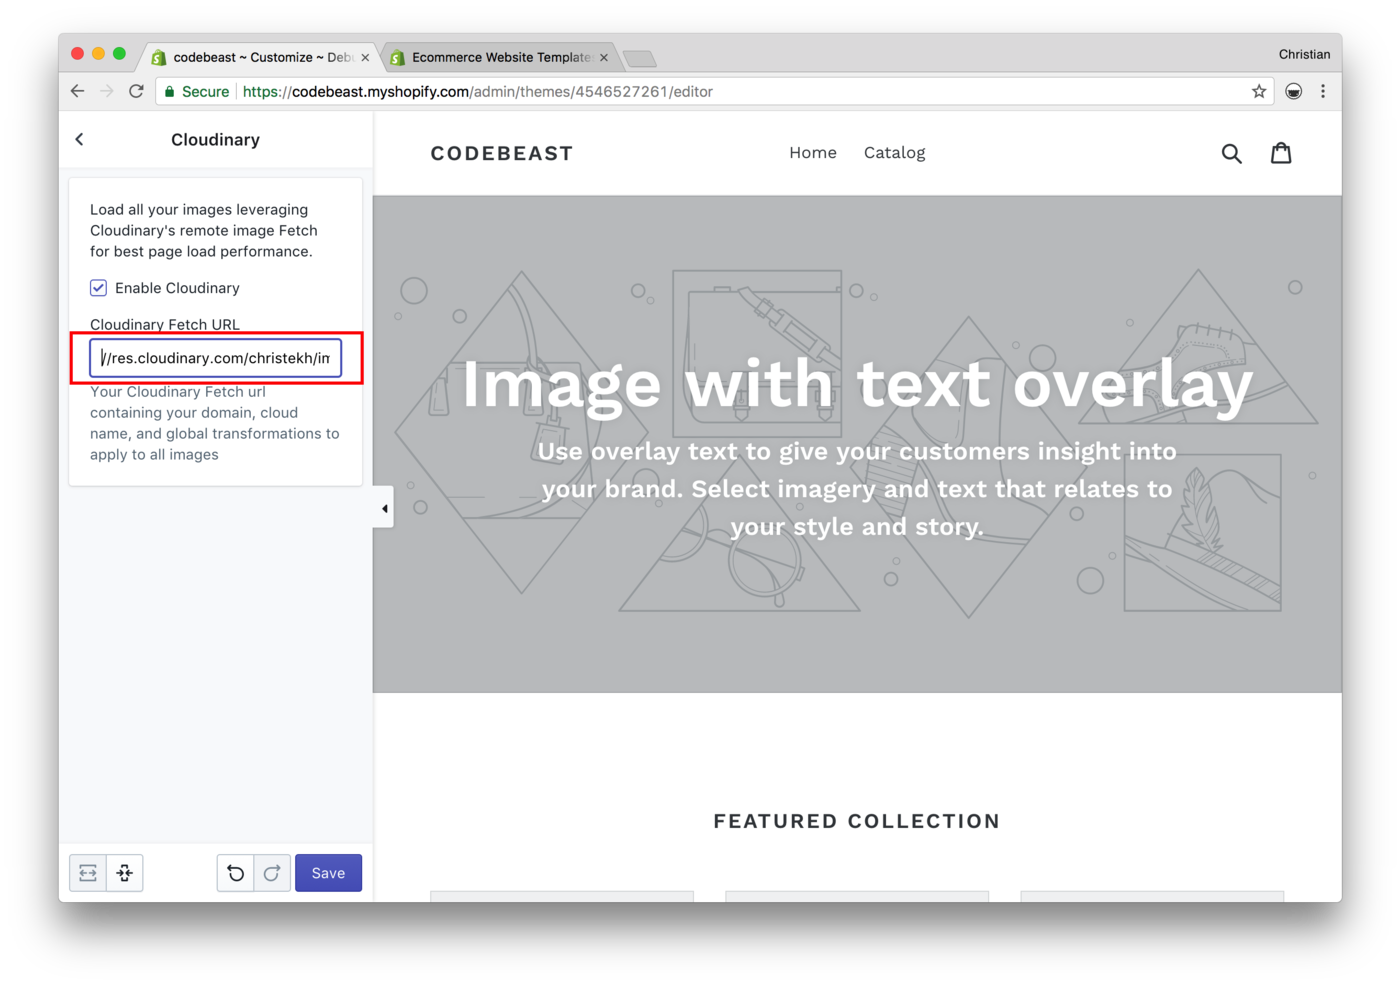
An example of the fetch URL would be something like the following:
//res.cloudinary.com/demo/image/fetch/q_auto,f_auto,fl_lossy
The demo parameter should be replaced with your Cloudinary cloud name.
You can read more about the auto property which applies global transformations to your images for optimization reasons
STEP 4: Update Your Section's Theme
On the store homepage, navigate to: Online Store > Themes > Actions> Edit Code > Sections
Click on the section or sections that you want to update.
    <!-- from feature-row.liquid -->

    <div class="page-width feature-row">
      {% capture image_layout %}
        <div class="feature-row__item">
          {% if section.settings.image != blank %}
          <!-- replace the commented out code using your `cloudinary.liquid` snippet  -->
          <!-- {% capture img_id %}FeatureRowImage-{{ section.id }}{% endcapture %}
            {% capture wrapper_id %}FeatureRowImageWrapper-{{ section.id }}{% endcapture %}
            {%- assign img_url = section.settings.image | img_url: '1x1' | replace: '_1x1.', '_{width}x.' -%}
            {% include 'image-style' with image: section.settings.image, width: 545, height: 545, small_style: true, wrapper_id: wrapper_id, img_id: img_id %}
            <div id="{{ wrapper_id }}" class="feature-row__image-wrapper js">
              <div style="padding-top:{{ 1 | divided_by: section.settings.image.aspect_ratio | times: 100}}%;">
                <img id="{{ img_id }}"
                     class="feature-row__image lazyload"
                     src="{{ section.settings.image | img_url: '200x200' }}"
                     data-src="{{ img_url }}"
                     data-widths="[180, 360, 540, 720, 900, 1080, 1296, 1512, 1728, 2048]"
                     data-aspectratio="{{ section.settings.image.aspect_ratio }}"
                     data-sizes="auto"
                     alt="{{ section.settings.image.alt | escape }}">
              </div>
            </div>

            <noscript>
              {{ section.settings.image | img_url: '600x600', scale: 2 | img_tag: section.settings.image.alt, 'feature-row__image' }}
            </noscript> -->

          {% else %}
            {{ 'image' | placeholder_svg_tag: 'placeholder-svg' }}
          {% endif %}
        </div>
      {% endcapture %}

      <div class="feature-row">
        {% if section.settings.layout == 'left' %}
          {{ image_layout }}
        {% endif %}

        <div class="feature-row__item feature-row__text feature-row__text--{{ section.settings.layout }}">
          {% if section.settings.title != blank %}
            <h2 class="h3">{{ section.settings.title | escape }}</h2>
          {% endif %}
          {% if section.settings.text != blank %}
            <div class="rte-setting featured-row__subtext">{{ section.settings.text }}</div>
          {% endif %}
          {% if section.settings.button_label != blank and section.settings.button_link != blank %}
            <a href="{{ section.settings.button_link }}" class="btn">
              {{ section.settings.button_label | escape }}
            </a>
          {% endif %}
        </div>

        {% if section.settings.layout == 'right' %}
          {{ image_layout }}
        {% endif %}
      </div>
    </div>
Remove the original image code. For example:
{{section.settings.image | img_url: '600x600' | img_tag: section.settings.image.alt, 'feature-row__image' }}Next, assign a new “img” variable to the Shopify CDN hosted image URL.
{% assign img = section.settings.image | img_url: '600x600' %}Then, include your Cloudinary snippet and pass the new img variable and optionally pass in additional Cloudinary transformations to further customize your images for your specific templates, in addition to any global transformations you may have configured:
{% include 'cloudinary', img:img, transformation: 'w_300,h_300,c_fill,g_auto', img_tag:
section.settings.image.alt, img_class: 'feature-row__image' %}
Congratulations! You're images are now loading through Cloudinary
Few Points to Take Away
- One click enable/disable of the Cloudinary integration - ideal for performance A/B testing on demand.
- The integration uses Cloudinary’s 3rd party proxy "Fetch" protocol so you can still use your Shopify media library as is and we'll import, manipulate and deliver all your images via Cloudinary automatically.
- You'll have access to both Global transformation settings (common transformations for all assets) as well as location specific / template specific transformation settings. The only downside is that you'll need to update your image references in your existing snippets / templates as shown in the integration guide. However, you also have full control to edit the integration to your needs using this version as a starting point.
Conclusion
Image optimization in websites is a very important feature that cannot be overlooked. The same can be said for online stores. Having a store that displays its content in the best possible way and display it immediately will not only speak well of your brand, but will play a huge role in dictating sales volume and other important factors in the long run. Some of these factors include customer acquisition rate, conversion rate, and whether or not they keep visiting your site after the first few experiences. For a more detailed overview on how to optimize images on your websites, you can check out this article by Prosper Otemuyiwa .


